background image

HUAWEI RP100-55T Room Presence 
User Guide 

2 On-Site Conferencing 


Issue 01 (2013-12-20) 

Huawei Proprietary and Confidential 

Copyright © Huawei Technologies Co., Ltd 

20 


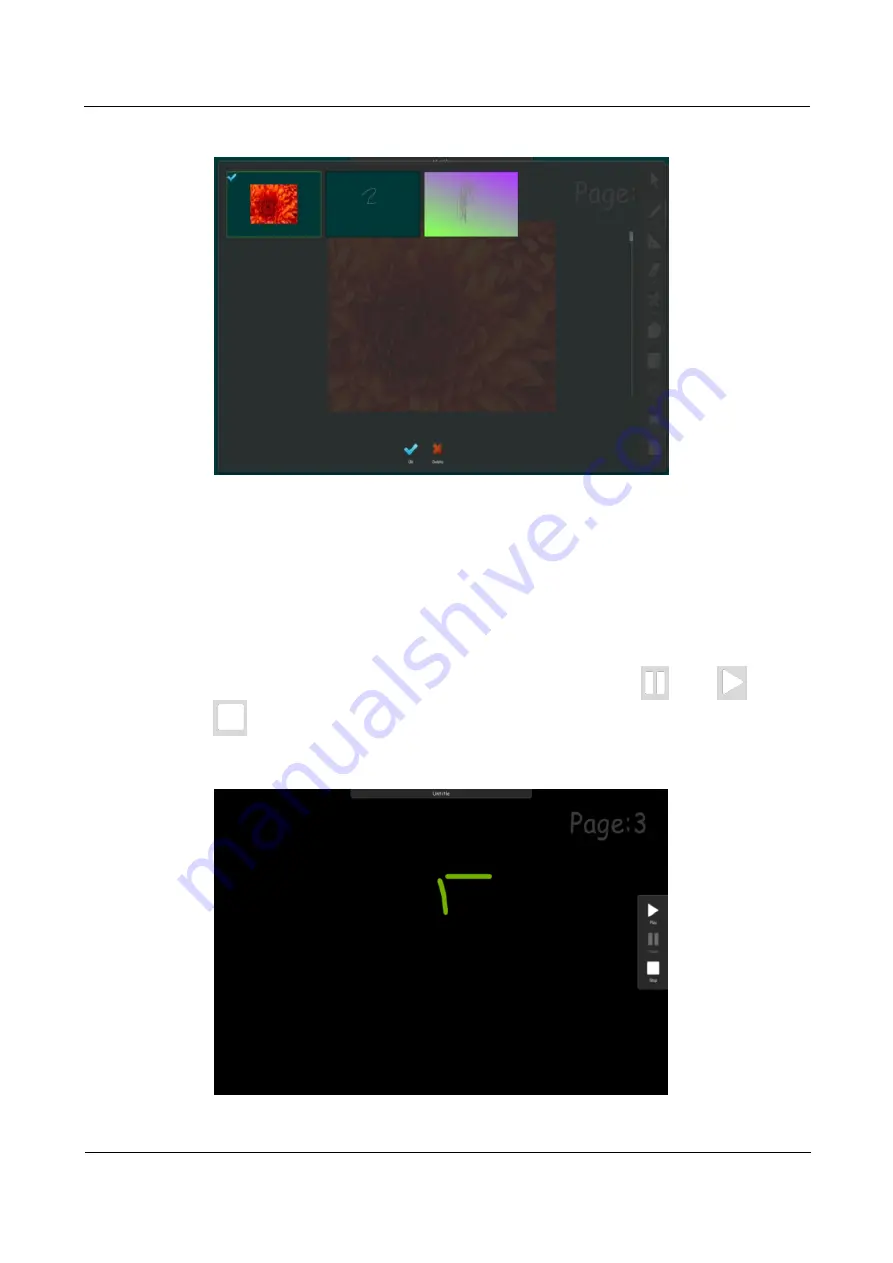
Figure 2-18


Preview page rendering 


Insert   

Click Insert page directly insert a new page. 


Delete Page 

Click 

Delete Page

 to delete the current page. 


Replay Page 

Click 

Reply Page

 to play the page automatically, users can choose 

Pause, 

Play, and 

Stop. As shown in Figure 2-19. 

Figure 2-19


Replay page rendering 


Содержание RP100-55T

Страница 1: ...HUAWEI RP100 55T Room Presence V100R001C03B014 User Guide Issue 01 Date 2013 12 20 HUAWEI TECHNOLOGIES CO LTD ...

Страница 2: ...ei and the customer All or part of the products services and features described in this document may not be within the purchase scope or the usage scope Unless otherwise specified in the contract all statements information and recommendations in this document are provided AS IS without warranties guarantees or representations of any kind either express or implied The information in this document i...

Страница 3: ... that may be found in this document are defined as follows Symbol Description Alerts you to a high risk hazard that could if not avoided result in serious injury or death Alerts you to a medium or low risk hazard that could if not avoided result in moderate or minor injury Alerts you to a potentially hazardous situation that could if not avoided result in equipment damage data loss performance det...

Страница 4: ...2 20 Huawei Proprietary and Confidential Copyright Huawei Technologies Co Ltd iii Change History Changes between document issues are cumulative The latest document issue contains all the changes made in earlier issues Issue 01 2013 12 20 This issue is the first official release ...

Страница 5: ...32 4 1 Selecting and Controlling a Camera 32 4 1 1 Selecting a Camera 32 4 1 2 Adjusting the Focal Length of a Camera 32 4 1 3 Controlling a Camera 33 4 2 Saving and Using Camera Presets 33 4 2 1 Saving a Camera Preset 33 4 2 2 Moving a Camera to a Preset 34 4 2 3 Deleting All Camera Presets 34 5 Conference Initiation 35 5 1 Initiating a Conference Using Different Methods 35 5 1 1 Initiating a Con...

Страница 6: ... 2 Customizing the Conference Control Screen 47 6 3 Using Conference Control Functions 48 6 3 1 Viewing Sites 50 6 3 2 Broadcasting Sites 50 6 3 3 Giving the Floor to a Site 50 6 3 4 Displaying Sites Requesting for the Floor 50 6 3 5 Placing a Call 51 6 3 6 Disconnecting a Site 51 6 3 7 Deleting a Site 51 6 3 8 Muting and Unmuting the Microphone 51 6 3 9 Muting and Unmuting the Speaker 51 6 3 10 R...

Страница 7: ...from the Web Interface 67 11 1 Allowing Login from the Web Interface 67 11 2 Configuring a Web Browser 67 11 3 Logging In to the RP100 55T from the Web Interface 68 11 4 Functions Provided on the Web Interface 69 11 4 1 Exporting the Address Book 70 11 4 2 Modifying Records of an Address Book 70 11 4 3 Importing an Address Book 70 11 4 4 Customizing Shortcut Icons 70 11 4 5 Navigation 71 11 4 6 Si...

Страница 8: ...yright Huawei Technologies Co Ltd vii 12 2 7 Conference Control 86 12 2 8 Restoring Default Settings 86 12 2 9 Viewing Help on the User Interface 87 12 2 10 Technical Support 87 A Safety Precautions 88 B Technical Specifications 92 C Videoconferencing Room Layout 95 D Glossary 96 E Acronyms and Abbreviations 99 ...

Страница 9: ...te interactive collaborative videoconferencing solution The RP100 55T has the following functions Supports on site video and collaborative conferences For details about how to initiate an on site conference see chapter 2 For details about how to initiate a video conference see chapter 5 For details about how to initiate a collaborative conference see the eSpace Meeting user guide delivered with th...

Страница 10: ...nal PC from the built in PC Copy the content from the external PC to the built in PC using network sharing USB flash drive or other methods Use a video cable to connect the external PC to the RP100 55T as a presentation source An external PC can deliver video signals but does not provide touch based controls 1 2 Key Description Table 1 1 and Table 1 2 list the keys of the RP100 55T IDB Table 1 1 K...

Страница 11: ...ected to the system Menu Opens the menu Volume Increases the volume Volume Decreases the volume Input Switches between video feeds Energy Saving Turns the screen backlight on or off Power Powers on the RP100 55T or places it in sleep mode The indicator in the lower right corner of the IDB is red when the RP100 55T is in sleep mode and blue when it is awake 1 3 Powering On or Off Powering On Step 1...

Страница 12: ...ng Off Step 1 Press on the right side of the IDB to place the RP100 55T in sleep mode Step 2 Turn the power switch on the right side of the rack to Off End 1 4 Entering and Waking Up from Sleep Mode To place the RP100 55T in sleep mode Press on the right side of the IDB To wake it up press again When the screen backlight is off pressing simply turns on the backlight ...

Страница 13: ...ilt in PC desktop you can touch the screen to operate the PC On the IDB UI you can write annotate and save For details see section 2 1 TPBoard Introduction 2 1 TPBoard Introduction TPBoard interactive touch software is an interactive application software running on Windows operating systems Its main function is cooperating with IDB interactive whiteboard equipment for creating annotations comments...

Страница 14: ...Ltd 6 Figure 2 1 TPBoard UI 2 2 1 Main Toolbar Function Key Introduction Figure 2 2 Main toolbar The TPBoard software function keys include the following aspects Arrow Pen Shape Eraser Tools Page Edit Desktop and File Arrow Click Arrow to display the functions listed in Table 2 1 Table 2 1 Arrow function sub menu No Icon Note 1 Select 2 Select all Select ...

Страница 15: ...indow any objects with the intersection larger than half of its area will be selected and these selected objects will be indicated by focal frame As shown in Figure 2 3 Figure 2 3 Select diagram Switch the current tool to select and move the mouse in the main window When the mouse slide over the object and turns to click to select the object Select All Click Select All to select all objects in the...

Страница 16: ...bject s rotation point drag the mouse to rotate the object As shown in Figure 2 5 Figure 2 5 Rotation and scaling operations diagram Scale objects Select the object to be scaled press and hold the selected object s scaling point drag the mouse to scale the object As shown in Figure 2 5 Pen Click Pen to show the functions as listed in Table 2 2 Table 2 2 Pen function sub menu No Name Icon Note 1 No...

Страница 17: ...e color thickness and transparency of the pen can be modified 3 Flat Pen Two kinds of commonly used colors are displayed in the drawing bar by default white and red the color and thickness of the pen can be modified 4 Transparency Slide the slider to set the transparency of the current pen Transparency ranges from 12 to100 5 Thickness Slide the slider to set the width of the pen The width range di...

Страница 18: ... There are only two colors available in the drawing bar or can be selected from the sub menu of Pen the writing effect is as shown in Figure 2 7 Figure 2 7 Writing effect of highlighter Flat Pen Click to select Flat Pen for writing There are only two colors available in the drawing bar or can be selected from the sub menu of PEN the writing effect is as shown in Figure 2 8 Figure 2 8 Writing effec...

Страница 19: ...Beeline Eclipse 2 Transparency Slide the slider to set the transparency of the shape Transparency ranges from 12 to100 3 Thickness Slide the slider to set the width of the shape line The width range differs from pens 4 Color Choose the color for shape line and fill color of the shape Available shapes in the system include Triangle Diamond Parallel Rectangle Beeline and Eclipse users can choose acc...

Страница 20: ... diagram Eraser Click Eraser to show the sub menu functions as listed in Table 2 4 Table 2 4 Eraser sub menu No Name Icon Note 1 Eraser Erasers are divided into Small Medium and Large 2 Area Eraser Area eraser can erase the writing and object selected 3 Clear Page Clear all the writings and objects on the page Tools Click Tools show the sub menu functions as listed in Table 2 5 ...

Страница 21: ...3 Table 2 5 Sub menu of tool No Icon Name 1 Magnifier 2 Spotlight 3 Soft Keyboard 4 Clock 5 Screen Shade 6 Screen recording 7 Insert image 8 Insert flash 9 Insert video 10 Open resource panel Magnifier Click Magnifier to zoom in or zoom out the place to be viewed or adjust the frame size to zoom in the range to be viewed click to quit as shown in Figure 2 10 ...

Страница 22: ... Magnifier diagram Spotlight Click Spotlight to overlook other pages and highlight the place to be viewed click the frame to zoom in the range to be viewed click Close to quit as shown in Figure 2 11 Figure 2 11 Spotlight diagram Soft Keyboard Click Soft Keyboard to display the soft keyboard in the screen as shown in Figure 2 12 Click and drag to zoom in or out the range ...

Страница 23: ...ng button to record a video and click again will stop recording The complete file of recording will generate the folder name to open the folder for TPBoard Screen Captures on the desktop automatically choose to open the recorded video files Insert Image Click Insert Image select the image in the computer and click to insert the image to the sketchpad as shown in Figure 2 13 and Figure 2 14 Figure ...

Страница 24: ...rt Flash select the Flash file to be inserted and click to open then the Flash play is started click to screenshot the playing Flash page to the sketchpad Click to quit Before you use this feature please come with corresponding Flash plugin Insert Video Click Insert Video select the video to be inserted and click to open click to screenshot the playing video page to the sketchpad as shown in Figur...

Страница 25: ...sitory it will appear in the interface on the right side of the repository toolbar it contains the sample pictures Users set up their own repository complete the following steps Step 1 Open my computer Step 2 On the left side of the computer find the repository directory select the picture options Step 3 In the picture directory create a folder Custom file name Note To put pictures subdirectory As...

Страница 26: ... Huawei Proprietary and Confidential Copyright Huawei Technologies Co Ltd 18 Figure 2 16 Folder location Step 4 Open the repository again choose my repository it can open As shown in Figure Figure 2 17 Figure 2 17 My repository schematic Repository only support PNG JPG image format End ...

Страница 27: ...Sub menu of the page No Icon Note 1 First page 2 Previous page 3 Next page 4 Last page 5 Insert page 6 Delete page 7 Replay page 8 Preview Flip Page Users can click First Page Previous Next Page and Last Page according to needs and go to corresponding page Preview Click Preview button to select the needed page in all pages and then double click or click button after selection click to delete the s...

Страница 28: ...t Huawei Technologies Co Ltd 20 Figure 2 18 Preview page rendering Insert Click Insert page directly insert a new page Delete Page Click Delete Page to delete the current page Replay Page Click Reply Page to play the page automatically users can choose Pause Play and Stop As shown in Figure 2 19 Figure 2 19 Replay page rendering ...

Страница 29: ... the content to be copied and click Copy to copy the content 4 Paste Click Paste to paste the successfully copied content in the desired position 5 Cut Select the content to be deleted and click Delete then the content will disappear in the sketchpad if recovery is needed select Undo to recover the content in the sketchpad again 6 Delete Delete the selected object Transparent Sketchpad After start...

Страница 30: ... Name Icon Note 1 Office Save in the current office software 2 Exit Exit the transparent sketchpad mode and insert the comment to the next page the content in the transparent sketchpad will insert in a new page of the file automatically Step 1 In the annotation open the corresponding OFFICE software Step 2 Keep the cursor stays on the page and then click on the paintbrush marking the place where n...

Страница 31: ...right Huawei Technologies Co Ltd 23 Figure 2 21 Save diagram In the OFFICE of the annotated content can only be saved to the OFFICE the current page End File Click File to display functions as listed in Table 2 9 Table 2 9 File sub menu No Icon Note 1 Create a new file 2 Open an existing file 3 Save 4 Save as 5 Send an email ...

Страница 32: ...4 No Icon Note 6 Set 7 File protection 8 About 9 Exit the program New Users can select New in File to create a new drawing sketchpad Open Click Open to select the dvk files to be opened and then click Open as shown in Figure 2 22 Figure 2 22 Open rendering Save Click Save to choose the save path then the dvk file can be named and saved as shown in Figure 2 23 ...

Страница 33: ... for later reuse At this time if the file is not saved in the disk it will pop up a file save dialog box select the save path for the file in the dialog box input the file name in the File name box and click the Save button or export the file content in BMP JPG PNG WORD PDF PPT DVK format As shown in Figure 2 24 Figure 2 24 Save as diagram BMP JPG PNG picture format Save too can only save the curr...

Страница 34: ...efore sending the email users will be required to save the file in any supported file format Then the mail client will be started as shown in Figure 2 25 After filling in the correct e mail address the email can be sent Figure 2 25 Mailing rendering Settings Users can choose to distribute the main toolbar horizontally or vertically Account Protection Click the user password can be set Exit to save...

Страница 35: ...ved it will prompt save or not If there is no file need to be saved it will exit As shown in Figure 2 27 Figure 2 27 Exit menu diagram 2 2 2 Gesture Recognition Introduction In TPBoard software with one hand holding a fist gestures in the display Board screen can realize the eraser function as shown in Figure 2 28 Figure 2 28 Eraser diagram of the fist gesture Use three fingers to slide down in an...

Страница 36: ...ogies Co Ltd 28 Figure 2 29 Three finger gesture switch diagram Use five fingers to grab the Board interface to switch to preview mode of the blackboard As shown in Figure 2 30 Figure 2 30 Preview diagram of five finger gesture Use two fingers to slide from left to right or vice versa in the Board interface to flip pages As shown in Figure 2 31 ...

Страница 37: ...r Guide 2 On Site Conferencing Issue 01 2013 12 20 Huawei Proprietary and Confidential Copyright Huawei Technologies Co Ltd 29 Figure 2 31 Flip page diagram of two finger gesture Humanized gestures enable you to use the software better ...

Страница 38: ...e screen is then displayed by default as shown in Figure 3 1 Figure 3 1 Home screen 1 Video window 2 3 Operation items 4 Local IP address 5 Shortcut menu 6 Status icon 7 Display Hide the shortcut menu The IDB recognizes the following gestures Tap Touch once to select an item or perform functions on a highlighted item Slide Touch and drag your finger left and right to toggle between the zones displ...

Страница 39: ...3 12 20 Huawei Proprietary and Confidential Copyright Huawei Technologies Co Ltd 31 The user interface for performing functions using the IDB is similar to that using the remote control Unless otherwise specified the operations using the remote control are used as examples ...

Страница 40: ...e camera to be controlled from remote cameras and the camera connected to the RP100 55T The text on the upper left corner indicates the camera local or remote that is currently being controlled End 4 1 2 Adjusting the Focal Length of a Camera You can change the magnification of distant objects by adjusting the focal length of the corresponding camera This function is not available on the touch pan...

Страница 41: ...ing in or zooming out function is not available on the touch panel End 4 2 Saving and Using Camera Presets A camera preset refers to pre saved camera configurations Each camera preset saves the zooming level and direction of the camera If a camera supports pan tilt and zoom PTZ functions you can create a maximum of 30 camera presets Each camera preset saves the camera number zoom level and camera ...

Страница 42: ...then select Select Position Step 2 Scroll to a camera preset by pressing arrow keys and then press to move the camera to the corresponding preset End 4 2 3 Deleting All Camera Presets If the camera presets saved on the RP100 55T are no longer required they can be deleted All the camera presets saved on the RP100 55T can be deleted at the same time however the presets cannot be deleted one at a tim...

Страница 43: ...n When initiating a conference from the Favorite Conferences screen you only need to change the settings of the preset parameters to complete the conference configuration Then you can initiate the conference To initiate a conference from the Favorite Conferences screen do the following Step 1 From the home screen select Favorite Conferences to display the Favorite Conferences screen Step 2 Select ...

Страница 44: ...the conference access password that can be used in the following two ways During a conference a site that wants to host the conference needs to enter this password to obtain the chair control rights An anonymous site needs to enter this password to join an authentication conference H 235 conference This specifies whether the H 235 security protocol needs to be used to encrypt media streams Insecur...

Страница 45: ...and then select Place Call to place a call to the site immediately or Create Conference to initiate a conference If you select multiple sites you can press on the remote control to initiate a conference Press to edit the selected site or to delete the selected site End 5 1 4 Initiating a Conference from the Call Screen You can initiate a two party conference by defining the site to participate in ...

Страница 46: ... Answering Incoming Calls and Ending a Conference The mode for answering incoming calls can be set 5 2 1 Setting the Answering Mode Two answering modes are available on the RP100 55T answering incoming calls manually and answering incoming calls automatically To set the answering mode do the following Step 1 Select Settings General If the automatic answering function is enabled the RP100 55T answe...

Страница 47: ... video protocol that is already set When the video protocol is set to auto the video format can be Sharp or Smooth When Sharp is selected the system prioritizes the frame rate When Smooth is selected the system prioritizes the video resolution Video frame rate This specifies the video frame rate that is the frequency at which the imaging device produces unique frames The higher the frame rate the ...

Страница 48: ... on the RP100 55T does not support H 239 the RP100 55T can receive presentation but cannot share presentation 5 4 1 Designating the Dual Streams Input sources and output destinations for the video and presentation must be chosen Choosing Input Sources If multiple video source devices are connected to the video input interfaces of the RP100 55T you can choose a channel of video as the source of the...

Страница 49: ...ve been set you can connect a computer to the RP100 55T to share files stored on the computer When you are sharing files on the computer the remote sites can view your video and the desktop contents of the computer You can press to start or stop sharing a presentation You can select one of the following modes for sharing a presentation based on the configuration Auto The RP100 55T automatically se...

Страница 50: ...btain the access number from the message which is displayed when the RP100 55T requests chair control rights successfully the chair site can also obtain the access number by choosing Diagnostics Status Conference Anonymous sites can obtain the access number and the authentication password from the chair site using other methods Joining the authentication conference by anonymous sites Anonymous PST...

Страница 51: ...ou can add edit and delete site entries The address book spares users from entering site information when initiating conferences saving time and preventing entry of incorrect addresses You can save sites in Dialed Received and Missed on the Conference History screen to the address book 5 6 1 Managing the Local Address Book Site information can be added to deleted from or edited in the local addres...

Страница 52: ... This specifies the line used by the RP100 55T to access the videoconferencing network Rate This specifies the rate supported by the RP100 55T over the corresponding access line used by the site It is recommended that you select the highest rate IP address This specifies the IP address of the site Step 3 Select Save End Creating a Group If certain sites join a conference regularly they can be defi...

Страница 53: ...ork address book server have been correctly set To set parameters related to the network address book server do the following Step 1 From the home screen select Settings enter the administrator password if set and then select OK to display the Settings screen Step 2 Choose Settings Network Network Address Book and then set the parameters listed in Table 5 4 Table 5 4 Parameters of the network addr...

Страница 54: ...P100 55T clears the local address book automatically when the local address book is updated Server address This specifies the IP address of the server where the network address book is stored File path This specifies the file path of the network address book on the server User name Password These specify the user name and password used by the RP100 55T when the RP100 55T accesses the network addre...

Страница 55: ... option bar In full screen mode press To customize the option bar do the following Step 1 Select on the option bar to display the Customize Option Bar screen If an administrator password has been set you must enter the password to display the Customize Option Bar screen Step 2 Select the conference control options to be added to the option bar You can move the position of an option by selecting Up...

Страница 56: ...e All the sites in the conference are forced to view the broadcasting site The chair site can broadcast one site at a time or multiple sites in turn at preset intervals Give Floor This function is used to give floor to a site The other sites in the conference view the site that is given the floor In addition their microphones are muted Lock Presentation This function is used to restrict the presen...

Страница 57: ... use this function to cancel the following conference control functions that are currently being used Broadcasting sites Muting the microphone Muting the speaker Giving the floor Extend Conference This function is used to extend a conference Add Site This function is used to add sites to an ongoing conference The sites join the current conference after being added At the chair site you can select ...

Страница 58: ...pt for the broadcasting site are forced to view the broadcasting site The chair site can broadcast any of the sites participating in a conference except for an audio only site or broadcast multiple sites including the chair site in turn at preset intervals When a site is being broadcast all non chair sites are forced to view the broadcasting site while the chair site can view any of the sites part...

Страница 59: ...isconnection the site exits the conference automatically 6 3 7 Deleting a Site During a conference the chair site can delete a site that has joined the conference or is not present in the conference After being deleted the site is not associated to the conference anymore and is not included in the site list To enable the site to join the conference again the chair site needs to add the site to the...

Страница 60: ...he chair site gives the floor to the site the site is broadcast and the microphones of all the other non chair sites are muted If the chair site does not give the floor to the site the conference status remains unchanged 6 3 12 Setting the Continuous Presence The continuous presence function is used to display the videos of two or more sites on the same monitor simultaneously The number of sites w...

Страница 61: ...oadcasting sites This Discussion function is used to cancel the following operations performed by the chair site Broadcasting sites Muting the speaker Muting the microphone Giving the floor The discussion function provides the following features Audio The microphones of all the sites are not muted and the sounds of all the sites are mixed and then broadcast to every site Video The video viewed by ...

Страница 62: ...Huawei Technologies Co Ltd 54 6 3 18 Ending a Conference If a conference is complete before the scheduled time the chair site can end the conference in advance by selecting End Conference During a conference the chair site can press on the Conference Control screen and then select End Conference to end the conference immediately ...

Страница 63: ... 7 2 Selecting a Video Source You can set video input interfaces for the local video local presentation and remote video Local Video Source Press and then select a camera or other video sources Local Presentation Source After a conference starts select Presentation source from the option bar From the Presentation source screen select a local presentation source For details about how to perform ope...

Страница 64: ...be seen by remote sites After this function is enabled the local site is displayed as a blue screen at remote sites To hide the local video choose Utilities Hide Video Off and then if prompted confirm that you want to enable the function to hide the local video After the function to hide the local video is enabled appears in the lower right corner of a screen in full screen mode In addition appear...

Страница 65: ...emote displays without being superimposed on the local video SIP and H 323 codecs can send and receive captions Only H 323 codecs can send and receive captions No restriction is imposed on the codecs that send or receive non T 140 captions If a T 140 caption is shared both the sending and receiving parties in a conference must support T 140 captions Otherwise a codec that does not support T 140 ca...

Страница 66: ...or This specifies the background color when a banner or a middle caption is displayed Up to 64 colors are available Line spacing This specifies the vertical spacing between lines of a middle caption Font color This specifies the font color for banners or middle captions in the foreground Up to 64 colors are available Effect A middle caption can contain multiple lines of text The height of each lin...

Страница 67: ...ositions can have different special effects Top caption The top caption can contain multiple lines of text In restricted areas the text can be aligned left middle or right The top caption cannot roll Middle caption The middle caption can contain multiple lines of text The height of each line is the maximum font height on this line In restricted areas the text can be aligned left middle or right Th...

Страница 68: ...ites Both the sending party and the receiving party support T 140 captions For details about how to configure T 140 captions see section 8 1 Configuring Captions Instant messages are a type of T 140 captions During a conference a site can send instant messages to a desired site Instant messaging is not supported by SIP sites or audio only sites Step 1 Display the option bar during a conference by ...

Страница 69: ...idential Copyright Huawei Technologies Co Ltd 61 9 Advanced Settings Before videoconferencing you can set advanced parameters such as network video and audio parameters on the RP100 55T These parameters have been set in the system deployment For details see the HUAWEI RP100 55T Room Presence Installation Guide ...

Страница 70: ...s are recommended for users performing debugging To enable or disable the Telnet login and SSH login function see 10 2 4 Allowing Remote Login The administrator user name and password for a debug user are both debug You cannot change the user name You can change the user name and password for other SSH client users when you log in to the RP100 55T using SSH with the administrator account The avail...

Страница 71: ... Transport Protocol RTP and Transport Layer Security TLS are supported to encrypt voice services Web based diagnostics tools require the correct user name and password to connect to the RP100 55T They must be the same as the administrator user name and password for the RP100 55T web interface and are encrypted before transmission to the RP100 55T For network management the RP100 55T supports the S...

Страница 72: ...nistrator password is set and certain screens are encrypted users are required to enter the administrator password to access these screens The administrator can encrypt the following screens Settings screen Utilities screen Diagnostics screen Customize Option Bar screen Standard users can access the preceding screens only after the correct administrator password is entered For details about how to...

Страница 73: ... password Confirm password This specifies the administrator user name and password used to log in to the RP100 55T web interface Use a string comprising uppercase and lowercase letters and digits for both The user name can contain a maximum of 128 characters and the password can contain a maximum of 32 characters The user name cannot be left blank and is case sensitive SSL encryption When Security...

Страница 74: ...urrent SSH logins are allowed By default the user name and password used for SSH logins are both debug Change the password at your first login and keep your new password secret to prevent unauthorized logins Serial a landing Serial 2 landing This specifies whether you can use the COM1 and COM2 serial ports to log in to the RP100 55T from a computer for debugging or troubleshooting Serial port 1 pa...

Страница 75: ...ns of Internet Explorer and Firefox can be configured using the method for configuring Internet Explorer 6 and Firefox 3 0 10 It is not recommended that earlier versions of Firefox than 3 0 10 be used To configure a Web browser for accessing the RP100 55T do the following Step 1 Launch Internet Explorer Step 2 Choose Tools Internet Options In the displayed dialog box click the Security tab Step 3 ...

Страница 76: ...00 55T from the web interface You can log in to the web interface of the RP100 55T from a computer and use all the functions provided on the web interface To log in to the RP100 55T from the web interface do the following Step 1 Launch Internet Explorer Step 2 In the address bar enter the IP address of the codec for example 192 168 1 1 Step 3 Press Enter on the keyboard Then the page for logging i...

Страница 77: ...ly personal settings and cannot configure the system Figure 11 1 Home page of the web interface 1 Shortcut bar 2 Menu bar 3 Button for collapsing the menu 4 Drop down list box for switching between languages 5 Area for displaying the site name 6 Area for displaying logs 7 Desktop icons 8 Area for displaying messages 9 Status icons End 11 4 Functions Provided on the Web Interface The functions prov...

Страница 78: ...ameter notes in the file modify file A so that the file is applicable to RP100 55T B Then save the modified file as file B 11 4 3 Importing an Address Book You can import the modified address book to a RP100 55T after which the records in the address book are displayed on the address book page of the web interface To import an address book do the following Step 1 Log in to the RP100 55T from the w...

Страница 79: ... of the character 11 4 7 Conference Control Page The conference control page of the web interface is a user friendly page which enables users to use conference control functions select a site group and sort the sites From the conference control page conference control functions can be more conveniently used The description in this section is not applicable if the RP100 55T accesses an IMS network ...

Страница 80: ...e conference control page for the chair site you can view the video and presentation of a remote site in real time You can also adjust the sizes of the video and presentation In this way the status and video quality of the remote site can be monitored 11 4 8 Taking Photos To ensure that a conference runs smoothly you may need to monitor how the RP100 55T operates and whether the local and remote v...

Страница 81: ...ronment Periodically To ensure that the RP100 55T can be used properly it is essential for the administrator to check the working environment periodically Table 12 1 lists the items that need to be checked If one of the following items cannot meet the corresponding requirement it is recommended that you power off the RP100 55T and then take measures to improve the environment Ensure that the RP100...

Страница 82: ...e network administrator to check the network 12 1 3 Viewing the System Status To perform diagnostics against line connection first view the network connection status To view the network connection status do the following Step 1 Select Diagnostics from the home screen or press on the remote control Step 2 Select Status to view the following items Line status You can view the IP address gatekeeper s...

Страница 83: ...to access the Settings and Diagnostics screens 12 2 1 IDB This section describes the troubleshooting methods for the problems arising on the IDB Table 12 2 Equipment cannot work properly Phenomenon Troubleshooting Remote control malfunction 1 Check whether the malfunction is resulted from obstructing of objects between the remote control and TV receiver 2 Check whether the battery polarity is corr...

Страница 84: ...red off and has just restarted the touch function is unavailable temporarily In this case you need to use the keyboard Touch positioning not accurate 1 Check whether the drive program is correctly installed and correct the installation 2 Reinstall the drive program 3 Check whether the touch pen is directed to the screen Table 12 5 Video function cannot work normally Phenomenon Troubleshooting No i...

Страница 85: ...e RP100 55T failed to connect to the Internet or failed to download images is displayed on the web interface The latest patches of the operating system or Internet Explorer are not installed Install the latest patches of the operating system and Internet Explorer The security level of Internet Explorer is too high or the IP address of the codec has not been added to the list of trusted sites From ...

Страница 86: ...roblems arising on the network Table 12 8 Troubleshooting methods for the problems arising on the network Problem Possible Cause Solution You cannot telnet to the RP100 55T A message is displayed indicating that the number of connections to the RP100 55T has reached the upper limit The number of connections to the RP100 55T has reached five Disconnect some of the Telnet connections If the interval...

Страница 87: ... on or activate the camera The RP100 55T is powered on but is not in a conference The local video is displayed properly The user interface however cannot be displayed No display is connected to the interface that is set as the output interface of the user interface or the relevant display is faulty Connect a display to the interface that is set as the output interface of the user interface and the...

Страница 88: ...ideo module Send the RP100 55T to the relevant distributor for maintenance When the scene captured by a remote camera is changed the remote video is not clear because the remote camera is not set to focus automatically In this case the remote camera is set to focus on a near or far scene Set the main camera of the remote site to focus automatically When the conference rate is lower than 256 kbit s...

Страница 89: ...for maintenance After the local site joins a conference and a remote site shares its computer desktop the VGA display at the local site cannot display the computer desktop of the remote site The resolution of the computer that is used for the VGA input at the remote site exceeds the maximum resolution supported by the local RP100 55T Contact and ask the administrator of the remote site to change t...

Страница 90: ...amera is connected insecurely Contact and request the administrator of the remote site to reset the camera parameters or connect the camera control cable properly 12 2 5 Audio Table 12 10 describes the troubleshooting methods for audio related problems Table 12 10 Troubleshooting methods for audio related problems Problem Possible Cause Solution The local site joins a conference No audio however i...

Страница 91: ...cted to the audio interface that is set as the audio source In this case set the audio source again or connect a sound pickup device to the corresponding interface The relevant sound pickup device is powered off In this case power on the device The audio cable is not connected securely In this case connect the audio cable properly After the local site joins a conference only the sound from the loc...

Страница 92: ... re register with the gatekeeper The local or remote site is not connected to an IP network Check the IP network settings and the connection of the IP network cable Ensure that the settings are correct and the cable is connected properly The local site cannot place a call to a remote site The local or remote site is not connected to an IP network Check the IP network settings and the connection of...

Страница 93: ... that the settings are correct and the cable is connected properly The NAT settings are incorrect If the local site is in a private network and if the gatekeeper is in a public network check whether the local site can communicate with the gatekeeper properly If not the local NAT settings are incorrect Choose Settings Network IP Firewall and then set the NAT parameters properly The listen port of t...

Страница 94: ...ast In this case all the sites except for the chair site and the broadcasting site must view the broadcasting site Contact and ask the chair site to stop broadcasting the site The chair site has performed the Give Floor operation In this case a non chair site cannot view other sites Contact and ask the chair site to perform the Discussion operation The chair site has performed the Voice Activation...

Страница 95: ... how to operate the user interface When using the RP100 55T and the provided administrator guide is not available press to display this operation guide on the user interface 12 2 10 Technical Support This website support huawei com provides an efficient and real time communication platform where users can obtain technical documents submit technical questions service requests and troubleshooting qu...

Страница 96: ...n a well ventilated place Do not expose the device to direct sunlight Install the device strictly according to the requirements of the manufacturer Do not place any object on the top of the device Reserve a minimum space of 10 cm at the four sides of the device for heat dissipation Do not place the device on or near inflammable materials such as foam Keep the device away from heat source or fire s...

Страница 97: ...ine cannot be connected inversely Do not scratch or abrade the shell of the device The shed painting may lead to skin allergy or malfunction of the device If the shed painting material drops into the host a short circuit may occur Cleaning Requirements Before cleaning the device stop using it disconnect the power supply and unplug all the cables connected to the device such as the power cable tele...

Страница 98: ... fire alarm or an automatic gate Otherwise this will lead to malfunction of the electronic device The user who uses an electronic assistant medical treatment device needs to confirm with the service center regarding the effects of the radio wave on this device Do not take the wireless device to the operation theater Intensive Care Unit ICU or the Coronary Care Unit CCU When using the device ensure...

Страница 99: ...es This device is compliant with the EU Registration Evaluation Authorisation and Restriction of Chemicals REACH Regulation Regulation No 1907 2006 EC of the European Parliament and of the Council and the EU Restriction of Hazardous Substances RoHS Directive Directive 2002 95 EC of the European Parliament and of the Council For more information about the REACH compliance of the device visit the we...

Страница 100: ...udio encoding and decoding protocols AAC LD HWA LD G 722 G 722 1 G 722 1C G 711 G 728 and G 729A Dual stream standard ITU T H 239 and BFCP Network transmission protocol TCP IP FTP FTPS DHCP SNMP Telnet SSH HTTP HTTPS PPPoE RTP and RTCP Media stream encryption protocol AES for media stream encryption and H 235 for signaling encryption Bandwidth Conference bandwidth 1080p 25 30 Hz 2 Mbit s to 8 Mbit...

Страница 101: ...al Response time 8 ms first on screen touch 5 ms continuous on screen writing Touch effective recognition 5 mm 0 20 in Maximum cursor speed 300 clicks second Coordinate output 4096 x 4096 Communication method full speed USB Writing four point touch Built in PC parameters CPU Intel i5 2 3 GHz Memory 4 GB DDR3 Hard disk 500 GB SATA Operating system Windows 7 Professional Edition Power and power supp...

Страница 102: ...1 2013 12 20 Huawei Proprietary and Confidential Copyright Huawei Technologies Co Ltd 94 Item Sub Item Specifications Weight About 108 kg 238 14 lb The dimensions may vary according to the actual product The dimensions in the preceding table are provided only for your reference ...

Страница 103: ...display screen for a long time Doing so may lead to blurred vision or damage to your eyes Layout Precautions Ensure that there are no large or moving objects behind you Otherwise the video cannot be viewed clearly Do not use striped patterns as the background Do not hold a conference in a room in which sound echoes Do not install the RP100 55T near a sound source Do not install the RP100 55T in a ...

Страница 104: ...andardize the horizontal and vertical resolutions in pixels of YCbCr sequences in video signals commonly used in video teleconferencing systems It was first proposed in the H 261 standard continuous presence A feature in multi point conferencing that allows the video endpoint to see images from multiple video endpoints at the same time All parties remain continuously visible or present for the dur...

Страница 105: ... titled Role management and additional media channels for H 3xx series RP100 55Ts Practical importance of this recommendation is its setting forth a way to have multiple video channels for example one for conferencing another for presentation within a single session call H 261 H 261 is a 1990 ITU T video coding standard originally designed for transmission over ISDN lines on which data rates are m...

Страница 106: ...ntical technical content H 264 is used in such applications as Blu ray Disc videos from YouTube and the iTunes Store DVB broadcast direct broadcast satellite television service cable television services and real time videoconferencing picture in picture Concurrent presence of two videos in different sizes on a monitor with one video superimposing the other The smaller video is approximately 1 16 t...

Страница 107: ... Co Ltd 99 E Acronyms and Abbreviations Numerics 3G Third Generation Mobile Telephony 4CIF 4 times Common Intermediate Format A AAC LD Advanced Audio Coding Low Delay C CIF Common Intermediate Format CDMA Code Division Multiple Access D DVI Digital Visual Interface G GK Gatekeeper I IMS IP multimedia subsystem P PC Personal Computer PPPoE PPP Over Ethernet ...

Страница 108: ...ssue 01 2013 12 20 Huawei Proprietary and Confidential Copyright Huawei Technologies Co Ltd 100 PTZ Pan Tilt Zoom Q QoS Quality of Service S SIP Session Initiation Protocol U USB Universal Serial Bus V VGA Video Graphics Array W WCDMA Wideband Code Division Multiple Access ...

Отзывы: