background image

24 


Only files in .mp4 and .3gp formats are supported. Files in 
other formats may not play. 

Image Viewer 

The Image Viewer provides the following options for all pictures in 
the phone memory and on the microSD card: View, Browse style, 
Send (by MMS), Use as (Wallpaper, Screen saver or Caller picture), 
Rename, Delete, Sort by (Name, Type, Time, Size or None), Delete all 
files and Storage selection. 

FM Radio 

To ensure reception of radio programs, pull out the TV & FM radio 
antenna.  

In standby mode, tap 

 > FM radio to access FM Radio. 

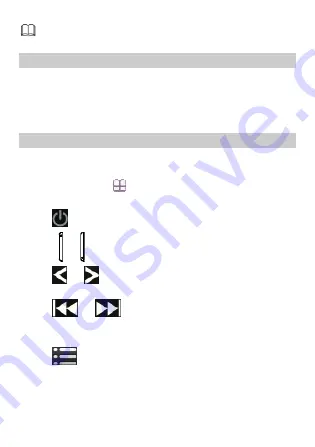
When listening to the radio, you can do the following: 

z


Tap 

  to stop or continue the playing. 

z


Press   or    to adjust the volume. 

z


Tap 

 or 

  to adjust the frequency at a precision of 0.1 

MHz. 

z


Tap 

 or 

  to switch to the adjacent channel. 

z


Press the button on the headset cable to switch between 
channels. 

z


Tap 

  to view or edit the channel list, manually set a 

frequency, automatically search for and save channels, configure 
the relevant settings, record the audio clip, and so on. 

Содержание G7206-C

Страница 1: ...DED AS IS EXCEPT AS REQUIRED BY APPLICABLE LAWS NO WARRANTIES OF ANY KIND EITHER EXPRESS OR IMPLIED INCLUDING BUT NOT LIMITED TO THE IMPLIED WARRANTIES OF MERCHANTABILITY AND FITNESS FOR A PARTICULAR PURPOSE ARE MADE IN RELATION TO THE ACCURACY RELIABILITY OR CONTENTS OF THIS MANUAL TO THE MAXIMUM EXTENT PERMITTED BY APPLICABLE LAW IN NO CASE SHALL HUAWEI TECHNOLOGIES CO LTD BE LIABLE FOR ANY SPEC...

Страница 2: ...Installing a microSD Card 5 Charging the Battery 5 Customizing the Home Screen 6 Working with the Main Menu 6 Accessing a Shortcut Menu 7 Phone Lock 7 Mass Storage 8 PIN and PUK 9 Locking the Keypad 9 3 Voice Services 10 Making a Call 10 Handling Incoming Calls 10 4 Text Input 12 Changing the Text Input Mode 12 Multi Tap Input Mode 12 Predictive Input Mode 13 Entering Digits 14 Entering Symbols 14...

Страница 3: ...n Email 18 7 Voice Mail 18 8 Phonebook 19 Creating a Contact 19 Searching for a Contact 20 Setting the Preferred Storage 20 Copying Contacts 20 Contact Group 21 9 Multimedia 22 Camera 22 Video Recorder 22 Media Player 23 Image Viewer 24 FM Radio 24 Sound Recorder 25 TV 25 10 WAP Browser 26 Configuring Network Settings 26 Accessing a Website 27 11 Chat Functions 27 Facebook Link 27 Facebook Client ...

Страница 4: ...culator 29 Unit Converter 29 Currency Exchanger 30 14 App Store 30 Installing a Java Application 30 Running a Java Application 31 Removing a Java Application 31 15 Opera Optional 31 Configuring Network Settings 32 Accessing a Website 32 16 FAQs 33 17 Warnings and Precautions 35 ...

Страница 5: ...rked as optional may vary according to service providers For details contact your service provider 1 Getting to Know Your Phone Your Phone 1 Earpiece 8 Volume key 2 Screen 9 Camera 3 Call Answer key 10 Headset jack ...

Страница 6: ... your phone and is provided only for your reference Keys and Functions Press To z Make a call z Answer a call z View all call history in standby mode z Power the phone on or off press and hold for about 3 seconds z End or reject a call z Return to the standby mode z Confirm a selection z Increase the volume or decrease the volume during a call z Scroll to the desired menu press or ...

Страница 7: ...ength Media player enabled Roaming New text messages New multimedia messages New voice mails New emails Call forwarding enabled Missed calls Alarm enabled Battery level General profile activated Meeting profile activated Outdoor profile activated ...

Страница 8: ... Getting Started Installing the SIM Card and the Battery When installing a SIM card ensure that the golden contact area on the SIM card is facing downward and that the beveled edge of the SIM card is properly aligned with that of the SIM card slot Removing the Battery and the SIM Card Before removing the battery and the SIM card ensure that your phone is powered off ...

Страница 9: ...n inserting the microSD card ensure that the golden contact area on the microSD card is facing downward Charging the Battery To charge the battery do the following 1 Connect the smaller end of the USB cable to the charger jack on the phone and the larger end to the charger 2 Connect the charger to a power socket 3 Wait until the battery is fully charged During charging an animated charging icon is...

Страница 10: ... to the home screen 3 Tap to close the widget menu To reposition widgets on the home screen do the following Touch and hold the icon of the widget you want to reposition and drag it to the desired position on the screen To remove a widget from the home screen do the following 1 In standby mode tap to open the widget menu 2 On the home screen touch and hold the icon of the widget you want to remove...

Страница 11: ... press Accessing a Shortcut Menu To access a shortcut menu do the following In standby mode tap to open the onscreen keypad to access the Messaging screen and to access the Phonebook screen Phone Lock The phone lock protects your phone from unauthorized use By default the phone lock is disabled After the phone lock is enabled the phone requests the phone code each time it is powered on To enable t...

Страница 12: ... Mass storage is displayed on the phone screen If you select Mass storage you can manage the files stored in the phone memory and on the microSD card The microSD card and the phone memory are displayed as removable disks on the PC You can perform the following operations z Double click a disk to open it z Copy paste or delete files on the disk z Disconnect the phone from the PC z Ensure that you c...

Страница 13: ...f you enter incorrect PUKs for a specified number of times consecutively the SIM card becomes permanently invalid In this case contact your service provider for a new SIM card Locking the Keypad To lock the keypad press in standby mode To unlock the keypad press any key to turn on the backlight and then slide to the right If the auto keypad lock function is enabled and the phone is in standby mode...

Страница 14: ...uence z To call an extension enter the phone number tap three times to enter P or four times to enter W and then enter the extension number 3 Press to dial the number 4 Press to end the call z You can also make calls from the call history phonebook and messages z During a call you can press or to adjust the in call volume Handling Incoming Calls When there is an incoming call do the following z Pr...

Страница 15: ... speaker If the any key answer function is enabled you can press any key except and to answer a call To enable the any key function do the following 1 Tap User profiles 2 Select the desired profile except Silent 3 Tap Options Customize Answer mode 4 Tap On and then Done ...

Страница 16: ...23 Number input mode z Tap to close the keyboard and tap the text box to open the keyboard z Tap once to delete the last entered character You can also touch and hold to clear all the entered characters at a time z Tap or to switch between the keypad and the QWERTY keyboard Multi Tap Input Mode In multi tap input mode do as follows to enter letters z When the onscreen keyboard is a keypad tap a ke...

Страница 17: ... keyboard is a QWERTY keyboard tap to open the numeric and symbol keyboard tap to start a new paragraph or tap to enter a space z Tap or to go back to the keypad or the QWERTY keyboard Predictive Input Mode In predictive input mode when the onscreen keyboard is a keypad do as follows to enter a word 1 Tap each key once according to the spelling sequence of the desired word The phone displays the c...

Страница 18: ... the screen Entering Symbols When the onscreen keyboard is a keypad do as follows to enter symbols 1 Tap to open the symbol keyboard 2 Tap or to scroll up or down 3 To enter symbols do the following z To enter only one symbol tap the desired symbol z To enter multiple symbols tap to change the icon to and then tap the desired symbols When the onscreen keyboard is a QWERTY keyboard do as follows to...

Страница 19: ...the phonebook To add multiple recipients repeat this step 5 Press or tap Options and then select one of the following options z Send to send the message to the recipient z Edit recipient to edit the recipient z Remove recipient to remove the recipient z Remove all recipients to remove all recipients z Save to save the message to Drafts and exit the Write message screen Writing and Sending a Multim...

Страница 20: ...Add subject the message automatically changes from a text message to a multimedia message 4 On the Write message screen press or tap Options and select Send to 5 Tap Enter recipient and enter the phone number of a recipient or tap Add from Phonebook and add a recipient from the phonebook To add multiple recipients repeat this step 6 Scroll to the desired recipient press or tap Options and select o...

Страница 21: ...ges may contain viruses such as malicious software that can damage your phone z You can configure the network settings provided by the service provider in Profiles To access Profiles tap Messaging Message settings Multimedia message Profiles Tap Add new and configure Profile name MMSC address Data account Connection type User name and Password z By default messages are stored in the phone memory 6...

Страница 22: ...or Bcc to add the email address of a recipient 3 Tap Subject to edit the email subject 4 Tap Attachments to add an attachment 5 Set the email Priority 6 Tap the text box to edit the text content of the email 7 After editing tap Done and select one of the following options z Send to send the email z Send and save to send and save the email z Save to Drafts to save into Drafts and exit the editor sc...

Страница 23: ...honebook Creating a Contact To create a contact do the following 1 Tap Phonebook or in standby mode tap 2 Tap Options Add new contact 3 Select To SIM or To phone to save the contact 4 Enter the contact information and save the contact as follows z For the contact saved to SIM enter Name and Number tap OK and then Yes to save the contact z For the contact saved to phone enter Name Number Home numbe...

Страница 24: ...Options and select Phonebook settings Preferred storage 3 Scroll to SIM Phone or Both as desired 4 Tap OK to select the preferred storage Copying Contacts You can copy contacts to the phone the SIM card or a file Copying One Contact To copy one contact do the following 1 Tap Phonebook or in standby mode tap 2 Enter the first letter of the contact name in the text box 3 Press or to scroll to the de...

Страница 25: ...nt contacts to the group The members in the group have some common features such as Caller ringtone and Caller picture To create a contact group do the following 1 Tap Phonebook or in standby mode tap 2 Tap Options and select Caller groups Add new group 3 Set Group name Caller ringtone and Caller picture and then tap Done 4 Tap Yes to save the contact group To add contacts to a contact group do th...

Страница 26: ...p to zoom in or to zoom out z Tap icons such as and to configure the corresponding settings 3 Focus the camera on the scene and press or tap to take a picture 4 Tap Back to save the picture You can take another picture or tap Options and select Delete to delete the picture Video Recorder To record a video clip do the following 1 Tap Video recorder 2 In video recording mode you can do the following...

Страница 27: ...der can be accessed from File manager To obtain better sound quality it is recommended that you use the headset to listen to audio clips To play a clip do the following 1 In standby mode tap Media player Now playing to access Media Player 2 Tap to start playing the clip When the clip is being played you can do the following z Press or to adjust the volume or tap to mute z Tap and to switch between...

Страница 28: ...io To ensure reception of radio programs pull out the TV FM radio antenna In standby mode tap FM radio to access FM Radio When listening to the radio you can do the following z Tap to stop or continue the playing z Press or to adjust the volume z Tap or to adjust the frequency at a precision of 0 1 MHz z Tap or to switch to the adjacent channel z Press the button on the headset cable to switch bet...

Страница 29: ...ap to stop recording the audio clip and then save the recorded clip as instructed TV To ensure reception of TV programs pull out the TV FM radio antenna In standby mode tap TV to access TV When watching the TV you can do the following z Tap to record a video clip z Tap to mute z Tap to take a picture z Press or tap to adjust the volume z Tap or to switch to the adjacent channel z Tap to access the...

Страница 30: ...e For details about the service and the charges contact your service provider Configuring Network Settings To access WAP sites on your phone you need to set your data account and WAP parameters first Setting the Data Account To set the data account do the following 1 Tap WAP browser Internet service Settings Data account or tap Settings Connectivity Data account 2 Tap Options Add 3 Set the paramet...

Страница 31: ...ions Done to access the website 11 Chat Functions The Facebook and Twitter built in chat applications allow you to send and receive instant messages and files Depending on the version of your phone these applications are provided as preset links or clients Check your General Packet Radio Service GPRS settings before using the chat applications Facebook Link To access Facebook Tap Facebook to acces...

Страница 32: ...red on your phone and microSD card To access File manager tap File manager in standby mode You can use File manager to access the following folders in your phone Apps Videos Received Pictures Photos Others Audio eBooks and ContactImage 13 Tools Alarm You can set five alarms on your phone To set an alarm tap Alarm in standby mode enable or disable the alarm and then set the alert time repeat mode s...

Страница 33: ...e rings as a reminder Ebook You can use Ebook to read txt files To access Ebook tap Ebook in standby mode Calculator To access Calculator tap Calculator in standby mode To calculate enter the number to be calculated select a mathematical operation by tapping the corresponding key enter another number to be calculated and then tap to obtain the result Unit Converter To access Unit Converter tap Uni...

Страница 34: ...e compatible with your phone If you have trouble in installing or running a Java application press to return to the standby mode and then remove the application from your phone z Certain Java applications require network connections Therefore ensure that the GPRS connection is properly set up Installing a Java Application To install a Java application on your phone do the following 1 Select a Java...

Страница 35: ...do the following 1 Tap App store Java Java 2 Select a Java application and tap Options 3 Select Delete to remove the application 4 Tap Yes to confirm the certification information After the Java application is removed the message Deleted is displayed 15 Opera Optional Opera is a fast and compact web browser that allows you to access the Internet on your phone With Opera you can use your phone to a...

Страница 36: ...eters based on the information provided by your service provider 4 Tap OK and then Yes to save the settings Setting the WAP Parameters To set the WAP parameters do the following 1 Tap WAP browser Internet service Settings Profiles 2 Tap Add new 3 Set the parameters based on the information provided by your service provider 4 Tap Done to save the settings Activating a Network Connection Profile To ...

Страница 37: ...d in this section before you consult the service provider or the phone dealer Question Answer How long should I charge the phone before I use it the first time Four hours Which are the factors that affect the lifetime of the battery z The lifetime of the battery depends on the number of times that the battery has been charged the duration that the battery is charged each time and the duration that...

Страница 38: ...s locked unlock it by entering the PUK delivered with the SIM card z If you have lost the PUK go to the nearest service store of the network service provider for assistance How do I maintain my phone and accessories z Prevent dust and water from entering your phone Do not use your phone in a dusty or moist environment Avoid dropping your phone and prevent physical impact to the phone z Do not inst...

Страница 39: ...ldings Why cannot the battery be charged z The charger has failed z The battery is damaged Why cannot my phone detect the SIM card The SIM card may be damaged Replace it with another SIM card that works properly and check again 17 Warnings and Precautions This section contains important information pertaining to the operating instructions of your device It also contains information about how to us...

Страница 40: ...ulting in bodily injuries or even deaths Do not power on your device at refueling points such as service stations Comply with restrictions on the use of radio equipment in fuel depots storage and distribution areas and chemical plants In addition adhere to restrictions in areas where blasting operations are in progress Before using the device watch out for areas that have potentially explosive atm...

Страница 41: ...al Operating Environment z Do not use or charge the device in dusty damp and dirty places or places with magnetic fields Otherwise it may result in a malfunction of the circuit z The device complies with the RF specifications when the device is used near your ear or at a distance of 1 5 cm from your body Ensure that the device accessories such as a device case and a device holster are not composed...

Страница 42: ... Accessories Use the accessories delivered only by the manufacturer Using accessories of other manufacturers or vendors with this device model may invalidate any approval or warranty applicable to the device result in the non operation of the device and cause danger Battery and Charger z Unplug the charger from the electrical plug and the device when not in use z The battery can be charged and dis...

Страница 43: ...circuit of the charger or a fire z Do not dispose of batteries in fire as they may explode Batteries may also explode if damaged z Danger of explosion if battery is incorrectly replaced Recycle or dispose of used batteries according to the local regulations or reference instruction supplied with your device Cleaning and Maintenance z The device battery and charger are not water resistant Keep them...

Страница 44: ...e charger with a piece of damp and soft antistatic cloth z Do not dismantle the device or accessories Otherwise the warranty on the device and accessories is invalid and the manufacturer is not liable to pay for the damage Emergency Call You can use your device for emergency calls in the service area The connection however cannot be guaranteed in all conditions You should not rely solely on the de...

Страница 45: ...evice pursuant to Part 15 of the FCC Rules These limits are designed to provide reasonable protection against harmful interference in a residential installation This equipment generates uses and can radiate radio frequency energy and if not installed and used in accordance with the instructions may cause harmful interference to radio communications However there is no guarantee that interference w...

Страница 46: ...not cause harmful interference and 2 this device must accept any interference received including interference that may cause undesired operation Warning Changes or modifications made to this device not expressly approved by Huawei Technologies Co Ltd may void the FCC authorization to operate this device Version 01 NO 6010461 ...

Отзывы: