FusionModule800 Smart Small Data Center
Maintenance Guide
5 Parts Replacement
Issue 02 (2016-11-15)
Huawei Proprietary and Confidential
Copyright © Huawei Technologies Co., Ltd.
89
5.4.1 Replacing a CIM
Step 1
Clear the network parameters for all the BIMs managed by the CIM to be replaced.
If the CIM is damaged, manually clear the network parameters for all the BIMs managed
by the CIM by holding down the networking switch for the BIM.
If the CIM is not damaged, hold down the networking switch for the CIM to clear the live
network (including the network parameters for all the BIMs managed by the CIM).
Step 2
Remove cables from the CIM.
1.
Remove the current detection cable from the HALL port on the CIM.
2.
Remove the BCB cable from the BCB_1 port on the CIM.
3.
Remove the communications cable from the POE port on the CIM.
If multiple CIMs are cascaded, remove all cables and label them.
Step 3
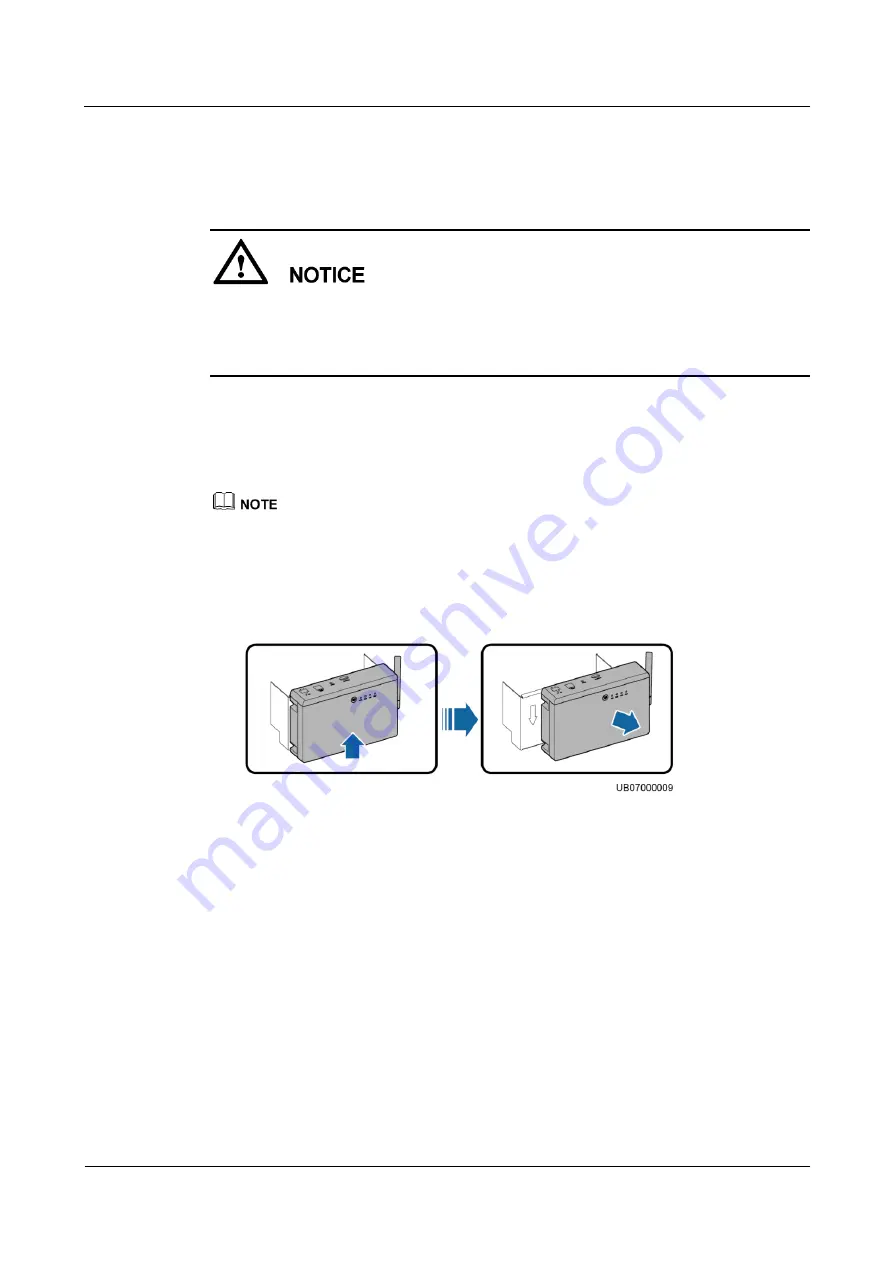
Remove the CIM.
1.
Remove the CIM from the fastener, as shown in
Figure 5-44
Removing a CIM
2.
Record the DIP switch address of the CIM.
Step 4
Install a CIM.
1.
Clamp the CIM to the fastener.
2.
Set the DIP switch for the CIM based on the recorded information. If DIP switch settings
are required for multiple CIMs in the system, refer to
iBAT 2.0-CIM01C2 User Manual
for the setting rules.
Step 5
Reconnect cables to the CIM based on the cable labels.
Step 6
After installing the CIM, network the CIM and BIM. For details, see the description about
power-on commissioning in the
iBAT 2.0-CIM01C2 User Manual
.
----End


