


1
Thank you for choosing E226 HSDPA USB
Modem (hereinafter referred to as the E226)
from Huawei.
Note
: This manual briefs the profile of the
E226, and the preparation, and
installation process. For the operation of
the management program, see User
Manual..
Getting Started
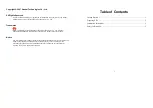
1. Getting to Know the E226
The following figure shows the E226 profile.
USB interface
USIM/SIM card slot
Indicator
2. Indicator
This indicator indicates the status of E226.
y
Off: The E226 is powered off.
y
Green, Blinking twice every 2.7 seconds: The
E226 is searching for a network or no
network is available.
y
Green, Blinking twice every 2.9 seconds: The
GSM network is normal.
y
Blue, Blinking once every 2.9 seconds: The
WCDMA network is normal.
y
Green: GPRS data service is established.
y
Cyan: HSDPA data service is established.
y
Blue: WCDMA data service is established.
3. Computer
Configuration
Requirements
To use the E226, configure a computer
according to the following items:
y
Central processing unit (CPU): Pentium 4, 1
GHz or above
y
Memory: 128 MB RAM or above
y
Hard disk: 50 MB or above
y
Operating system (OS): Windows XP,
Windows 2000, or Windows Vista
y
Universal serial bus (USB) modem interface:
USB 2.0 full speed
y
Display resolution: 800
%
600 or above
(1024
%
768 is recommended)
Note:
y
Improper configuration may degrade the
computer performance.
2
y
For Windows XP, it is recommended to
install patches such as
Service Pack 2
or
above.
y
For Windows 2000, it is recommended to
install patches such as
Service Pack 4
or
above.
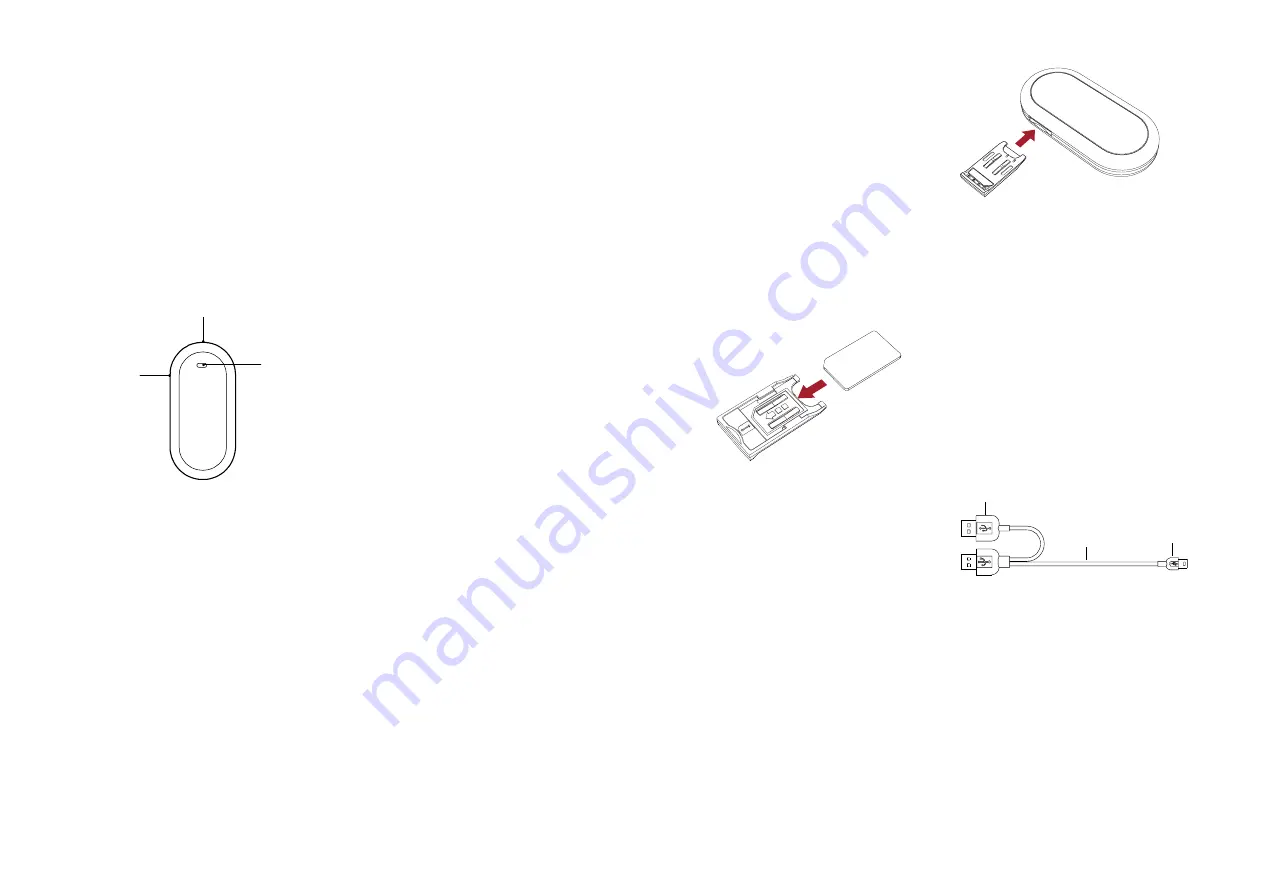
Preparing E226
1)
Remove the UMTS subscriber identity
module/subscriber identity module
(USIM/SIM) card slot from the E226.
Then insert the USIM/SIM card into the
card slot, as shown in the following
figure. Make sure that the USIM/SIM
card is fully in place.
2)
Insert the card slot into the E226, as
shown in the following figure.
Installation Instructions
The installation procedures of the E226
Manager vary with operating systems (OSs).
Refer to the actual installation instructions
during the installation process.
1. Connecting the E226 with
a Computer
Note
: First, power on a computer. Then
connect the E226 with the computer.
Otherwise, the normal installation of the
E226 can be affected.
The following figure is the sketch map of the
data cable.
Auxiliary USB
data cable
Mini-USB
Connector
Mini-USB
data cable


