


8
Here are some good rules of thumb to help you select the
correct filler metal:
1) ER70S-6 is generally used for mild steel welding.
2) ER70S-2 is highly recommended for welding 4130
chrome-moly tubing in many applications.
3) ER80S-D2 is recommended for welding 4130 chrome-moly
tubing if a higher strength, less ductile weld is required. If
your weld will be heat treated to obtain optimum strength,
then use a filler metal which matches the chemistry of your
tubing, which neither 70S-2 nor 80S-D2 wires do.
4) Generally speaking, use a 1/16" diameter filler rod for
applications where the material is 1/8" and less. Use a 3/32"
diameter rod for 1/8" and thicker.
The following Filler Rod is available from HTP in 1 lb. tubes
which are tightly sealed to prevent oxidation.
Filler Rod
Part #
Material
308L-035-1
308L Stainless Steel Wire
.035" x 36"
308L-1/16-1
308L Stainless Steel Wire
1/16" x 36"
70S6-1/16-1
ER70S-6 Steel Wire
1/16" x 36"
70S6-3/32-1
ER70S-6 Steel Wire
3/32" x 36"
70S2-1/16-1
ER70S-2 Steel Wire
1/16" x 36"
80SD2-1/16-1
ER80SD-2 Steel Wire
1/16" x 36"
Quick Set Up
1) Welding Mode in 2T for foot pedal.
2) Slope down – 0
3) Touch Start/HF set to HF
4) Ground clamp plugged into Positive receptacle
5) TIG Torch into Negative receptacle
6) 100% Argon Gas Flow to 20 CFH
TIG Welding with your 130 DC/HF
In order to TIG weld, install TIG welding torch (SR9-12) on the
machine. Generally speaking, except for very rare instances,
you will TIG weld DCEN, or DC electrode negative. Plug the
tig torch into the negative output receptacle (#10) and connect
the female gas nut onto the gas outlet (#9) on the front of the
machine. Do not use teflon tape or any other sealers, as the
threads do not seal the connection. Use 100% argon shielding
gas set at approximately 20 cfh. Plug the ground cable into the
positive output receptacle (#7).
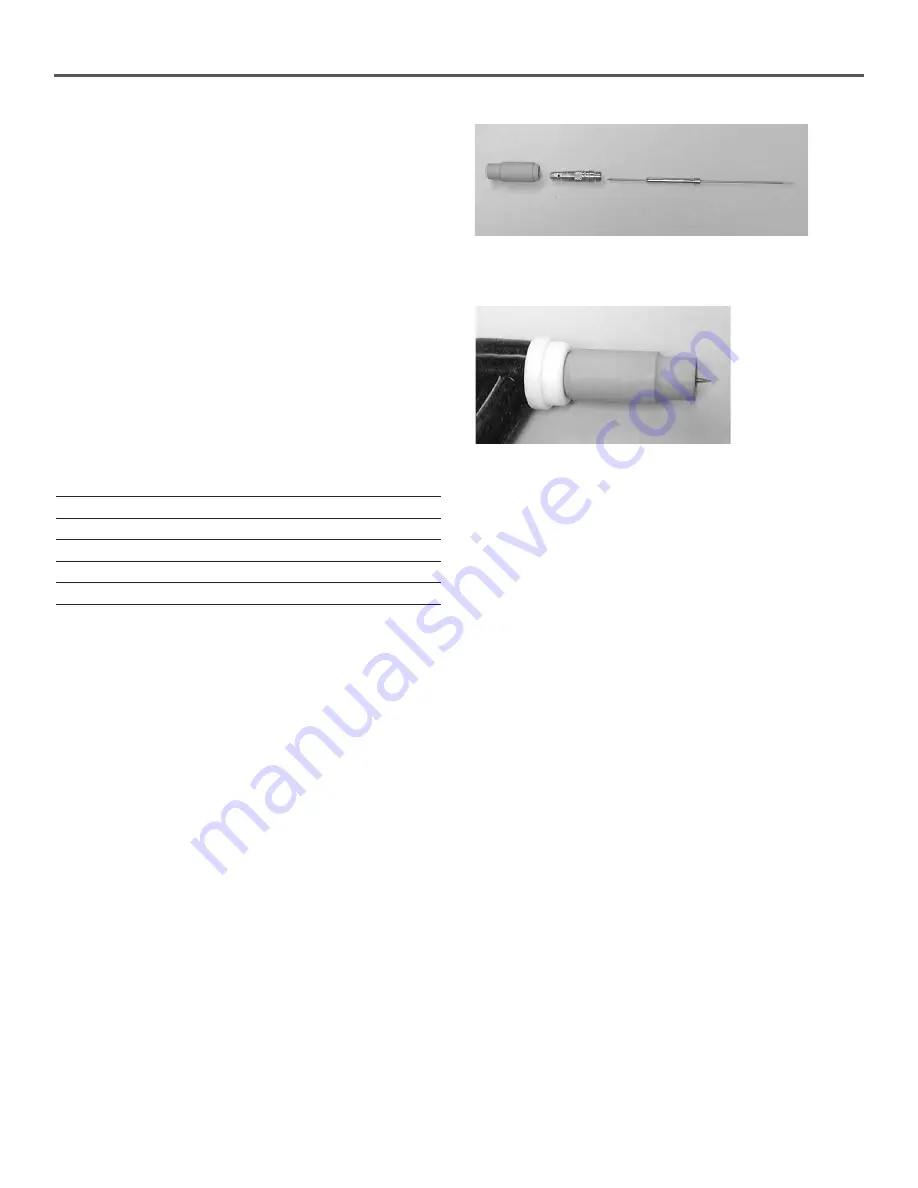
Setting up the torch
Lets assume we will be welding some .060" mild steel.
Selecting a 1/16" 2% Ceriated tungsten, we grind a point on
the end of the tungsten (remember always grind the tungsten
longitudinally, never radially). Select a 1/16" collet and insert
the tungsten so the pointed end of the tungsten comes out
through the slit in the collet. Next insert the collet/tungsten
assembly into the threaded end of the collet body, so the pointed
end of the tungsten comes out through the sized hole of the
collet body. (See Fig 8) Thread the assembly into the torch head
and tighten the collet body snugly by hand. Install the back cap,
but do not tighten at this point. Install a #6 alumina cup on the
collet body and tighten snugly by hand. Have the tungsten
protruding from 2 to 3 times its diameter from the end of the
cup (in this instance 1/8" to 3/16" (See Fig 9). Tighten the
back cap.
Holding the Torch
It is recommended that you use TIG welding gloves like our
BL25 gloves. These are thinner than standard welding gloves
and will give you a much better “feel” and make it easier to
work the filler rod. Grip the torch somewhat like a pencil, as
indicated in figure 10. The torch must be positioned almost
perpendicular to the work and in such a manner that the
tungsten is kept 1/8" to 1/4" off the work. The tungsten should
only contact the work when starting the arc. Once the arc is
started, the tungsten should never contact the work. Use the
edge of your hand and little finger to hold the torch steady.
Fig 8 – Assembly order for Torch Parts
Fig 9 – Tungsten Stickout


