lp-674 Rev. 5.7.18
3
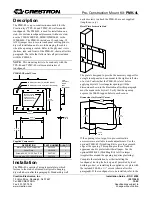
Figure 6 - Installed Main Rack and Extension Rack
General Notes on Securing the Rack to a Concrete Floor:
When locating the rack and preparing to install concrete
anchors, IT IS MANDATORY to check for buried electrical
cables, gas tubing, and water or radiant heating piping. DO
NOT drill into or drive fasteners into concrete slab unless
absolutely certain it is safe to do so. If in doubt, CONSULT A
PROFESSIONAL to determine and accurately locate buried
objects. Failure to follow this warning could result in property
damage, serious personal injury, or death.
General Rules for Drilling in Concrete
Concrete drillers must comply with OSHA’s general rules.
Operators must be adequately trained to use concrete drilling
equipment, and the drilling equipment must be maintained in safe
operating condition. Operators must wear personal protective
equipment (PPE), including goggles, long pants, protective
noise equipment, and steel-toed work boots. Operators should
wear a respirator whenever exposed to hazardous materials.
Adequate ventilation is required whenever drilling in concrete.
Utility Precautions
OSHA rules state that concrete drillers should make certain
they are not drilling into electrical cables. They should use the
services of the underground utility and cable locating companies
prior to drilling. Concrete drillers should maintain a minimum
distance of 10 feet from high voltage power cables.
If seismic anchoring is required, consult state and local codes
for requirements and instructions. If in doubt as to whether
seismic anchoring is necessary in your installation location,
CONSULT A PROFESSIONAL. Failure to follow this warning
could result in property damage, serious personal injury, or
death.
General Anchoring Instructions
1. Position the stand in the installation location.
2. Once properly positioned, use a pencil to mark the drill holes for
the lag screws / expansion anchors. Then move away the stand.
3. Prepare to drill holes into the mounting surface (either 4” thick
minimum Wood Structural Member, or 4” thick minimum Concrete
Flooring). Consult lag screw or expansion anchor manufacturer for
predrill diameters.
3. After taking appropriate precautions, drill the four anchor holes.
4. Reposition the stand with attached seismic anchors over the
newly drilled anchor holes.
5. Install the washers and lag screws or expansion anchors
(depending on the installation and code requirements).
Installing Appliance(s) on the Rack:
1. a. If mounting one (1) appliance to the rack, use a 10mm Ratchet
or Socket Driver and wrench and two (2) M6 bolts and included
washers and nuts to mount the top mounting bracket to the upper
beam of the rack. See Figure 7.
1. b. If mounting two (2) appliances to the rack, use a 10mm
Ratchet or Socket Driver and wrench and two M6 (2) bolts and
included washers and nuts to mount two (2) top mounting brackets
to the upper beam of the rack.See Figure 8.
2. Hang the appliance(s) from the top mounting bracket(s). See
Figure 7.
Figure 7 - Single Appliance Mounted on Top Mounting Bracket
3. Use a 10mm Ratchet or Socket Driver and wrench and two
(2) M6 bolts and included washers and nuts to secure the lower
mounting bracket(s) to the lower beam of the rack. See Figures 9
and 10.
Figure 8 - Secured Top Mounting Bracket for Back to Back
Appliance Mounting
4. See the following page for mounted appliance images.
5. Repeat the previous steps for installing additional appliances on
Extension Rack(s).
Figure 9 - Single Appliance Secured Lower Bracket
Figure 10 - Secured Lower Bracket for Back to Back Appliance
Mounting
This rack system must be properly anchored and secured to
the floor BEFORE mounting appliances on it. Failure to follow
these instructions could result in substantial property damage,
severe personal injury, or death.