


23
Removing microSD Card
1.
Make sure the power is off
2.
Remove the Back Cover, then remove the
battery
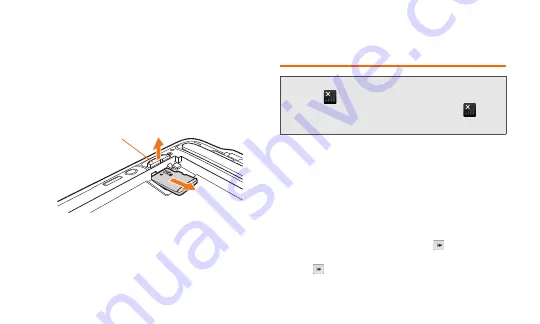
3.
Lift the slot lock until it clicks (
①
), then
eject microSD card from its slot (
②
)
4.
Insert the Battery, then replace the Back
Cover
Making and Answering
Calls
Making Calls
In the Phone
’
s dialer, you can dial a number
directly.
1.
Tap
Phone
2.
Enter a phone number on the phone
keypad
• If you enter a wrong digit, tap
to erase that
digit. To erase the entire number, tap and hold
.
①
②
Slot Lock
memo
•
When
appears, the device is out-of-range or
signal is weak. Move to a location where
disappears.
Содержание EVO WiMAX ISW11HT
Страница 1: ...Basic Manual ...
Страница 8: ...6 ...
Страница 10: ...8 ...
Страница 11: ...Your Device ...
Страница 72: ...70 ...
Страница 73: ...Network Services Internet ...
Страница 78: ...76 ...
Страница 95: ...Appendix ...


