HQ Power TRIMO 310 Скачать руководство пользователя страница 4


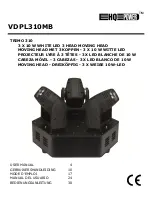
VDPL310MB 

V. 01 – 17/11/2014 

©Velleman nv 

USER MANUAL 

1.


Introduction 

To all residents of the European Union 
Important environmental information about this product 

This symbol on the device or the package indicates that disposal of the device after its lifecycle 
could harm the environment. Do not dispose of the unit (or batteries) as unsorted municipal 
waste; it should be taken to a specialized company for recycling. This device should be returned 
to your distributor or to a local recycling service. Respect the local environmental rules. 

If in doubt, contact your local waste disposal authorities. 

Thank you for choosing HQPower™! Please read the manual thoroughly before bringing this device into 
service. If the device was damaged in transit, do not install or use it and contact your dealer. 

2.


Safety Instructions 


Be very careful during the installation: touching live wires can cause life-threatening 
electroshocks. 


Always disconnect mains power when device not in use or when servicing or maintenance 
activities are performed. Handle the power cord by the plug only. 


Indoor use only.

 Keep this device away from rain, moisture, splashing and dripping 

liquids. Never put objects filled with liquids on top of or close to the device. 


Keep this device away from children and unauthorized users. 


Caution:

 device heats up during use. 


Do not stare directly at the light source

, as this may cause 


epileptic seizure in sensitive people 


temporarily loss of sight (flash blindness) 


permanent (irreversible) eye damage. 


This device falls under protection class I. It is therefore essential that the device be 
earthed. Have a qualified person carry out the electric connection.


There are no user-serviceable parts inside the device. Refer to an authorized dealer for 
service and/or spare parts. 


Make sure that the available voltage does not exceed the voltage stated in the specifications of this 
manual. 


Do not crimp the power cord and protect it against damage. Have an authorised dealer replace it if 
necessary. 


Use an appropriate safety cable to fix the device (e.g. VDLSC7N or VDLSC8N). 


Install the device at a minimal distance of 0.5 m from flammable and explosive objects or 
substances. 


Respect a minimum distance of 0.5 m between the device’s light output and any illuminated surface. 


The maximum ambient temperature is 40 °C. Do not operate the device at higher temperatures. 

3.


General Guidelines 

Refer to the 

Velleman

®

 Service and Quality Warranty 

on the last pages of this manual. 


Keep this device away from dust and extreme temperatures. Make sure the ventilation 
openings are clear at all times. For sufficient air circulation, leave at least 1" (± 2.5 cm) 
in front of the openings. 

Содержание TRIMO 310

Страница 1: ...MET 3 KOPPEN 3 X 10 W WITTE LED PROJECTEUR LYRE 3 T TES 3 X LED BLANCHE DE 10 W CABEZA M VIL 3 CABEZAS 3 X LED BLANCO DE 10 W MOVING HEAD DREIK PFIG 3 X WEI E 10 W LED USER MANUAL 4 GEBRUIKERSHANDLEI...

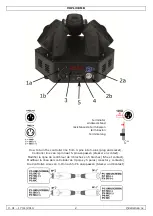
Страница 2: ...ler line from 3 pins into 5 pins plug and socket Controller line van 3 pin naar 5 pin aanpassen stekker en contact Modifier la ligne du contr leur de 3 broches en 5 broches fiche et contact Modificar...

Страница 3: ...VDPL310MB V 01 17 11 2014 3 Velleman nv...

Страница 4: ...Keep this device away from children and unauthorized users Caution device heats up during use Do not stare directly at the light source as this may cause epileptic seizure in sensitive people tempora...

Страница 5: ...ed indoors with an alternating current of 230 VAC 50 Hz Lighting effects are not designed for permanent operation regular operation breaks will prolong their lives Use the original packaging if the de...

Страница 6: ...does not exceed the power line s nominal current Use power cables with an adequate section The installation has to be approved by an expert before the device is taken into service DMX 512 Connection W...

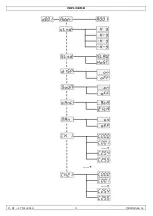
Страница 7: ...MENU to open the menu 3 Select cHnL 4 Select one of the channel modes Sound Activation With sound activation the built in program responds to sound To use sound activation with the selected built in...

Страница 8: ...ct the device in question DMX Starting Address first device second device third device 9 channels 1 10 1 9 19 10 9 21 channels 1 22 1 21 43 22 21 To set the device to work with a DMX controller 1 Pres...

Страница 9: ...Fuse Only replace the fuse by a fuse of the same type and rating 1 Before replacing the fuse switch off the device and unplug the mains lead 2 Unscrew the fuse holder 5 on the rear panel of the base w...

Страница 10: ...ebruik het toestel enkel binnenshuis Bescherm dit toestel tegen regen vochtigheid en opspattende vloeistoffen Plaats nooit objecten gevuld met vloeistof op of naast het toestel Houd dit toestel buiten...

Страница 11: ...eter om het toestel niet onmiddellijk in te schakelen nadat het werd blootgesteld aan temperatuurschommelingen Om beschadiging te vermijden moet u wachten tot het toestel de kamertemperatuur heeft ber...

Страница 12: ...elektricien Sluit het toestel via de stekker aan op het lichtnet Alle toestellen moeten via een geaard stopcontact gevoed worden en niet via een variabele weerstand of dimcircuit ook al gebruikt u de...

Страница 13: ...e modus Selecteer met UP of DOWN Bevestig met ENTER Achtergrondverlichting aan of uit Selecteer met UP of DOWN Bevestig met ENTER Muzieksturing aan of uit Selecteer met UP of DOWN Bevestig met ENTER S...

Страница 14: ...r bedienen Alle DMX gestuurde toestellen hebben een digitaal startadres nodig zodat het juiste toestel reageert op de signalen Dit digitale startadres is het kanaalnummer van waarop het toestel luiste...

Страница 15: ...geen extra gaten in montagebeugels boren aansluitingen niet verplaatsen enz Mechanisch bewegende delen mogen geen sporen van slijtage vertonen en mogen niet onregelmatig bewegen De voedingskabels moge...

Страница 16: ...k van dit toestel Voor meer informatie over dit product en de laatste versie van deze handleiding zie www hqpower eu De informatie in deze handleiding kan te allen tijde worden gewijzigd zonder vooraf...

Страница 17: ...quement l int rieur Prot ger de la pluie de l humidit et des projections d eau Ne jamais placer d objet contenant un liquide sur ou pr s de l appareil Garder cet appareil hors de la port e des enfants...

Страница 18: ...t l appareil apr s exposition des variations de temp rature Afin d viter des dommages attendre jusqu ce que l appareil ait atteint la temp rature ambiante Cet appareil a t d velopp pour un usage profe...

Страница 19: ...areil sur le r seau lectrique par la fiche d alimentation Tout appareil doit tre branch sur une prise de courant mise la terre et ne peut pas tre aliment depuis un rh ostat ou un circuit variateur m m...

Страница 20: ...NTER S lection de r tro clairage allum ou teint S lectionner avec UP ou DOWN confirmer avec ENTER Pilotage par la musique allum ou teint S lectionner avec UP ou DOWN confirmer avec ENTER S lection du...

Страница 21: ...pilot s par un signal DMX demandent une adresse de d part DMX pour assurer que les appareils corrects r agissent sur les signaux de contr le Cette adresse de d part num rique indique le num ro de cana...

Страница 22: ...tante ne peuvent pas tre d form s adapt s ou bricol s p ex ne pas forer de trous additionnels dans un support ne pas d placer les connexions etc Les parties m caniques mobiles ne peuvent pas tre us es...

Страница 23: ...ectes pouvant r sulter de l utilisation de cet appareil Pour plus d information concernant cet article et la derni re version de ce mode d emploi visiter notre site web www hqpower eu Toutes les infor...

Страница 24: ...ido en el aparato Mantenga el aparato lejos del alcance de personas no capacitadas y ni os Cuidado el aparato se calienta durante el uso No mire directamente a la fuente de luz porque esto podr a caus...

Страница 25: ...para prolongar la vida del aparato Transporte el aparato en su embalaje original Guarde este manual del usuario para cuando necesite consultarlo 4 Caracter sticas La TRIMO 310 es una compacta cabeza m...

Страница 26: ...orriente total no sobrepase la corriente nominal de la red al conectar varios aparatos en serie a esta salida Utilice cables de alimentaci n con un di metro adecuado Un experto debe probar la instalac...

Страница 27: ...tand alone 1 Desconecte cualquier conexi n de la entrada DMX 1a del aparato 2 Pulse MENU para abrir el men 3 Seleccione cHnL 4 Seleccione uno de los modos de canal Control por la m sica En este modo e...

Страница 28: ...recci n inicial DMX primer aparato segundo aparato tercer aparato 9 canales 1 10 1 9 19 10 9 21 canales 1 22 1 21 43 22 21 Hacer funcionar el aparato con un controlador DMX 1 Pulse MENU para abrir el...

Страница 29: ...uido El usuario no habr de efectuar el mantenimiento de ninguna pieza salvo el fusible Contacte con su distribuidor si necesita piezas de recambio Reemplazar el fusible Reemplace el fusible fundido po...

Страница 30: ...Sie nie an der Netzleitung Eignet sich nur f r die Anwendung im Innenbereich Sch tzen Sie das Ger t vor Regen und Feuchte Setzen Sie das Ger t keiner Fl ssigkeit wie z B Tropf oder Spritzwasser aus St...

Страница 31: ...en Sch tzen Sie das Ger t vor Besch digung indem Sie es ausgeschaltet lassen bis es die Zimmertemperatur erreicht hat Dieses Ger t wurde f r den professionellen Einsatz auf B hnen in Discotheken Theat...

Страница 32: ...en Verbinden Sie das Ger t ber das Stromkabel mit dem Netz Beachten Sie dass alle Ger te ber eine geerdete Steckdose und nicht ber einen Regelwiderstand oder Dimmkreis versorgt werden auch wenn Sie d...

Страница 33: ...est tigen Sie mit ENTER Die Hintergrundbeleuchtung ein oder ausschalten W hlen Sie mit UP oder DOWN aus und best tigen Sie mit ENTER Den musikgesteuerten Modus ein oder ausschalten W hlen Sie mit UP o...

Страница 34: ...Ger te brauchen eine digitale Startadresse sodass das richtige Ger t auf die Signale reagieren kann Diese digitale Startadresse ist die Kanalnummer von der das Ger t die Befehle der DMX Steuerung emp...

Страница 35: ...t angespannt werden und d rfen keine Rostspuren zeigen Das Geh use die Linsen die Montageb gel und der Montageort z B Decke oder Gebinde d rfen nicht angepasst werden z B bohren Sie keine zus tzlichen...

Страница 36: ...chaden oder Verletzungen bei falscher Anwendung dieses Ger tes F r mehr Informationen zu diesem Produkt und die neueste Version dieser Bedienungsanleitung siehe www hqpower eu Alle nderungen ohne vorh...

Страница 37: ...volledig terug te betalen In dat geval krijgt u een vervangend product of terugbetaling ter waarde van 100 van de aankoopsom bij ontdekking van een gebrek tot n jaar na aankoop en levering of een ver...

Страница 38: ...de transporte de y a Velleman si el aparato ya no est cubierto por la garant a Cualquier art culo que tenga que ser reparado tendr que ser devuelto a su distribuidor Velleman Devuelva el aparato con l...

Отзывы: