HQ Audio Hq9038 Tube DAC Скачать руководство пользователя страница 13

13

M u s i c p l a y e r s e t u p .

Music Server setup with Moode Audio Palyer

CUSTOM CONFIGS

[services]

Customize  the  player  by  using  any  of  the  following 

airplaysvc=0

procedures.

upnpsvc=0

=========================================

dlnasvc=0

 1. CONFIGURE FOR WIFI CONNECTION
    - Ethernet mode

[network]

    a) leave eth cable connected

wlanssid=MySSID

    b) insert wifi adapter (while Pi running)

wlansec=wpa

    c) http://moode

wlanpwd=MyPassword

    d) Menu, Configure, Network

apdssid=Moode

    e) configure a wifi connection

apdchan=6

    f) Menu, Restart, Shutdown

apdpwd=moodeaudio

    g) unplug eth cable
    h) power on

[other]

    - Access Point (AP) mode

timezone=America/Detroit

    a) join network SSID=Moode, pwd=moodeaudio

themecolor=Emerald

    b) http://moode.local

=========================================

    c) Menu, Configure, Network

AFTER PLAYER SETUP

    d) configure a wifi connection

Follow these instructions for making certain types of 

    e) Menu, Restart, Reboot

changes
=========================================

 2. CHANGE HOST AND SERVICE NAMES

 1. Switching from USB to I2S audio device

    a) Menu, Configure, System (and Audio)

    a) unplug USB audio device

        b)  SET  after  entering  appropriate  value  in  each 

    b) Menu, Restart, Shutdown 

name field

    c) install I2S audio device

    c) reboot is required if changing Host name and/or 

    d) power on

Browser title

    e) Menu, Configure, Audio
    f) select appropriate I2S audio device then SET

 3. AUTO-CONFIGURE AT BOOT

    g) Menu, Restart, Reboot

       NOTE-1: this works only on a fresh image that has 

        h)  Menu,  Configure,  Audio,  MPD  options:  EDIT 

never been booted!

SETTINGS

       NOTE-2: to start AP mode at boot set wlanssid to 

    i) Verify Audio output set to "I2S audio device"

blank e.g., wlanssid=

    j) APPLY
 2. Switching from I2S to USB audio device

    a) change values in the file below

    a) Menu, Configure, Audio

    b) paste contents into /boot/moodecfg.txt

    b) select "None" for I2S audio device then SET

    c) sudo reboot

    c) Menu, Restart, Shutdown

    d) join SSID if AP mode

    d) optionally unplug I2S audio device

    e) http://hostname.local

    e) plug in USB audio device


    f) power on

##################################

        g)  Menu,  Configure,  Audio,  MPD  options:  EDIT 

# Copy this file to /boot/moodecfg.txt

SETTINGS

# worker will process it at startup then

    h) Select "USB audio device" for Audio output

# delete it and automatically reboot.

    i) APPLY

##################################

 3. Switching from WiFi back to Ethernet

[names]

    a) plug in Ethernet cable 

hostname=moode

    b) Menu, Configure, Network 

browsertitle=moOde Player

    c) RESET network configuration to defaults

airplayname=Moode Airplay

    d) Menu, Restart, Shutdown

upnpname=Moode UPNP

    e) Remove WiFi adapter 

dlnaname=Moode DLNA

    f) power on

mpdzeroconf=Moode MPD

 
========================    END SETUP GUIDE

Содержание Hq9038 Tube DAC

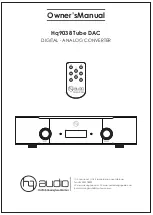
Страница 1: ...CH MUTE DSP V V Owner sManual Hq9038 Tube DAC DIGITAL ANALOG CONVERTER 11th floor room 1116 Kimvan Kimlu Hanoi Vietnam Tel 84 902578899 W www quanghao com W www audiodesignguide com E mail quanghao168 yahoo com vn ...

Страница 2: ...ower amplifier is turned off then connect your analog interconnects from the DACs analog outputs to the amplifier s inputs Connecting to the Mains Check to make sure your DAC unit has been manufactured for operation at your AC line Voltage Attempting to use the DAC at any voltage other than the specified on the rear of the unit may damage the unit Damage caused by improper operation is not covered...

Страница 3: ...s a differential amplifier with 2 x 12 AU7 and 2 X 6DJ8 output The HQ9038 Tube DAC has an Analouge output design that surpasses all earlier designs The DAC chips balanced output current are converted to a voltage using the HQ unique technology That gives a great experiences and creates unbelievably stunning soundstage In particular the output of the DAC has an impedance of less than 100 Ohm and 3V...

Страница 4: ... ir receive input selection buttons click volume control Mute led stanby mute buttons click output USB input optical input input spdif fuse power switch AES input AC IN Balanced output RCA Ethrenet input USB out input HQ9038 Tube Dac in Your Audio System ...

Страница 5: ...r the programming mode by Pushing the SET button PCM filters Select sharp roll off or slow roll off by pushing the buttons V or V DSD filters Select cut off at 47kHz 50kHz 60kHz or 70kHz by pushing the buttons CH or CH Select the desired filter setting and Save the new setting by pushing the DSP button followed by the SET button DISPLAY Light Phase invert Custom default start up setting It is poss...

Страница 6: ...yed through the DAC and you will start enjoying the music Turn off and On the DAC in standby using the PWR button on the remote control or press button SELECT SWITCH on the front panel DSD S2 SELECT SWITCH Control guide SET PWR CH CH MUTE DSP V V power on off Setting menu volume up volume down change input 1 USB 2 optical 3 Coax 4 Aes EBU setting menu SET PWR CH CH MUTE DSP V V power on off rollof...

Страница 7: ...ons In most cases you just need to accept the defaults on the following screens Windows ASIO Driver Installation http www amanero com drivers htm Direct Stream Digital also known as DSD format this format is not new as many people think it is as old as digital but it wasn t used for consumer audio or home audio before It became very popular after 2010 and continues to make its way into our homes I...

Страница 8: ...n control The Kernel streaming KS is the lower level mode to operate on Audio device so there are lower stratification in the software stack The Windows Audio Session API WASAPI give less problems and it work very good with PCM and DSD tracks To use Foobar2000 To use Foobar2000 is much more complex You can follows the guide on http hifiduino wordpress com or this following images download the last...

Страница 9: ...M DoP DoP Format DoP 1 0 0XFA 0x05 5 Ok and save Now playing Direct Stream Digital also known as DSD format this format is not new as many people think it is as old as digital but it wasn t used for consumer audio or home audio before It became very popular after 2010 and continues to make its way into our homes It encodes the music in the data stream differently looks differently and sounds diffe...

Страница 10: ...setup Audirvana on MAC OS configuration The Audirvana is more simple and with this configuration you can play DSD files and SACD ISO download the last player https audirvana com it s best to buy a license for Audirvana ...

Страница 11: ...ill give you choose High resolution audio files Actually the DAC plays all formats of digital music file HQ Audio has seleceted the Raspberry Pi3 for music server as this is the Music source that plays with an immersive listening experience that HQ Audio appreciate and admired for playing music better than a most then most of computers used as Music server Interface and music player software You c...

Страница 12: ...icular device is not package listed then select USB audio device Note that I2S devices are automatically populated WRITING MOODE IMAGE ONTO AN SD CARD OR USB DRIVE 4 ADD SOURCE S CONTAINING MUSIC FILES USB AND SDCARD STORAGE DEVICES https www raspberrypi org documentation install a Menu Configure Sources ation installing images b UPDATE MPD database c WAIT for completion no spinner on the Browse S...

Страница 13: ...ost name and or d power on Browser title e Menu Configure Audio f select appropriate I2S audio device then SET 3 AUTO CONFIGURE AT BOOT g Menu Restart Reboot NOTE 1 this works only on a fresh image that has h Menu Configure Audio MPD options EDIT never been booted SETTINGS NOTE 2 to start AP mode at boot set wlanssid to i Verify Audio output set to I2S audio device blank e g wlanssid j APPLY 2 Swi...

Страница 14: ...rive any power amplifier and any interconnects even at very long lengths Leave the DAC unit with the power on The DAC unit is designed to be left with the power on with noharm or wear to the unit If desired the front display can be turned off see Turning off the Display under Remote Operation Leaving the power on allows the circuitry to remain in thermally stable which provides better performance ...

Страница 15: ...or Pi3 Replacement Tube Set RTPR9 Please visit the following pages to see how to record your memory card for the Pi3 1 http moodeaudio org 2 http www runeaudio com documentation 3 https volumio org Thanks you very much V2 V4 12AU7 V1 V3 6DJ8 ...

Страница 16: ...2 Ultralow Noise PCM 16 32Bit 44 1kHz 48kHz 88 2kHz 96kHz 176 4kHz 192kHz 352 8kHz 384kHz 705 6kHz 768kHz DSD DSD64 128 256 DoP dCS DSD64 128 256 512 ASIO Native PCM 16 32Bit 44 1kHz 48kHz 88 2kHz 96kHz 176 4kHz 192kHz 352 8kHz 384kHz 705 6kHz 768kHz DSD DSD64 128 256 DoP dCS DSD64 128 256 512 ASIO Native Music Server Interface and music player software Moodaudio Runeaudio Volumio Wifi 802 11 b g ...

Отзывы: