MF877-00 Page 2
Template Revision A
HPE instructions for this template are available at
Item Description
Notes
Quantity
of items
included
in product
Components, parts and materials containing
radioactive substances
0
2.0 Tools Required
List the type and size of the tools that would typically be used to disassemble the product to a point where components
and materials requiring selective treatment can be removed.
Tool Description
Tool Size (if
applicable)
Phillips screwdriver
various sizes
Flat-blade screwdriver
various sizes
Small adjustable wrench
Needle nose pliers
3.0 Product Disassembly Process
3.1 List the basic steps that should typically be followed to remove components and materials requiring selective treatment:
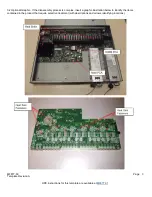
1. Remove the chassis lid
1. Using a Phillips screwdriver, remove the screws (qty 14)
2. Slide the lid off the chassis
2. Remove the two power supplies
1. Locate the power supplies on the right side as you are facing the back of the chassis
2. While pressing the release lever toward the handle, pull the power supply out of the chassis
3. Repeat for the other power supply
3. Remove the DIMM PCA
1. Using a Phillips screwdriver, remove the screw securing the small PCA mounted near the center of the main
PCA
2. Remove the DIMM PCA by lifting straight up to disconnect the connector
4. Remove the main PCA
1. Using a flat-blade screwdriver, loosen the four screws holding down the CPU heat sink
2. Remove the heat sink
3. Using a small adjustable wrench, remove the hexagonal studs near the center of the main PCA
4. Disconnect the front LED cable from the main PCA
5. Peel the air flow diverter away from the inside wall of the chassis
6. Using a Phillips screwdriver, remove the twelve screws holding down the main PCA
7. Slide the main PCA toward the back of the chassis then lift the right side to remove it
5. Remove the remaining three heatsinks
1. Flip the main PCA over
2. Use needle nose pliers to pinch the four heat sink fasteners while removing a heat sink from the main PCA
3. Repeat the above step for the other two heat sinks


