background image


Specifications  22 

Specifications 

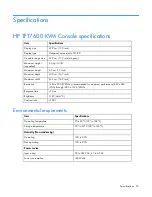
HP TFT7600 KVM Console specifications 


Item 

Specifications 

Display size 

43.9 cm (17.3 inch) 

Display type  

Flat panel, active matrix-TFT LCD 

Viewable image size 

43.9 cm (17.3 inch) diagonal 

Maximum weight 
(unpacked) 

4.5 kg (10 lb) 

Maximum height 

4.2 cm (1.7 inch) 

Maximum depth 

42.3 cm (16.7 inch) 

Maximum width 

43.2 cm (16.9 inch) 

Resolution 

1440 x 900 (WXGA+) (recommended for maximum performance) 640 x 480 

(VGA) through 1280 x 1024 (SXGA) 

Response time 

<16 ms 

Brightness 

>187 (cd/m^2) 

Contrast ratio 

>500:1 


Environmental requirements 


Item 

Specifications 

Operating temperature 

0º to 40º C (32º to 104º F) 

Storage temperature 

-20º to 60º C (68º to 140º F) 

Humidity (Non-condensing) 


Operating  

10% to 90% 

Non-operating  

10% to 90% 

Power source 


Input rating 

90 to 264 VAC, 47 to 63 Hz 

Power consumption 

<36 Watts 


Содержание TFT7600

Страница 1: ...HP TFT7600 G2 Rackmount Keyboard Monitor KVM Console User Guide Part Number 615930 001 June 2010 First Edition ...

Страница 2: ...ing herein should be construed as constituting an additional warranty HP shall not be liable for technical or editorial errors or omissions contained herein ENERGY STAR and ENERGY STAR mark are registered U S trademarks Intended audience This document is for the person who installs racks and rack products This procedure is performed only by trained personnel HP assumes you are qualified in perform...

Страница 3: ...een display 16 Launching OSD menu 16 Navigating OSD 16 OSD menu 17 Brightness Contrast 17 Image control 17 Advanced 18 Auto Configuration 19 Factory settings 19 Language 19 Information 19 Maintenance 20 Maintenance guidelines 20 Cleaning the monitor 20 Shipping instructions 21 Moving a rack with the HP TFT7600 KVM Console installed 21 Specifications 22 HP TFT7600 KVM Console specifications 22 Envi...

Страница 4: ...tions 27 Disposal of waste equipment by users in private households in the European Union 27 Power cord requirement 27 Power cord statement for Japan 28 Electrostatic discharge 29 Preventing electrostatic discharge 29 Grounding methods to prevent electrostatic discharge 29 Technical support 30 HP contact information 30 Acronyms and abbreviations 31 Index 32 ...

Страница 5: ...nch color active matrix TFT LCD Main components on page 6 Feature Description Display 43 9 cm 17 3 inch viewable area display Resolution 640 x 480 VGA through 1280 x 1024 SXGA 1440 x 900 WXGA and 1600 x 900 WXGA Monitor input Plugs into a standard VGA connector does not require a special graphics adapter card Plug and Play Plug and Play capability if supported by your system OSD Available in seven...

Страница 6: ...nent Function 1 Display release latch Pushes down to unlatch the display assembly 2 Blue LED Turns on when the display is closed Helps identify the HP TFT7600 KVM Console in a rack 3 OSD activation button Launches OSD menus Selects Exits menus and OSD 4 OSD scroll up and down button Used to scroll in the OSD menu and adjust functions 5 Scroll lock LED Lights when Scroll lock is on 6 Cap lock LED L...

Страница 7: ...e option on the right 11 Middle pick button Used to select the option in the middle 12 Left pick button Used to select the option on the left 13 Touchpad Used to move the mouse on the monitor Rear components Callout Component 1 USB pass through 2 USB keyboard and mouse port 3 PS2 keyboard port 4 PS2 mouse port 5 VGA input port 6 Power connection port 7 Serial firmware port ...

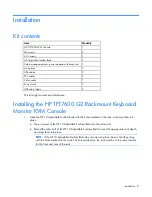
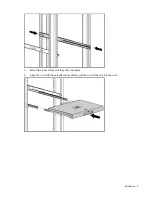
Страница 8: ...unt Keyboard Monitor KVM Console 1 Align the HP 1U Adjustable Toolless Rails with the holes marked on the rack and snap them into place a Snap one end of the HP 1U Adjustable Toolless Rails into the retna rails b Extend the other half of the HP 1U Adjustable Toolless Rails to meet the appropriate rack depth and snap them into place NOTE If the HP 1U Adjustable Toolless Rails do not snap into place...

Страница 9: ...Installation 9 2 Extend the inner slides until they lock into place 3 Align the unit with the extended inner slides and then insert the unit into the rack ...

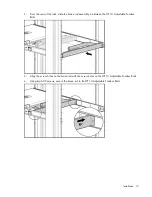
Страница 10: ... brace rail assembly in between the HP 1U Adjustable Toolless Rails 5 Align the screw holes on the brace rail with the screw holes on the HP 1U Adjustable Toolless Rails 6 Using two 6 32 screws secure the brace rail to the HP 1U Adjustable Toolless Rails ...

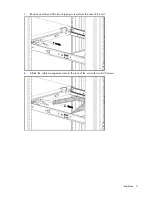
Страница 11: ...Installation 11 7 Remove and discard the two shipping screws from the rear of the unit 8 Attach the cable management arm to the rear of the unit with two 6 32 screws ...

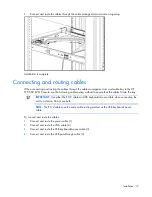
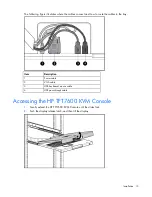
Страница 12: ...lowing cable routing method to ensure that the cables fit into the tray IMPORTANT Use either the PS 2 cables or USB keyboard mouse cable when connecting the unit to a device Do not use both NOTE The PS 2 cables use the same cable routing method as the USB keyboard mouse cable To connect and route the cables 1 Connect and route the power cable 1 2 Connect and route the VGA cable 2 3 Connect and rou...

Страница 13: ... route the cables in the tray Item Description 1 Power cable 2 VGA cable 3 USB keyboard mouse cable 4 USB pass through cable Accessing the HP TFT7600 KVM Console 1 Gently extend the HP TFT7600 KVM Console until the slides lock 2 Push the display release latch and then lift the display ...

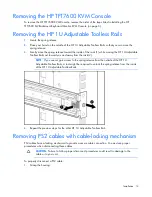
Страница 14: ... Toolless Rails out toward you and away from the rack 2 NOTE If you cannot gain access to the spring release from the outside of the HP 1U Adjustable Toolless Rails a tool might be required to unlock the spring release from the inside of the HP 1U Adjustable Toolless Rails 4 Repeat the previous steps for the other HP 1U Adjustable Toolless Rail Removing PS2 cables with cable locking mechanism PS2 ...

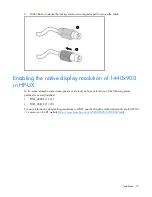
Страница 15: ...in HP UX To fix issues related to wide screen panels verify that you have at least one of the following server patches or newer installed PHSS_40809 11 31 PHSS_40810 11 23 For more information about setting resolutions in HP UX see the Graphics Administration Guide for HP UX 11 x servers on the HP website http www docs hp com en 5900 0585 5900 0585 pdf ...

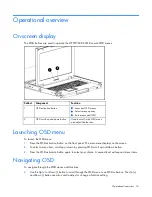
Страница 16: ...on Launching OSD menu To launch the OSD menu 1 Press the OSD activation button on the front panel The main menu displays on the screen 2 To select a menu item scroll up or down by pressing OSD scroll up and down button 3 Press the OSD activation button again to select your choice A second level will expand menu items Navigating OSD To navigate through the OSD menus and functions Use the Up or Down...

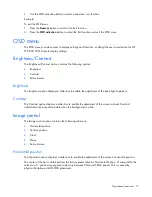
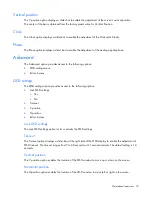
Страница 17: ...ption displays a slider bar to enable the adjustment of the back light brightness Contrast The Contrast option displays a slider bar to enable the adjustment of the screen contrast Contrast adjustments are more discernable when the background is white Image control The Image control option contains the following sub menu Horizontal position Vertical position Clock Phase Exit sub menu Horizontal po...

Страница 18: ...gs menu Exit sub menu OSD settings The OSD settings option provides access to the following options Lock OSD settings o Yes o No Timeout V position H position Exit sub menu Lock OSD settings The Lock OSD settings option locks or unlocks the OSD settings Timeout The Timeout option displays a slider bar at the right side of the OSD display to enable the adjustment of OSD timeout The timeout ranges f...

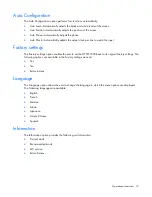
Страница 19: ...the input Factory settings The Factory settings option enables the user to set the HP TFT7600 back to its original factory settings The following options are available in the Factory settings menu list Yes No Exit sub menu Language The Language option allows the user to change the language in which the menu options are displayed The following languages are available English French German Italian J...

Страница 20: ... Do not use liquid or aerosol cleaners Slots and openings in the monitor are provided for ventilation These openings must not be blocked or covered Do not push objects of any kind into these slots or openings Do not drop the unit or place it on an unstable surface Do not allow anything to rest on the power cord Do not step on the cord Keep the unit in a well ventilated area away from excessive lig...

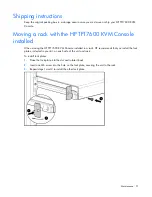
Страница 21: ... installed When moving the HP TFT7600 KVM Console installed in a rack HP recommends that you install the lock plates included in your kit on each side of the unit and rack To install lock plates 1 Place the lock plate into the slot and rotate it back 2 Insert one M6 screw into the hole on the lock plate securing the unit to the rack 3 Repeat steps 1 and 2 to install the other lock plate ...

Страница 22: ...2 3 cm 16 7 inch Maximum width 43 2 cm 16 9 inch Resolution 1440 x 900 WXGA recommended for maximum performance 640 x 480 VGA through 1280 x 1024 SXGA Response time 16 ms Brightness 187 cd m 2 Contrast ratio 500 1 Environmental requirements Item Specifications Operating temperature 0º to 40º C 32º to 104º F Storage temperature 20º to 60º C 68º to 140º F Humidity Non condensing Operating 10 to 90 N...

Страница 23: ... both classes to bear a label indicating the interference potential of the device as well as additional operating instructions for the user FCC rating label The FCC rating label on the device shows the classification A or B of the equipment Class B devices have an FCC logo or ID on the label Class A devices do not have an FCC logo or ID on the label After you determine the class of the device refe...

Страница 24: ... cause harmful interference and 2 this device must accept any interference received including interference that may cause undesired operation For questions regarding this product contact us by mail or telephone Hewlett Packard Company P O Box 692000 Mail Stop 530113 Houston Texas 77269 2000 1 800 HP INVENT 1 800 474 6836 For continuous quality improvement calls may be recorded or monitored For que...

Страница 25: ...ith the correct CE marked AC adapter provided by HP Compliance with these directives implies conformity to applicable harmonized European standards European Norms that are listed in the EU Declaration of Conformity issued by HP for this product or product family and available in English only either within the product documentation or at the following HP website http www hp eu certificates type the...

Страница 26: ...Regulatory compliance notices 26 Japanese notice BSMI notice Korean notice Class A equipment Class B equipment ...

Страница 27: ...recycling of your waste equipment at the time of disposal will help to conserve natural resources and ensure that it is recycled in a manner that protects human health and the environment For more information about where you can drop off your waste equipment for recycling please contact your local city office your household waste disposal service or the shop where you purchased the product Power c...

Страница 28: ...Regulatory compliance notices 28 product In addition the diameter of the wire must be a minimum of 1 00 mm2 or 18 AWG your maximum length may be up to 3 66 m 12 ft Power cord statement for Japan ...

Страница 29: ...tic sensitive component or assembly Grounding methods to prevent electrostatic discharge Several methods are used for grounding Use one or more of the following methods when handling or installing electrostatic sensitive parts Use a wrist strap connected by a ground cord to a grounded workstation or computer chassis Wrist straps are flexible straps with a minimum of 1 megohm 10 percent resistance ...

Страница 30: ...ebpage http welcome hp com country us en contact_us html To contact HP by phone o Call 1 800 HP INVENT 1 800 474 6836 This service is available 24 hours a day 7 days a week For continuous quality improvement calls may be recorded or monitored o If you have purchased a Care Pack service upgrade call 1 800 633 3600 For more information about Care Packs refer to the HP website http www hp com hps In ...

Страница 31: ...ronyms and abbreviations KVM keyboard video and mouse LCD liquid crystal display LED light emitting diode OSD on screen display RKM rackmount keyboard monitor TFT thin film transistor USB universal serial bus VGA video graphics array ...

Страница 32: ...FCC rating label 23 features 5 Federal Communications Commission FCC notice 23 24 G grounding methods 29 H Horizontal Position 17 HP website 30 I Image Enhancement 17 installation instructions 8 installation overview 8 introduction 5 J Japanese notice 26 K kit contents 8 Korean notices 26 L languages 19 M maintenance 20 maintenance guidelines 20 moving a rack with the unit installed 21 N native re...

Страница 33: ...nce notices 23 27 Removing the Brace Rail Assembly 14 removing the HP 1U Adjustable Toolless Rails 14 removing the unit 14 S shipping the unit 21 specifications 22 27 T technical support 30 telephone numbers 30 V Vertical Position 18 W website HP 30 ...

Отзывы: