Page 3
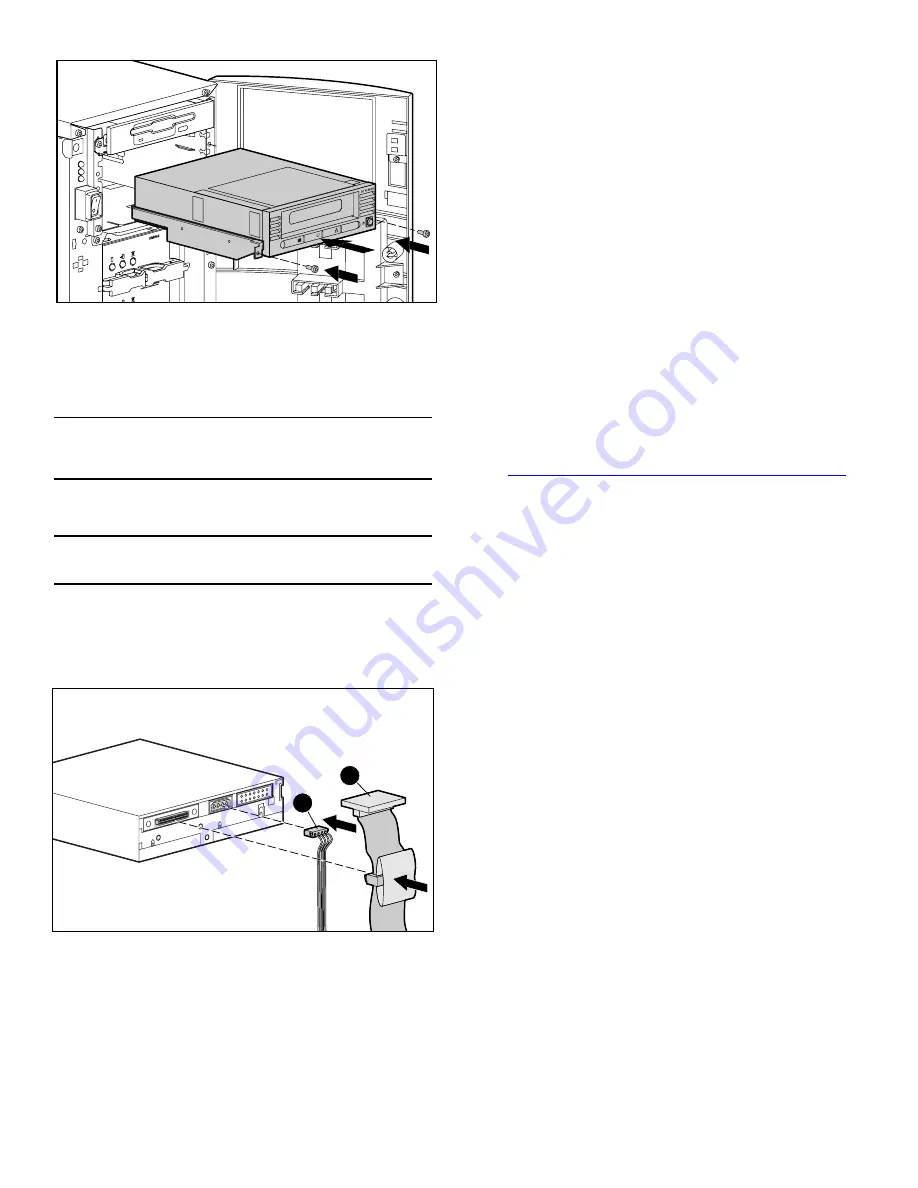
Figure 4: Installing an internal drive
3. Install an LVD/SE SCSI host adapter in the server that is to
be the host for the drive, if necessary.
4. If necessary, attach the drive rails that ship with the drive.
Note:
Your server may supply rails in the drive bay. Refer to your
server user guide for information on the correct rails to use with your
server.
5. Insert the drive into an available 5 1/4-inch drive bay.
Note:
You may need to remove the front cover from the drive bay.
Refer to the documentation included with your server.
6. Secure the tape drive into the server according to the
documentation included with the server.
7. Connect an available power cable and the wide SCSI signal
cable.
Figure 5: Connecting the power and signal cable
1
Signal cable
2
Power cable
8. Attach the other end of the SCSI ribbon cable to the SCSI
host adapter.
9. Replace the cover on the server.
10. Plug in the AC power cords for any peripheral devices and
power all of them on.
11. Plug in the AC power cord for the server and power it on.
Verifying the Installation
Every time the DLT VS 40/80 GB tape drive is powered on, it
conducts a Power-On Self-Test (POST) to ensure that the drive
is working properly and ready to use.
While POST is in progress, watch the front panel LEDs to see
the progress and results of the test. During POST, the following
actions take place:
1. The LEDs turn on all at once and then turn off.
2. The Ready (green) LED remains illuminated after POST.
3. The drive emits a buzzing sound as the drive calibrates the
read/write head's position.
POST is complete only after the buzzing sound stops. POST
takes several seconds to complete, after which the drive is
ready to use. Refer to Chapter 5, “Operating the DLT VS 40/80
GB Tape Drive,” in the
HP StorageWorks DLT VS 40/80 GB
Tape Drive Reference Guide
.
Device drivers for Intel-based systems are located on the HP
website at:
http://wwss1pro.compaq.com/support/TSSD2/default.asp
Under Tape Drives, select VS80.
SELE
CT
ENTE
R
EJEC
T
1
2


