Содержание QL243A

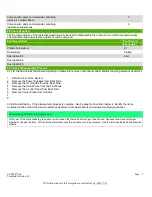
Страница 1: ...s applicable Item Description Notes Quantity of items included in product Printed Circuit Boards PCB or Printed Circuit Assemblies PCA With a surface greater than 10 sq cm 18 to 26 Batteries All types including standard alkaline and lithium coin or button style batteries 0 Mercury containing components For example mercury in lamps display backlights scanner lamps switches batteries 0 Liquid Crysta...

Страница 2: ...ly be followed to remove components and materials requiring selective treatment 1 SBOD unit from the System 2 Remove the Power Supplies from Back Side 3 Remove the IO modules from the Back Side 4 Remove the Hard Drives from the Front Side 5 Remove the Control Panel from Back Side 6 Remove Center Plane from Chassis 7 8 3 2 Optional Graphic If the disassembly process is complex insert a graphic illu...

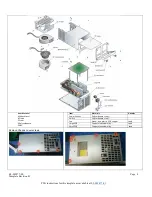
Страница 3: ...EL MF877 00 Page 3 Template Revision B PSG instructions for this template are available at EL MF877 01 Use the following diagram for power supply disassembly AC PSU ...

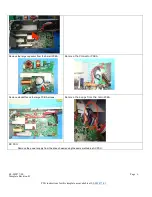
Страница 4: ...7 01 Item Material A Sheet Metal B Plastic C Steel D Polycarbonate E ABS Item Materials Hazards Power Socket Polycarbonate steel Switch Polycarbonate steel Fan Steeel iron plastic PCB copper Lead Large PCB Copper aluminium alloy Lead Small PCB Copper aluminium alloy Lead Remove Chassis cover screws ...

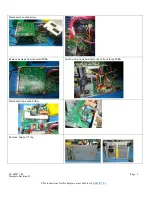
Страница 5: ...vision B PSG instructions for this template are available at EL MF877 01 Disconnect Fan connectors Remove 4 screws from the small PCBA Cut the tie wraps and disconnect from large PCBA Disconnect from switch PCBA Remove Support Tray ...

Страница 6: ...ate are available at EL MF877 01 Remove the large capacitor from the Small PCBA Remove the Connector PCBA Remove standoffs and the large PCBA screws Remove the 4 caps from the main PCBA DC PSU Remove the power supply from the drive chassis using the same method as AC PSU ...

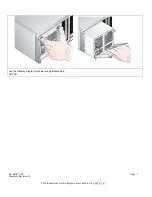
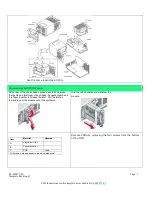
Страница 7: ...h latch between the thumb and forefinger of each hand Squeeze thumb and forefinger together to release the latch Pull the latches forward to cam the module out of the enclosure Grip the latch handles and withdraw the module Item Material Hazards A Aluminium Alloy B Polycarbonate C PCB Lead All Screws nuts and washers are zinc plated steel Remove PCBA by removing the four screws from the bottom of ...

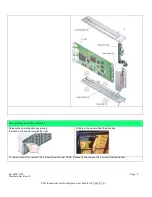
Страница 8: ...lable at EL MF877 01 Disassembling Hard Drive Modules Release the carrier handle by pressing the latch in the handle towards the right Withdraw the module from the drive bay To remove hard drive remove the 2 screws from the rear PCBA if present and remove the 4 screws from the bottom ...

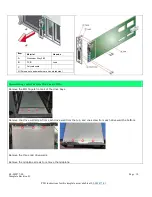
Страница 9: ... C Plain spring steel D Zinc alloy 3 E Polycarbonate G Beryllium copper 190 alloy XHM ASTM B194 1996 Lead H Silicon Grease I PCB Lead All Screws nuts and washers are zinc plated steel Disassembling Control Panel At the rear of the drive chassis remove the two screws shown and pull out the PCBA Remove the four screws from the PCBA to bracket assy to remove the PCBA ...

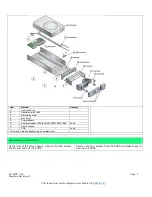
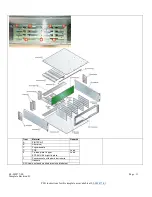
Страница 10: ...ead C Polycarbonate All Screws nuts and washers are zinc plated steel Disassembling Center Plane aka Mid Plane PCBA Remove the EMI fingers from all of the drive bays Remove one drive wall screw from each drive wall from the top and one screw from each drive wall the bottom Remove the three mid drive walls Remove the midplane screws to remove the midplane ...

Страница 11: ... template are available at EL MF877 01 Item Material Hazards A ZINTEC A F B Aluminium C Polycarbonate D PCB Lead E Tin lead plate Copper ECP 0613 08 bright tin plate Lead F Polycarbonate with aluminium inserts Gaskets All Screws nuts and washers are zinc plated steel ...

Отзывы: