EL-MF877-00 Page 7
Template Revision C
Last revalidation date 09-May-2018
HPI instructions for this template are available at
EL-MF877-01
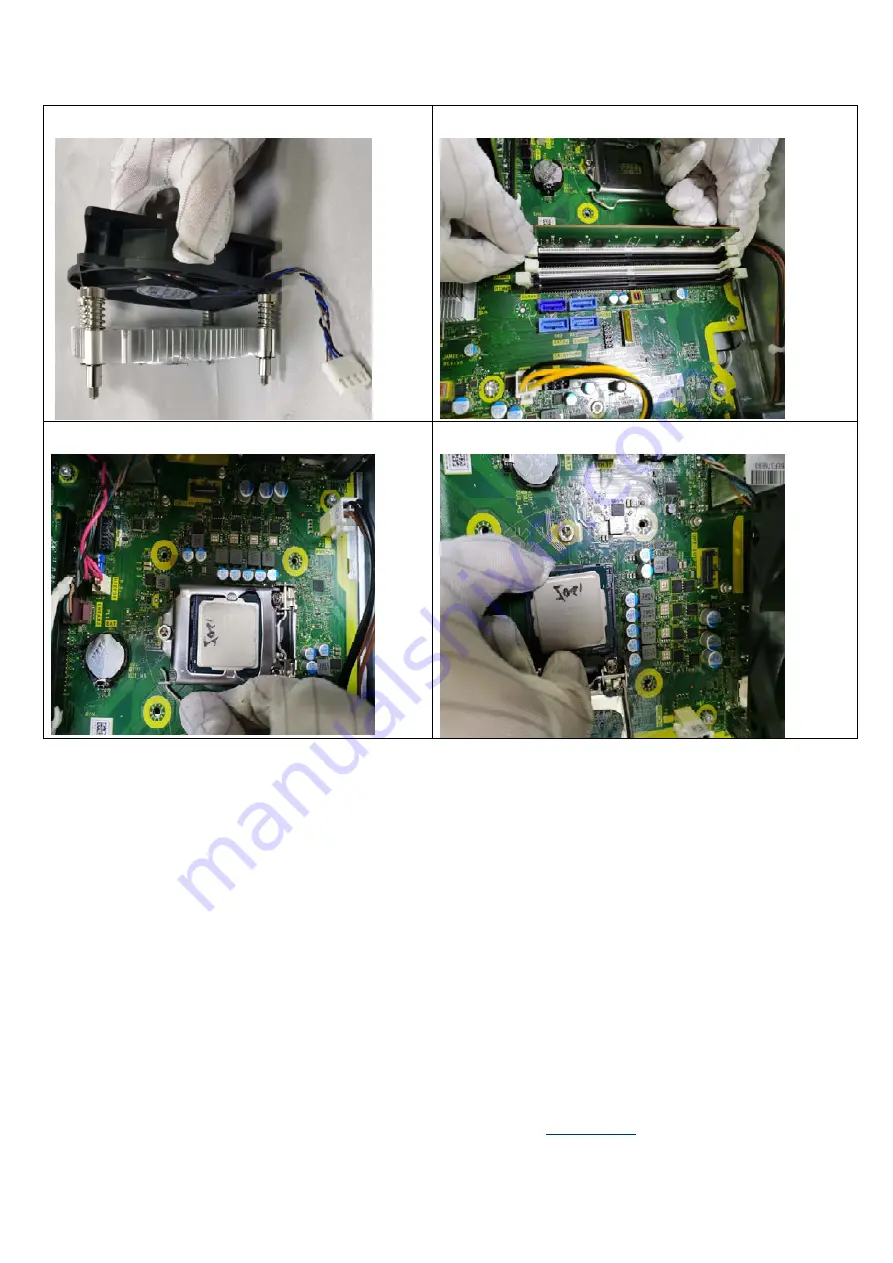
Step21 Separate the fan from cooler
Step22 Remove memory from MB
Step23 Rotate the handle and open it up
Step24 Remove the CPU from the board


