HP P244 Скачать руководство пользователя страница 15

10.Disassemle Stand Assembly

12

20.Push the release button then remove 

the stand

21.Release the four screws by cross 

screwdriver

22.Remove hinge from stand

23.Release four screws from hinge by cross 

screwdriver

Содержание P244

Страница 1: ... Description Notes Quantity of items included in product Printed Circuit Boards PCB or Printed Circuit Assemblies PCA With a surface greater than 10 sq cm IF BD Power BD 2 Batteries excluding Li Ion batteries All types including standard alkaline coin or button style batteries 0 Li Ion batteries Include all Li Ion batteries if more than one is provided with the product such as a detachable noteboo...

Страница 2: ...terials requiring selective treatment can be removed Tool Description Tool Size if applicable Description 1 SCREW DRIVER PHILLIPS HEAD 1 Description 2 SCREW DRIVER WAHSER HEAD 2 Description 3 SCREW DRIVER HEX HEAD Description 4 SPANNER 10 3 0 Product Disassembly Process 3 1 List the basic steps that should typically be followed to remove components and materials requiring selective treatment inclu...

Страница 3: ...Safari Cheetah P244 Disassemble Process Prepare By Jove Liu Date 2018 12 06 ...

Страница 4: ...1 Remove Cable From Display Head 1 1 Remove cable from display head ...

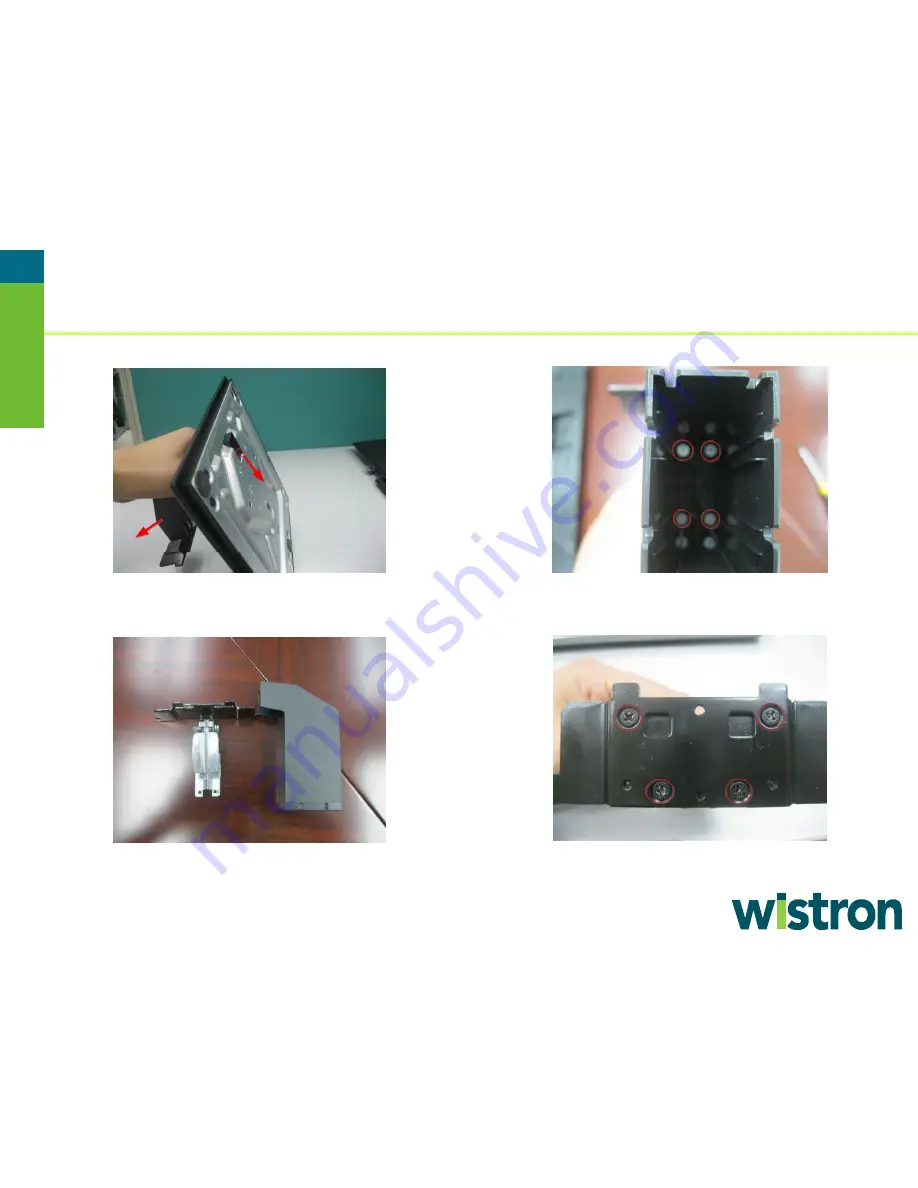
Страница 5: ...2 Remove Stand Base From Display Head 2 2 Push the red point 3 Remove stand base assembly ...

Страница 6: ...3 Remove Rear Cover From Display Head 3 4 Release the six screw from rear cover by cross screwdriver 5 Remove rear cover cross screwdriver ...

Страница 7: ...4 Remove Aluminum Foil 4 6 Remove three Aluminum Foil ...

Страница 8: ...5 5 Remove Bracket Assembly From Display Head 7 Release two screws and remove the OSD cable 8 Remove the interface cable and LED cable 9 Remove Bracket Assembly ...

Страница 9: ...6 Remove Middle Cover From Display Head 6 10 Release all the screws by cross screwdriver 11 Remove middle cover ...

Страница 10: ...7 1 Remove black Mylar 7 Disassemble Bracket Assembly ...

Страница 11: ...8 2 Release the four screws from bracket by cross screwdriver 3 Release the five screws from BD by cross screwdriver 4 Remove interface and power BD 7 Disassemble Bracket Assembly ...

Страница 12: ...9 7 Disassemble Bracket Assembly 4 Remove EMI gaskets and white Mylar ...

Страница 13: ...8 Disassemble Mid cover Assembly 10 1 Remove OSD BD 2 Remove OSD KEY 3 Remove lens ...

Страница 14: ...9 Disassemble Rear cover Assembly 11 1 Release two screws by cross screwdriver 2 Remove wall mount ...

Страница 15: ...isassemle Stand Assembly 12 20 Push the release button then remove the stand 21 Release the four screws by cross screwdriver 22 Remove hinge from stand 23 Release four screws from hinge by cross screwdriver ...

Страница 16: ...13 24 Release the two screws and nut from hinge by cross screwdriver 25 Remove all part 10 Disassemle Stand Assembly ...

Страница 17: ...11 Disassemble Base Assembly 14 26 Remove the five rubbers 27 Release eleven screws by cross screwdriver 28 Remove the chassis ...

Страница 18: ...01 Back side Shielding disassembly Use cross screwdriver to unlock the two screws 12 Disassemble Panel Assembly ...

Страница 19: ...02 Back side Source board disassembly Lift up the source board that stick by double tape 12 Disassemble Panel Assembly ...

Страница 20: ...03 Front side OC disassembly Use film to separate the OC and MF Film Note there will be residual gum on the OC and MF It is easy to tear off by hand as next page 12 Disassemble Panel Assembly ...

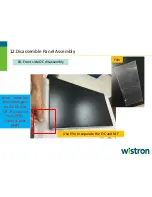
Страница 21: ...residual gum on OC residual gum on MF 12 Disassemble Panel Assembly ...

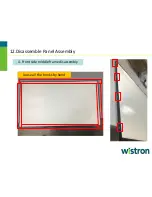
Страница 22: ...4 Front side middle frame disassembly loose all the hooks by hand 12 Disassemble Panel Assembly ...

Страница 23: ...5 Take out 3pcs film carry the suspension loop left and right side to take out 3pcs film Note use hand to carry the suspension loop left and right side to take out the film 12 Disassemble Panel Assembly ...

Страница 24: ...06 Take out LGP Use tape to stick one bottom corner of the LGP then take it out note use hand to hold the two sides when take out LGP 12 Disassemble Panel Assembly ...

Страница 25: ...07 Take out reflector Use tape to stick one bottom corner of the reflector plate then take it out 12 Disassemble Panel Assembly ...

Страница 26: ...08 Take out light bar use knife to separate light bar and BC then take out light bar note Light bar can t be reused after take out 12 Disassemble Panel Assembly ...

Страница 27: ...24 Thank You ...

Отзывы: