English 3
Installing the 5.25-inch CD-RW Drive
Installing the 5.25-inch CD-RW Drive
NOTE
These instructions are given as a guide. For more detailed
instructions, refer to your PC’s documentation. If you do not have
this documentation available, you can download it from the HP
Support Web site for your PC model (refer to “HP Support Services”
on page 16).
To install the CD-RW drive, you may need a flat-headed screwdriver
(not supplied with the drive kit).
1
Switch off the monitor and PC, disconnect all power cords and
any telecommunications cables.
2
Remove the PC’s cover (refer to your PC documentation).
3
Select a power connector and an IDE data connector for
connecting the CD-RW drive (refer to your PC documentation).
4
Select an empty drive shelf for installing the CD-RW drive. The
shelf must have front access.
5
For PCs that have a drive tray or removable drive
bay unit:
Remove the drive tray or the drive bay unit (refer to
your PC documentation).
For other PCs
:
Remove the RFI metal filler plate from the chosen shelf (refer to
your PC documentation).
6
For PCs that have a drive tray or removable drive bay
unit:
Attach the CD-RW drive to the drive bay or drive tray (refer
to your PC documentation).
7
For PCs that have a drive tray or removable drive
bay unit:
Insert the drive bay unit or drive tray into the
computer (refer to your PC documentation).
For other PCs:
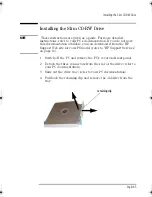
Slide the CD-RW drive into the chosen drive shelf then, using
the screws, fasten it into place (refer to your PC
documentation).
8
If necessary, remove the bezel from the PC’s cover (refer to your
PC documentation).
9
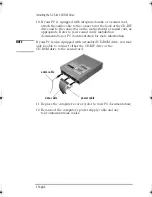
Attach the data and power connectors to the rear of the CD-RW
drive.
CD-RW.book Page 3 Wednesday, December 19, 2001 3:06 PM


