HP L1940T
49
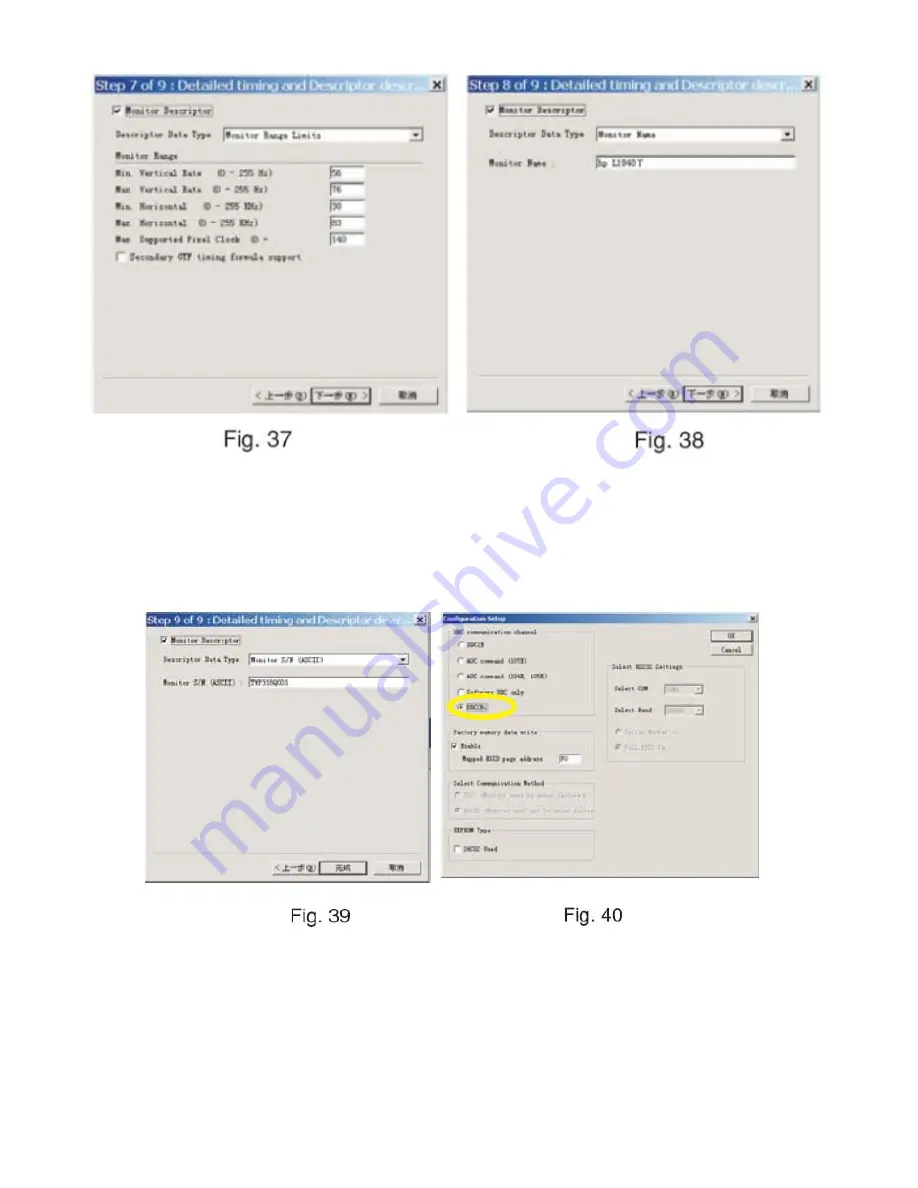
8. Click Next , bring up Fig. 39.
- Click Finish to exit the Step window.
- Serial number can be filled up at this moment (for example, TWP318Q001).
NOTE: You must modify the Serial NO. In step 9, otherwise the Serial NO. In OSD Couldn't be modified correctly.
Step 5: Write DDC data
1. Configuration should be as Fig. 40. And press OK.
2. Access Factory Mode
1). Turn off monitor.
2). [Push "Auto Adjust " and "+(plus) and hold them at the same time ] + [Press power "Power " button untill comes out
"Windows screen"] => then release all button, then press "Menu" button, wait until the OSD menu with Character "F"
(below OSD menu) come on the Screen of the monitor (see Fig. 41).
Содержание L1940T
Страница 13: ...HP L1940T 13 5 2 Optical Characteristics Test Conditions Optical Specifications ...
Страница 14: ...HP L1940T 14 6 Monitor Exploded View ...
Страница 15: ...HP L1940T 15 7 Repair Flow Chart ...
Страница 16: ...HP L1940T 16 ...
Страница 17: ...HP L1940T 17 ...
Страница 19: ...HP L1940T 19 9 Block Diagram ...
Страница 20: ...HP L1940T 20 10 Schematic 10 1 Main Board ...
Страница 21: ...HP L1940T 21 ...
Страница 22: ...HP L1940T 22 ...
Страница 23: ...HP L1940T 23 ...
Страница 24: ...HP L1940T 24 ...
Страница 25: ...HP L1940T 25 10 2 Power Board include inverter and power AC DC Schematic ...
Страница 26: ...HP L1940T 26 Inverter Schematic ...
Страница 27: ...HP L1940T 27 AC DC Function Block Schematic ...
Страница 28: ...HP L1940T 28 Inverter Function Block Schematic ...
Страница 29: ...HP L1940T 29 10 3 Key Board ...
Страница 30: ...HP L1940T 30 ...
Страница 31: ...HP L1940T 31 11 PCB Layout 11 1 Main Board ...
Страница 32: ...HP L1940T 32 11 2 Inverter Power Board ...
Страница 33: ...HP L1940T 33 11 3 Key Board ...
Страница 40: ...HP L1940T 40 2 Click Next bring up Fig 16 3 Click Next bring up Fig 17 ...
Страница 41: ...HP L1940T 41 4 Click Next bring up Fig 18 5 Click Next bring up Fig 19 ...
Страница 66: ...字数 7 349 约 字符数 41 893 约 ...


