background image

2.0 Tools Required


List the type and size of the tools that would typically be used to disassemble the product to a point where components 
and materials requiring selective treatment can be removed. 

Tool Description 

Tool Size (if 
applicable) 

Screw driver 

 2# 

tweezers 


Description #3  


Description #4  


Description #5   


3.0 Product Disassembly Process


3.1 List the basic steps that should typically be followed to remove components and materials requiring selective treatment:  

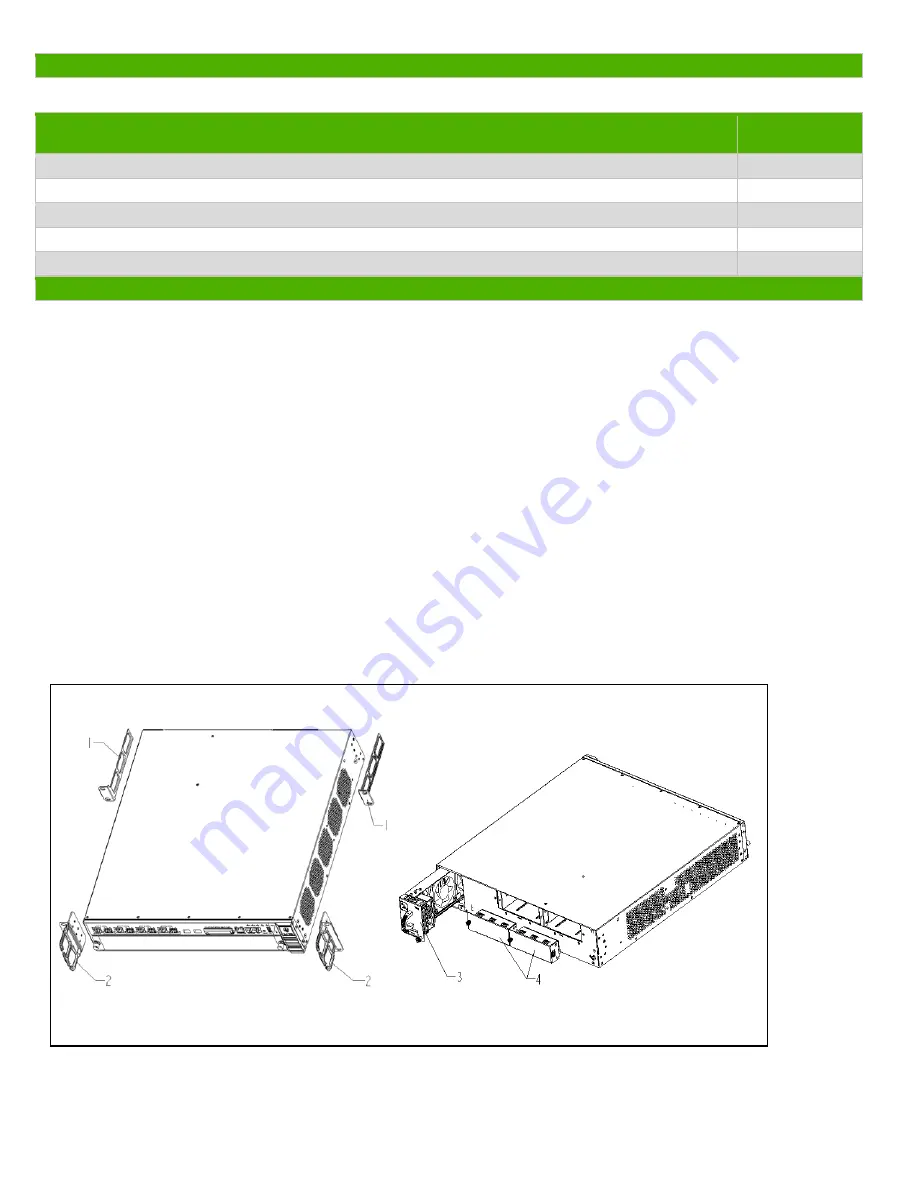
1.   Unscrew the screws for mounting angle 1, and then remove the mounting angle 1 from the rack or cabinet. 
2.   Unscrew the screws on mounting angle 2, and then remove the mounting angle 2. 
3.   Remove all of the labels. 
4.   Unscrew the screws on fan-assembly 3, and then remove the fan-assembly 3. 
5.   Unscrew the screws on power mask 4, and then remove the power mask 4. 
6.   Remove the blank panel 5. 
7.   Unscrew the screws on top cover 6, and remove the top cover 6. 
8.   Unscrew the screws on power bracket 7, and then remove power bracket 7. 
9.   Unscrew the screws on PCB 8, and then remove PCB 8. 
10.   Unscrew the screws on PCB 9, and remove PCB 9. 
11.   Unscrew the screws on PCB 10, and remove PCB 10. 
12.   Remove shielding fingers 11. 
13.   Unscrew all the screws on the fan-assembly 3, and remove PCB 3.4. 
14.   Clear the yellow adhesive, if had, by  the tweezers. 
15.   Pry the button battery up from socket. 

3.2 Optional Graphic.  If the disassembly process is complex, insert a graphic illustration below to identify the items 
contained in the product that require selective treatment (with descriptions and arrows identifying locations)


Figure 1   Remove the mounting angle 2


Figure 2   Treatments to rear panel 


EL-MF877-00                                                 Page  2 
Template Revision B  


Содержание HSR6602-G

Страница 1: ...semblies PCA With a surface greater than 10 sq cm 4 Batteries All types including standard alkaline and lithium coin or button style batteries 1 Mercury containing components For example mercury in lamps display backlights scanner lamps switches batteries 0 Liquid Crystal Displays LCD with a surface greater than 100 sq cm Includes background illuminated displays with gas discharge lamps 0 Cathode ...

Страница 2: ...the fan assembly 3 5 Unscrew the screws on power mask 4 and then remove the power mask 4 6 Remove the blank panel 5 7 Unscrew the screws on top cover 6 and remove the top cover 6 8 Unscrew the screws on power bracket 7 and then remove power bracket 7 9 Unscrew the screws on PCB 8 and then remove PCB 8 10 Unscrew the screws on PCB 9 and remove PCB 9 11 Unscrew the screws on PCB 10 and remove PCB 10...

Страница 3: ...top cover 6 and PCB 8 Figure 4 Remove PCB 9 and PCB 10 Figure 5 Treatments to Fan assembly 3 Figure 6 Clear the yellow adhesives by the tweezers Figure 7 Pry up the button battery EL MF877 00 Page 3 Template Revision B ...

Страница 4: ...2 4 4 Fe 96 2 1 8 Fe recycling 5 Fe 313 3 0 Fe recycling 6 Fe 2515 23 7 Fe recycling 7 Fe 759 7 2 Fe recycling 8 Complex PCB 100 0 9 The surface of PCB is greater than 10 square centimeters 9 Complex PCB 250 2 4 The surface of PCB is greater than 10 square centimeters 10 Complex PCB 1200 11 3 The surface of PCB is greater than 10 square centimeters 11 Be Cu 6 0 1 Cu recycling 12 Fe 4300 40 5 Fe re...

Отзывы: