


Upgrading and Servicing Guide
19
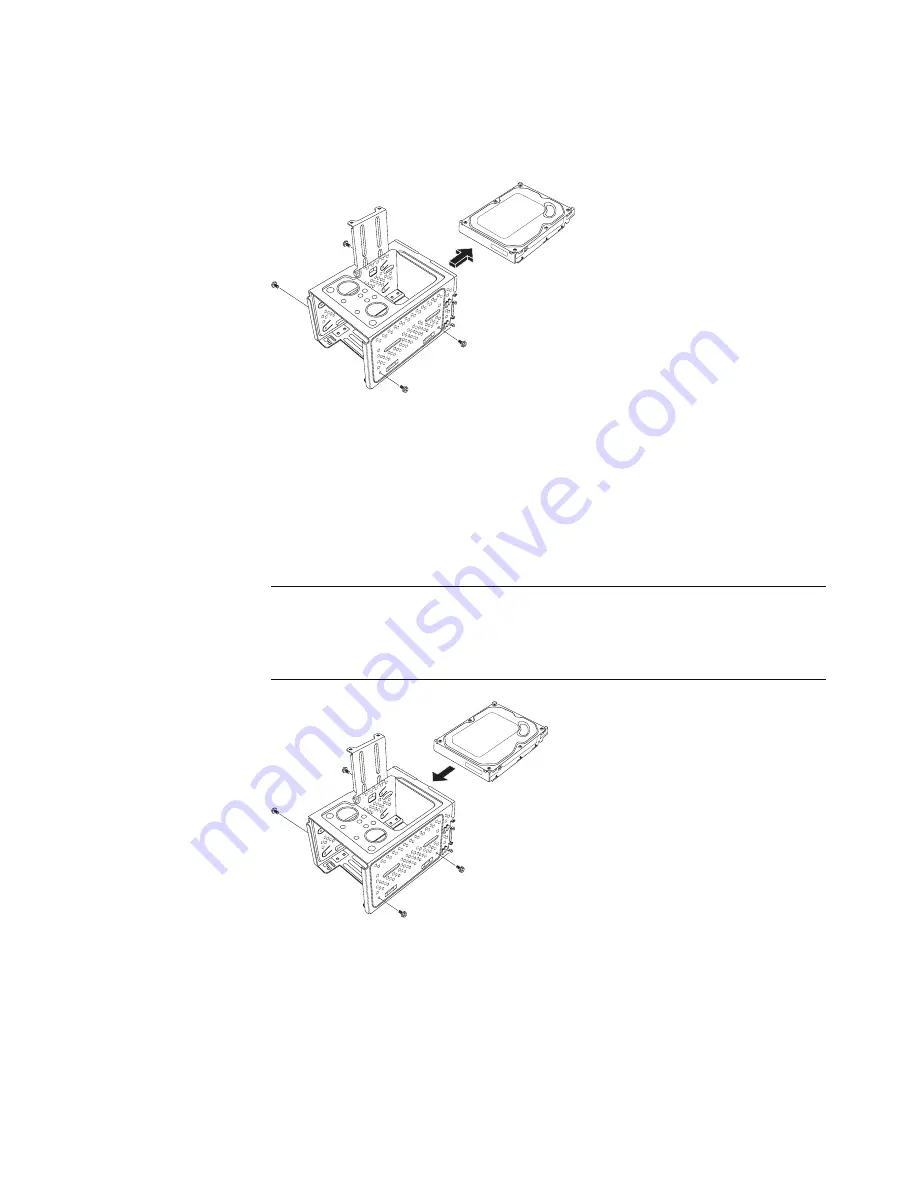
6
Remove the four screws that secure the hard disk drive to the hard disk drive cage,
and then slide the hard disk drive out of the hard disk drive cage.
Adding or Replacing a Hard Disk Drive
1
If necessary, remove the existing drive. See “Removing the Hard Disk Drive” on
page 17.
2
Slide the new drive into the hard disk drive cage, aligning the drive with the four
screw holes on the cage. Install the four screws that secure the hard disk drive to the
hard disk drive cage. Make sure the hard disk drive cables are facing the top of the
drive cage.
NOTE:
If you are replacing an old drive with a new drive, remove the four guide
screws from the old drive, and use the screws to install the new drive.
If you are installing a second hard disk drive, use four standard 6-32 screws that you
purchase separately.
Содержание G3000 - Notebook PC
Страница 1: ...Upgrading and Servicing Guide ...
Страница 4: ...iv Upgrading and Servicing Guide ...


