


-164
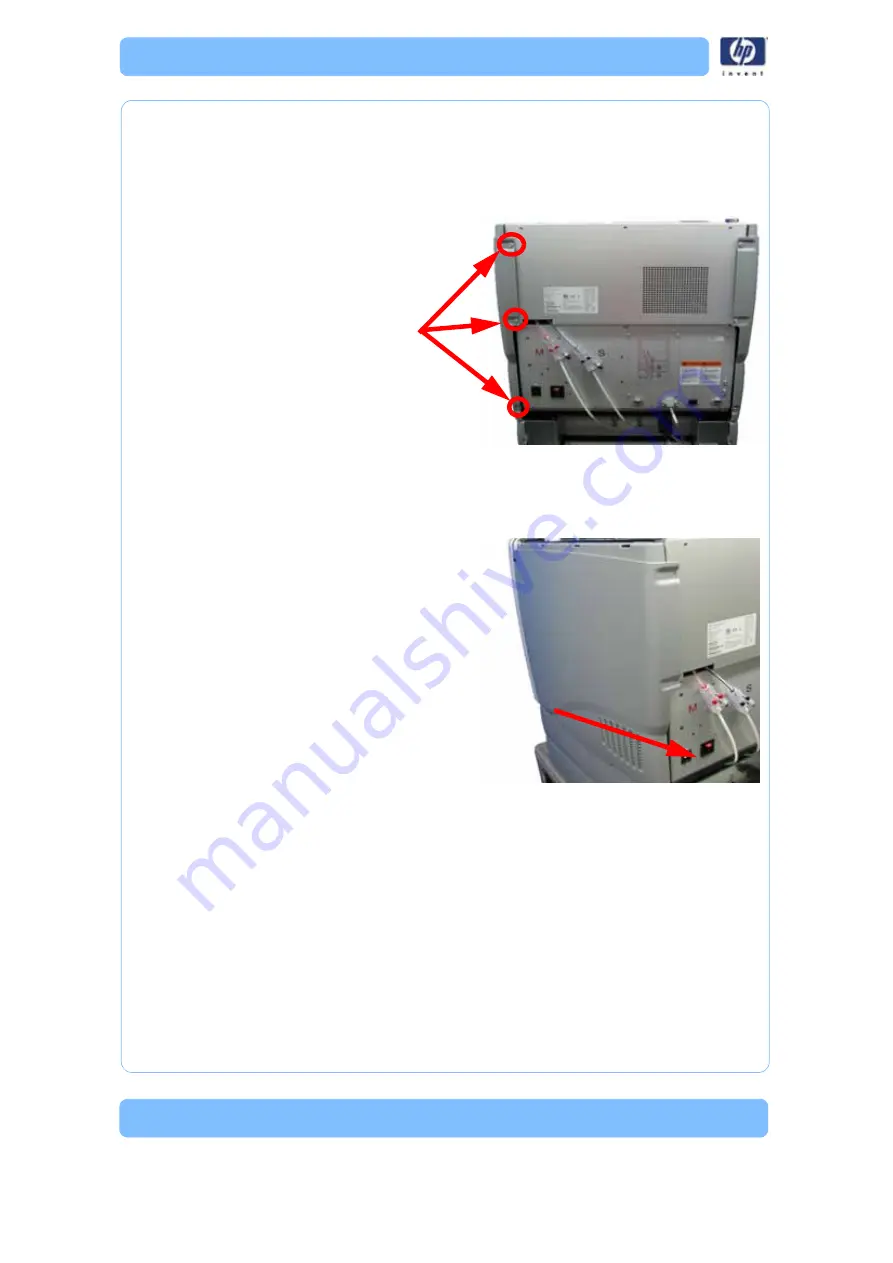
Removing the right side panel:
1. Using a
5
⁄
16
” nut driver or standard screwdriver, remove the 3 mounting
screws. See
Figure 67: Right side panel mounting screw locations
2. Slide towards the back of the printer and pull outward to remove. See
Figure 68: Removing the right side panel
Installing the side panels
1. Slide the left side panel towards the front of the printer and push into
place.
2. Using a
5
⁄
16
” nut driver or standard screwdriver, Reinstall the 3 mounting
screws.
3. Slide the right side panel towards the front of the printer and push into
place.
4. Using a
5
⁄
16
” nut driver or standard screwdriver, Reinstall the 3 mounting
screws.
5. Reinstall the top panel. See
“Installing the top panel” on page 162
Remove the 3 right side
panel mounting screws.
Pull the right side panel out and
towards the back of the printer to
remove.
Содержание DESIGNJET 3D
Страница 1: ...HP Designjet 3D HP Designjet Color 3D Service Guide ...
Страница 3: ......
Страница 4: ... 3 ...
Страница 16: ... 12 ...
Страница 40: ... 24 ...
Страница 52: ... 36 ...
Страница 70: ... 54 ...
Страница 74: ... 58 ...
Страница 90: ... 74 ...
Страница 172: ... 156 ...
Страница 314: ... 298 Figure 272 HP Designjet 3D measurement points and worksheet BL FL FR BR ...
Страница 315: ... 299 Figure 273 HP Designjet Color 3D measurement points and worksheet BL FL FR BR ...
Страница 349: ... 333 Figure 316 HP Designjet 3D measurement points and worksheet BL FL FR BR ...
Страница 350: ... 334 Figure 317 HP Designjet Color 3D measurement points and worksheet BL FL FR BR ...
Страница 352: ... 336 ...
Страница 404: ... 388 Figure 402 HP Designjet 3D measurement points and worksheet BL FL FR BR ...
Страница 405: ... 389 Figure 403 HP Designjet Color 3D measurement points and worksheet BL FL FR BR ...
Страница 458: ... 442 ...


