


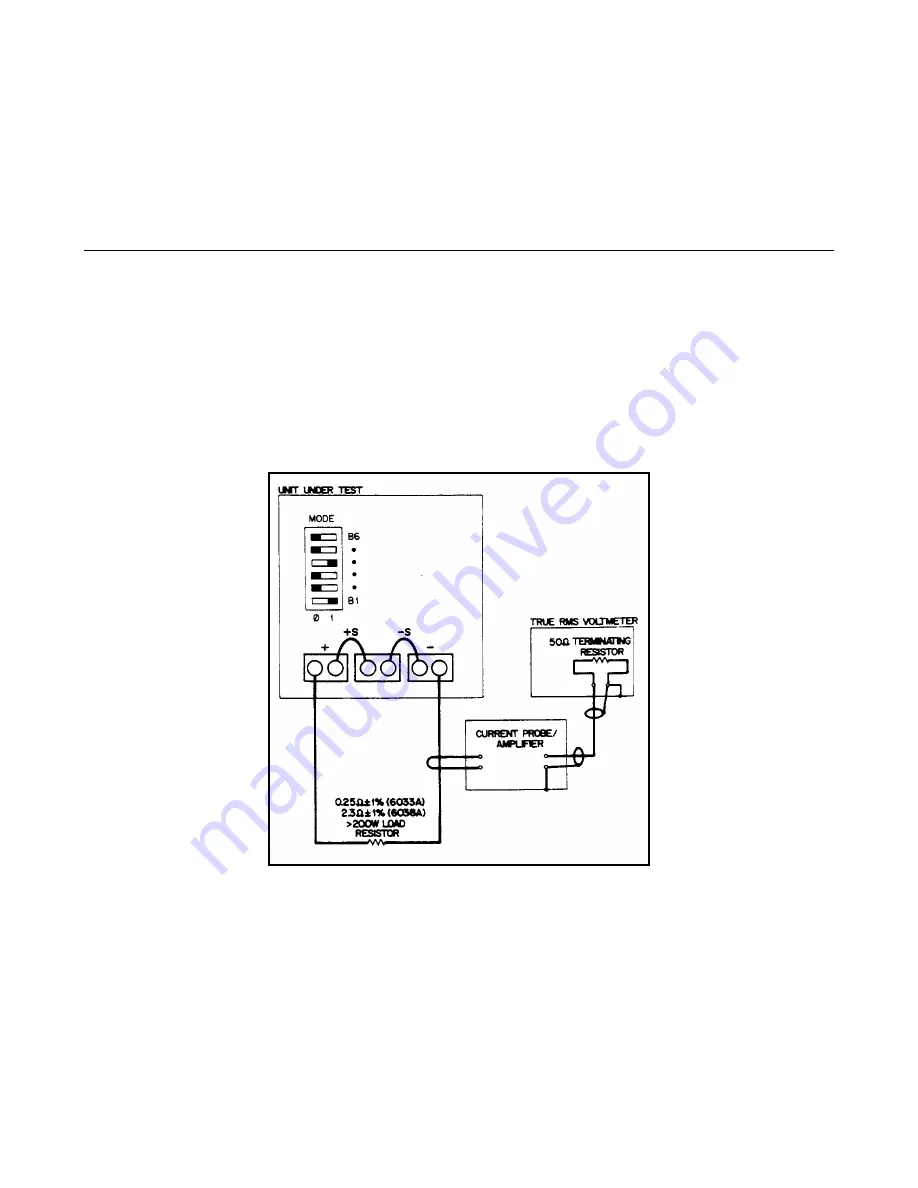
28
29Adc (6033A).
10Adc (6038A).
Check that the unit’s CC LED remains lighted.
d.
Check that the rms noise current measured by the current probe and rms voltmeter is no more than:
15mA rms (6033A).
5mA rms (6038A).
Initialization Procedure
Follow the procedure if either the HP-IB assembly has been replaced, or the EEPROM (U70) has been replaced:
1.
Install the HP-IB assembly in the unit.
2.
Turn the power on and depending on your unit’s model number, send string:
"EEINIT 6033"
or
"EEINIT 6038’’.
3.
Turn the power off, wait 5 seconds, then turn the power back on.
4.
If the HP-IB assembly has been replaced, calibrate the unit.
Figure 2-9. CC PARD Test Setup
Содержание 6038A
Страница 4: ......
Страница 8: ......
Страница 34: ...34 Figure 3 1 Troubleshooting Isolation ...
Страница 35: ...35 Figure 3 1 Troubleshooting Isolation continued ...
Страница 37: ...37 Figure 3 3 Clock and Primary SA Waveforms ...
Страница 40: ...40 Figure 3 4 Readback and Secondary SA Waveforms ...
Страница 56: ...56 Figure 3 7 Waveforms ...
Страница 62: ...62 Figure 4 1 HP IB Block Diagram ...
Страница 65: ...65 Figure 4 2 Front Panel Block Diagram ...
Страница 90: ......
Страница 93: ...93 Figure 6 1 Top View Top Covers Removed ...
Страница 94: ...94 Figure 6 2 Main Board A1 Component Location ...
Страница 95: ...95 Figure 6 3 Control Board A2 Component Location ...
Страница 96: ...96 Figure 6 4 Front Panel Board A3 Component Location ...
Страница 97: ...97 Figure 6 5 Power Mesh Board A4 Component Location ...
Страница 98: ...98 Figure 6 6 HP IB Board A8 Component Location ...
Страница 105: ...105 Figure 3 1 Troubleshooting Isolation option 001 ...
Страница 106: ......