3.
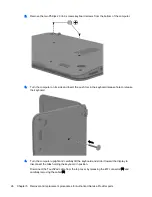
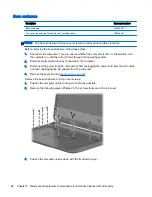
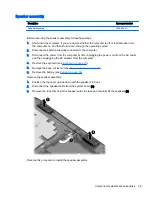
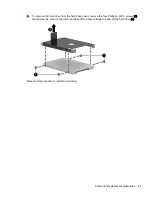
Open the computer as far as possible and turn the computer on its side. Remove the two Phillips
2.5×5.0 screws (1), and (2) from the display hinges.
4.
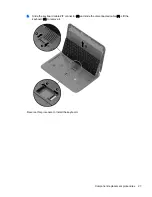
Slide the display assembly (3) to remove it.
CAUTION:
When installing the display assembly, be sure that the wireless antenna cables are
routed and arranged properly.
Failure to properly route the antennas can result in degradation of the computer's wireless
performance.
5.
Replace the panel if this is a whole unit touchscreen replacement by reversing these
procedures. The whole unit panel replacement is complete.
NOTE:
If you are replacing an assembly component for a non-touchscreen display, continue the
steps below.
Display assembly
Remove the display assembly:
1.
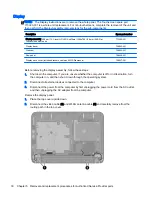
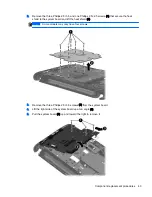
Place the computer upright and open as far as possible.
2.
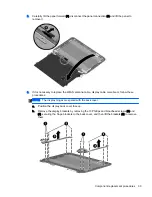
Remove the display screw covers (1) and remove the two Phillips 2.5×2.5 screws (2).
Component replacement procedures 31
Содержание 10
Страница 1: ...HP Pavilion 10 Notebook PC Maintenance and Service Guide ...
Страница 4: ...iv Important Notice about Customer Self Repair Parts ...
Страница 6: ...vi Safety warning notice ...
Страница 10: ...x ...
Страница 17: ...Top Top 7 ...
Страница 24: ...14 Chapter 3 Illustrated parts catalog ...

