background image

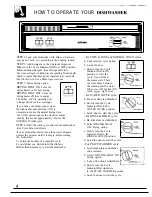
HOW TO OPERATE YOUR 

STEP 1. 

Load your dishwasher with dishes, silverware,

pots, pans, bowls, etc., according to the Loading section.

STEP 2. 

Add detergent to the detergent dispenser.

Make sure the Cycle Indicator 

 is at OFF position

before adding detergent. (See Detergent Guide).

Use rinse aid agent to help prevent spotting. Occasionally
check to insure that rinse agent container is at least half

 (See How to Use a Rinse Agent section).

STEP 3. 

Select drying option.

DRYING HEAT ON. 

Turns the

drying heater on for fast drying.

DRYING HEAT OFF. 

Turns the

drying heater off to save energy.
The dishes 

 dry naturally over

a longer period such as overnight.

If you need your dishes sooner, open

the dishwasher door after the 

 is

complete to reduce the natural drying time.

Use of this option reduces the electrical energy
used by this model approximately 

 for the

NORMAL WASH cycle.

STEP 4. 

 the wash cycle and start the dishwasher.

(See Cycle Selection Hints).

If your dishwasher drains into a food waste disposer,

operate the disposer until it is empty before starting
the dishwasher.

To obtain the benefits of a complete cycle,
be careful that you 

do not turn the dial any

farther than necessary 

to start the dishwasher.

4

● 

For POTS & PANS and NORMAL WASH cycles:

a. 

Push selected cycle button.

b. Latch the door.

c. Slowly turn the Cycle

Indicator Dial to ON
position to start the
cycle. You will hear
the motor start. There
is a time delay between
the start-up and the water

I

fill so you-will not hear 
wash 

 right away. 

-

● 

For WATER SAVER cycle:

a. 

Be sure door is unlatched.

b. Slowly turn the Cycle

Indicator Dial to the

WATER SAVER position.

c. 

Latch door to start the cycle.

● 

For RINSE & HOLD cycle:

a. 

Be sure door is unlatched.

b. Select DRYING HEAT

OFF drying option.

c. Slowly turn the Cycle

Indicator Dial to the
RINSE & HOLD position.

SAVE

washing

ON .

OFF 

● 

:;!S:D

 .$,

d. Latch the door to start the cycle.

● 

For PLATE WARMER cycle:

a. Load clean plates and dishes

to be warmed.

 ●

b. Select DRYING HEAT ON 

drying option.


c. 

Leave the door unlatched. 

PLATE 


d. Slowly turn the Cycle

Indicator Dial clockwise
to the PLATE WARMER position.

e. Latch the door to start the cycle.

Содержание HDA430

Страница 1: ...afety Instructions 3 Cycle Features 4 5 User Maintenance Instructions 11 Detergent Detergent Guide 6 7 Warranty Back Cover Dispenser Cups 7 Water Temperature 6 Energy Saving Tips 2 Winter Storage 11 F...

Страница 2: ...e see the Consumer Services page in the back of this guide We re proud of our service and want you to be pleased If for some reason you are not happy with the service you receive here are 3 steps to f...

Страница 3: ...ies Do not tamper with controls c Do not touch the Calrod heating element during or immediately after use Do not operate your dishwasher unless all enclosure panels are properly in place Do not abuse...

Страница 4: ...nto a food waste disposer operate the disposer until it is empty before starting the dishwasher To obtain the benefits of a complete cycle be careful that you do not turn the dial any farther than nec...

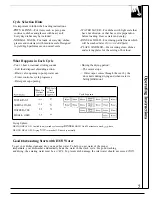
Страница 5: ...disposer shredding action The motor stops Drain valve opening to pump water out Water vapor comes through the vent by the Timer control as cycle progresses door latch during drying and when water is b...

Страница 6: ...Do not overfill If you accidentally spill Wipe up the rinse agent with a damp cloth Don t leave the spill in the dishwasher It can keep your detergent from working If you can t find any rinse agent w...

Страница 7: ...s not necessary With common sense and a little practice you ll soon know what foods to remove Here are some guidelines 1 Scrape off bones seeds skins toothpicks and other hard solids It is also best t...

Страница 8: ...t block it or load tall things next to it Also be careful not to let a portion of an item such as a pot or dish handle extend through the bottom rack This could block the wash arm and cause poor wash...

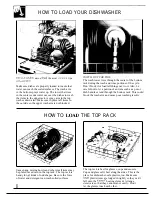
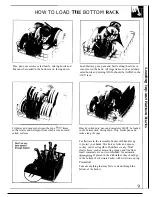
Страница 9: ...n the lower rack Heavily soiled pots pans and casseroles MUST be loaded in the bottom rack facing down Prop broiler pans and racks along the edge Put flatware in the removable basket with handles up t...

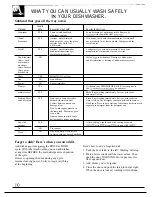
Страница 10: ...s can stain if left on Sterling Silver and Silver plate YES Don t put in same silverware basket with stainless steel Contact between metals can damage silver Don t wash copper utensils in the same loa...

Страница 11: ...er Turn off the water supply s Disconnect the water inlet line from the water valve I I PUMP COVER SCREWS Drain water from the inlet line and water valve Use a pan to catch the water Reconnect the wat...

Страница 12: ...changing panels or when lower access panel is removed How to Change Lower Panel Insert Top Trim 1 Remove the lower access assembly by taking out the attachment screws and then lifting it up and clear...

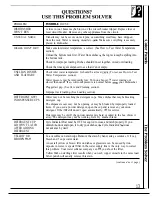
Страница 13: ...ressure is normal before using your dishwasher Plugged air gap See Care and Cleaning section Improper rack loading See Loading section Water may not be reaching the detergent cups Move dishes that may...

Страница 14: ...POTS PANS cycle 4 Start the dishwasher and allow to run for 18 to 22 minutes The dishwasher will now be in the main wash 5 Then open the door and pour 2 cups 500 ml of white vinegar into the botiom of...

Страница 15: ...TO AVOID SUDSING To remove suds from the tub Open the dishwasher Let suds evaporate Add 1 gallon of cold water to the tub Close and latch the dishwasher Pump out water by slowly turning the control di...

Страница 16: ...NOTES 16...

Страница 17: ...NOTES 17...

Страница 18: ...NOTES 18...

Страница 19: ...iill il t xJ ilc s P lr ll ist it k ontr ac while yolrl w lll llll is still in eflk l arrci yell 11 rt c ivc a Slll stilrllial Iisc otlrll U itll a mul iple yeal C n 1 rac 1 yolr I t ilSSlrl C 1 of i...

Страница 20: ...RED Service trips to your home to teach Replacement of house fuses or you how to use the product resetting of circuit breakers Read your Use and Care material Cleaning or servicing of air gap If you t...

Отзывы: