4
HOTPOINT DISHWASHER - Instructions for installation and use
D
ISHWASHER
You have loaded your dishes and you now have
to set the wash cycle. It takes just one minute
to learn how
Starting the dishwasher
Make sure the
wash cycle has
ended before
removing the
dishes!
Ready, steady, go!
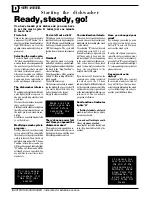
First of all.
Turn on the water tap completely
and press ON-OFF button "
A
": a
short beep will sound and indicator
light "
B
" will come on. Now the
appliance is on and ready to be pro-
grammed.
Selecting the wash cycle.
To select a wash cycle, turn knob
"
D
" clockwise until the reference
notch on the knob corresponds with
the number or symbol for the cy-
cle you wish to set (have a look at
the wash cycle table on page 6).
After a few seconds, you will hear
a short beep: the wash cycle has
begun and it is not advisable to
make any changes at this point.
The dishwasher informs
you.
Your dishwasher is fitted with indi-
cator lights (
G
) that come on to
show you at which point the wash
cycle is at.
Here are the symbols correspond-
ing to each cycle phase:
Starting from the indicator light on
the left moving towards the one on
the right: pre-wash, wash, rinses,
drying.
At all times, your dishwasher tells
you where it is at.
Modifying a wash cycle in
progress.
But if you have chosen the wrong
cycle, not to worry! You can modify
the wash cycle in progress, if it has
only just started. Turn the knob
anti-clockwise and set it to Change
Position, after a few seconds you
will hear 4 beeps and indicator light
"
G
" will go out: this means all the
settings have been cancelled. You
are now free to re-set the correct
wash cycle.
You've left out a dish?
Well, it happens to everyone. Inter-
rupt the wash cycle by pressing the
ON-OFF button, insert the dish you
had forgotten and press the ON-
OFF button again. The cycle will
start up from where you interrupted
it.
Finished?
The end of the wash cycle is sig-
nalled by 2 short beeps and a flash-
ing drying phase indicator light. Set
the knob to the Stop Position to
clear all settings.
Turn the appliance off by pressing
button "A", thus cutting off the elec-
tricity supply.
Turn off the water tap.
Wait a few minutes before unload-
ing the dishes: they are very hot! If
you wait a little while, they dry
better thanks to the steam.
Empty the lower rack first.
There's been a power fail-
ure? Have you opened the
dishwasher door?
The wash cycle stops and then re-
starts when the electricity comes
back on or when you shut the door.
Everything is under control!
If opening the
door soon after
the end of the
p r o g r a m m e , o r
during it, stand
away from the
Dishwasher, to
avoid possible
injury from hot
steam.
You decide when it starts.
When you have loaded the dishes,
you can choose when to start your
dishwasher before setting the wash
cycle desired.
Press button "
F
" to delay the start
of the wash cycle by 12, 9, 6 or 3
hours. Each time you press it, you
will hear a short beep and the
indicator light "
G
" corresponding
to the selected delay will come on.
Now you can select the desired
wash cycle and, after you hear the
beep, the countdown to the
delayed start will begin.
If you have set a 12 hour delay, for
example, once you have selected
the wash cycle, the 12 hour
indicator light will flash followed
by the others in sequence until the
set time delay is up. A quick look
at the indicator lights will keep you
informed of the countdown
progress at all times.
Dual function of indicator
lights "G"
1)
flashing to indicate a delayed
start:
to remind you that you have
set a delayed start;
2)
on and not flashing beneath
the cycle phase symbol:
meaning the cycle has started and
is in the phase indicated by the
symbol.
Have you changed your
mind?
If you change your mind, you can
set a shorter time delay: press
button "
F
" to select it. You need
not reset the wash cycle.
If on the other hand you want to
cancel the delay set and you want
the cycle to start immediately,
press button "
F
" repeatedly until
the cycle starts and indicator light
"G" corresponding to the cycle start
phase comes on.
Do you want extra
drying?
Press button "
E
" before you start
the selected wash cycle. A short
beep will tell you that you have
selected extra drying and the wash
cycle will last longer in order to
provide you with drier dishes.
You can cancel
the wash cycle
in progress, if it
has only just
started.


