background image

5

D

ISHWASHER

Installation

Cold water connection.
Connect the cold water supply hose
to a 3/4 gas threaded connection,
taking care to screw it tightly onto
the tap. If the water hoses are new
or have been out of use for an
extended period of time, let the water
run to make sure it is clear and free
of impurities before making the
connection. If this precaution is not
taken, the water inlet could get
blocked, causing damage to your
dishwasher.

Choose where you want to install
your dishwasher, you can place it
so that its sides or back panel are
side by side with furniture or up
against the wall. The dishwasher is
provided with water supply and drain
hoses, which can be directed
towards the left or right to facilitate
appropriate installation.

Levelling.
Once the appliance is positioned,
adjust the feet by screwing them in
or out depending on how high you
want it and to level it so that it is
horizontal. Make sure that it is not
inclined more than 2 degrees. If the
appliance is level, it will  help ensure
its correct operation.

Height Adjustment
Insert the appliance into the cutout
and then adjust the height using the
screws located on the front bottom
part of the machine. Use a
screwdriver to turn the screws in
the clockwise or anti-clockwise
direction to increase or decrease
the height respectively.

Adjusting the Back Feet
Insert the appliance into the cutout
and then adjust the height using the
screws located on the front bottom
part of the machine. Use a
screwdriver to turn the screws in
the clockwise or anti-clockwise
direction to increase or decrease
the height respectively.

Drain hose connection.
WARNING: Connect your
dishwasher drain hose to pipes
which connect to the foul drain
system and not to surface water
drains.
IMPORTANT: For the correct
operation of your dishwasher, it is
essential to comply with the following
information:-

Standpipe:
Ensure that the hose is not pushed
too far down the standpipe.
If  the end of your drain hose is
fitted with ‘retaining flaps’, ensure
they are inserted fully into the
standpipe.  This will prevent the
pipe from jumping out during
installation and use.

DO NOT position the standpipe
near an electrical outlet.
ENSURE that the drain hose is not
kinked and it is routed as shown in
the diagram.

The standpipe should have a bore
of at least 38mm (11/2”). It should
be installed as shown, have a trap
fitted and must discharge into the
same drain system as your
household sink.
It MUST NOT be connected to a
surface water drain.

Anti-flooding protection
Your dishwasher has a special
system which stops the water
supply in the event of leaks inside
the appliance.
It is equipped with a  water inlet that
has a clear outer hose and an inner
high pressure hose which turns
bright red if it breaks.
Leaks are prevented as the clear
outer hose now contains the water.
It is vital that you check it on a
regular basis, if you see it has turned
bright red, you know you need to
replace it as soon as possible.
Call for an authorised technical
engineer to come and replace it.

Sink Waste System:
For under sink drainage:
Before connecting the drain hose,
remove any internal restrictions -
This will prevent a build up of debris
which could cause a blockage.
Remove any restrictions from the
waste spigot and ensure that the
sealing bung is removed. The hose
should be routed, such that it is
raised to a minimum height of
800mm (31/2”).

NOTE: Ensure the sink outlet
pipe has a minimum diamtere of
32mm.

1. Untie the end of the GREY
drainage hose from the rear of
the appliance.
2. Reposition the ‘Hooked End
Support’ as required along the
GREY drainage hose.
3. If fitting an under sink waste
disposal unit, cut out the
membrane, bung or blanking
plug.

Ensure the drain hose is
securely attached, to prevent
it coming away while the
machine is in use and causing
a flood.

Condensation-proof tape.
On some models, a transparent
condensation-proof adhesive tape
has been provided.
It should be stuck onto the lower
side of your wooden worktop to
protect it from the formation of
condensation.
When not provided, this tape can
be requested as a spare part from
authorised retailers.

Содержание BFZ 700

Страница 1: ...Instructions for Installation and Use Dishwasher Model BFZ 700 ...

Страница 2: ... become familiar with the appliance and safety warnings If the Book is lost or damaged a copy may be obtained from Electrical Connection For Your Safety Installation Getting to know your Dishwasher The Controls How to use your Dishwasher Programme Chart Before Using your Dishwasher Loading your Dishwasher Care and Cleaning Troubleshooting Information for Test Labs After Sales Service Hotpoint Guar...

Страница 3: ...nglyadvisedthatthisworkiscarriedout byaqualifiedelectrician Ifthedomesticwiringincludesaresidualcurrent operatedcircuit breaker ensurethatitconformstothelatestregulations Safety Information Atthetimeofdelivery Allfunctionsofyourdishwasherhavebeenthoroughlytestedatthe factory Asmallnumberofwatermarksmayhavebeenleftasa result theywilldisappearwhentheapplianceisusedforthefirsttime Thisapplianceshould...

Страница 4: ...edfloor ensurethatthe openingsontheundersideare notobstructed 9 Do not touch the heating elementduringorstraightafter awashcycle 10 Iftheappliancemalfunctions turnoffthewaterinlettapand disconnecttheplugfromthe wallsocket Thenreadthe sectionentitled Troubleshooting Ifyou cannotresolvetheproblem thencallHotpointService seeKEYCONTACTS back page Installationmustbeperformedbyaqualifiedtechnician incom...

Страница 5: ...e end of your drain hose is fittedwith retainingflaps ensure they are inserted fully into the standpipe This will prevent the pipe from jumping out during installationanduse DO NOT position the standpipe nearanelectricaloutlet ENSUREthatthedrainhoseisnot kinkedanditisroutedasshownin thediagram Thestandpipeshouldhaveabore ofatleast38mm 11 2 Itshould beinstalledasshown haveatrap fittedandmustdischar...

Страница 6: ...herdoor D Display LCD Buttons and indicator lights to programtheappliance G Cycle phase indicator light pre wash wash rinses drying H Extradryingbutton Press this button for greater drying I Delayed start select button This button delays the start of the wash cycle you selected by 1 to 24 hours L Multifunction numeric indicator It informs you as to the duration of the cycle the amount of time left...

Страница 7: ...want your dishes to be perfectlydry followtheinstructions below Pressbutton H Afteraprolonged beep indicator light Z lights up andthetimecorrespondingtothe wash cycle selected on the knob willflashonthedisplay Todisabletheextradryingoption pressthesamebuttonandindicator light Z will be turned off after a beepissounded Thisoptionisincompatiblewiththe soak cycle Remember that with extra drying the w...

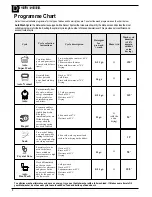
Страница 8: ...er at 70 C Drying JU XWR 1RUPDO Normally dirty dishes pots and pans Standard daily cycle Wash at 50 C Cold Rinse Rinse with hot water at 70 C Drying JU XWR Environmentally frien dly cycle with low energy consumption levels suitable for normally dirty pans and dishes 2 Cold pre washes Wash at 50 C Hot rinse at 65 C Drying JU 5DSLG Economic and fast cycle to be used for slightly dirty dishes Run cyc...

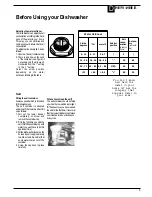
Страница 9: ... 0 14 36 18 44 1 8 4 4 20 60 36 71 45 89 4 5 8 9 MED 40 40 71 89 8 9 60 25 You don t know how hard the water in your home is Ask the company that supplies water in your area Filling the salt container Alwaysusesaltwhichisintended fordishwasheruse The salt container is situated underneaththelowerbasket fillit upasfollows 1 Pull out the lower basket completely unscrew and removethecontainercap 2 If ...

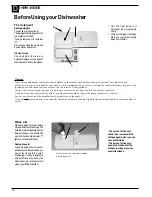
Страница 10: ...tobeincreasedifthe dishesappeardulloryoucan seecircularstains The amount of rinse aid needstobereducedifthe dishesarestickyoryoucan seewhitestreaks Use the right amount of detergent see programme chart Storeyourdetergentandrinse aid in a cool dry place safely awayfromchildren B D C A F C Warning Three in one dishwasher tablets are now available on the market and combine detergent salt and rinse ai...

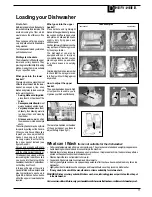
Страница 11: ...ithertheupperorlowerbasketas required What goes into the upper basket Place delicate and lightweight dishesintheupperbasket glasses teacupsandcoffeecups saucers andplates shallowsaladbowls slightly dirty frying pans and shallowpans Positionlightweightdishesinsucha wayastoavoidtheirbeingmoved bythesprayofwater The dishwasher can also be equipped with one or two tip up compartmentsontowhichyoucan pl...

Страница 12: ... cause unpleasantodourstoforminsidethe dishwasherisfoodthatremains trapped in the seals Periodic cleaningusingadampspongewill preventthisfromoccurring Goingaway Ifthedishwasherisnotgoingtobe usedforsometime carryoutthe following runacyclewiththedishwasher empty switchoffattheelectricalsocket andunplug turn off the water supply tap disconnecttheinlethoseand allowtodrain filltherinseaiddispenser lea...

Страница 13: ...tergents can be more corrosive than others thetankismadeofsteeland thereforeanyrustmarksaredue toexternalelements fragments ofrustfromthetankpipes pots cutleryetc Specialproductsare commerciallyavailabletoremove suchmarks Error messages Yourdishwasherisequippedwitha safetysystemwhichisabletode tectoperatingfaults Youwillknowifthereareany faults ifcodesstartflashingonthedisplay Takeanoteofthecodes ...

Страница 14: ...inse aid used for each cycle can be regulated by turning the dose adjuster F which you will find under lid C There are 6 different settings the normal dosage is setting 5 Loading the detergent The cleaning detergent should be introduced into the two containers Comp 2 and Comp 3 see table at the end of the page 2 2 2 2 2 2 2 2 2 2 5 3 3 3 3 5 3 3 3 3 3 3 3 3 1 1 1 1 1 1 7 8 1 1 1 1 1 1 4 4 4 4 4 4 ...

Страница 15: ...l repairs include a parts and labour guarantee for 12 months from the date of the repair If you require any information or have any questions about your appliance our operators are on hand with help and advice All this ensures that you will receive the best available after sales service possible Extended Warranties UK 08709 088 088 www theservicecentre co uk Republic of Ireland 1850 502 200 Whethe...

Страница 16: ...l Has not been subject to misuse accident modified or repaired by anyone other than one of our own service engineers For pre purchase information on any other Hotpoint product call 08701 50 60 70 or visit www hotpoint co uk Recycling Disposal Information As part of Hotpoint s continued commitment to helping the environment Hotpoint reserves the right to use quality recycled components to keep down...

Страница 17: ...17 D ISHWASHER Notes ...

Страница 18: ...18 D ISHWASHER Notes ...

Страница 19: ...19 D ISHWASHER Notes ...

Страница 20: ...co uk Republic of Ireland 1850 302 200 Note Our operators will require the following information Model number Serial number Extended Warranties UK 08709 088 088 Open 8 to 8 Mon Sun www theservicecentre co uk Republic of Ireland 1850 502 200 Genuine Parts and Accessories UK 08709 077 077 Open 8 30 to 5 30 Mon Fri 9 to 12 Sat www theservicecentre co uk Republic of Ireland 01 842 6836 Indesit Company...

Отзывы: