7
GB
Refined Salt and Rinse Aid
(°dH = hardness measured in German degrees - °f = hardness
measured in French degrees – mmol/l = millimoles per litre)
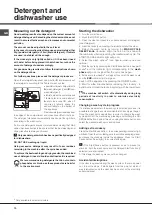
Measuring out the rinse aid
Rinse aid makes dish DRYING easier. The rinse aid dispenser
should be filled:
• When the LOW RINSE AID indicator light on the panel/display
is lit
*
;
• When the dark optical indicator on the dispenser door
“E”
becomes transparent.
1. Open the dispenser by turning
the cap
"G"
in an anticlockwise
direction.
2. Pour in the rinse aid, making
sure it does not overflow from the
dispenser. If this happens, clean
the spill immediately with a dry cloth.
3. Screw the cap back on.
NEVER pour the rinse aid directly
into the tub.
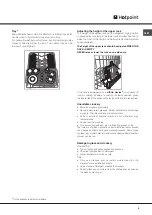
Adjusting the amount of rinse aid
If you are not completely satisfied with the drying results, you
can adjust the quantity of rinse aid used. Turn the adjuster
“F”
.
A maximum of 4 levels can be set according to the dishwasher
model. The factory setting is for a medium level.
• If you see bluish streaks on the dishes, set a low number (1-2).
• If there are drops of water or limescale marks on the dishes,
set a high number (3-4).
Only use products which have been specifically designed
for dishwashers. Do not use table salt or industrial salt.
Follow the instructions given on the packaging.
If you are using a multi-function product, we recommend
that you add salt in any case, especially if the water is hard
or very hard.
(Follow the instructions given on the packaging.)
If you do not add salt or rinse aid, the LOW SALT
*
and
LOW RINSE AID
*
indicator lights will remain lit.
Measuring out the refined salt
The use of salt prevents the formation of LIMESCALE on the
dishes and on the machine's functional components.
• It is important that the salt dispenser be never empty.
• It is important to set the water hardness.
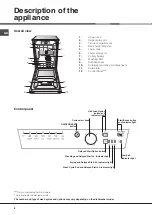
The salt dispenser is located in the lower part of the dishwasher
(see Description)
and should be filled:
• When the LOW RINSE AID indicator light in the control panel
is lit
*
;
• When the green float
*
on the cap of the salt dispenser is no
longer visible.
• See autonomy in the water hardness table.
1. Remove the lower rack and unscrew the
container cap (anticlockwise).
2. Only the first time you do this: fill the water
dispenser up to the edge.
3. Position the funnel
(see figure)
and
fill the salt container right up to its edge
(approximately 1 kg); it is not unusual for a little water to leak out.
4. Remove the funnel and wipe any salt residue away from the
opening; rinse the cap under running water and then screw it on.
It is advisable to perform this procedure every time you add salt
to the container.
Make sure the cap is screwed on tightly, so that no detergent can
get into the container during the wash cycle (this could damage
the water softener beyond repair).
Whenever you need to add salt, we recommend carrying out
the procedure before the washing cycle is started.
Setting the water hardness
For perfect water softener operation, it is essential that the
adjustment be based on the water hardness in your house. Ask
your local water supplier for this information. The factory setting
is for medium water hardness.
• Switch the dishwasher on using the On/Off button.
• Switch it off using the On/Off button
• Press and hold the START/PAUSE button
for 5 seconds.
• Switch it on using the On/Off button
• The salt indicator light flashes (as many times as the current
selection.)
• Set the knob to the desired hardness level number
(see Table
on water hardness.)
• Switch it off using the On/Off button
• Setting is complete!
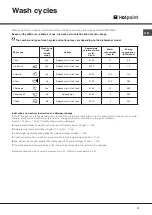
Water Hardness Table
Average autonomy
salt dispenser with 1
wash cycle per day
level
°dH
°fH
mmol/l
months
1
0 - 6
0 - 10
0 - 1
7 months
2
6 - 11
11 - 20
1.1 - 2
5 months
3
12 - 17 21 - 30
2.1 - 3
3 months
4
17 - 34 31 - 60
3.1 - 6
2 months
5
*
34 - 50 61 - 90
6.1 - 9
2/3 weeks
For values between 0°f and 10°f, we do not recommend the use
of salt. A setting of 5 may increase cycle duration.
*
Only available in selected models.

