background image

22

GB

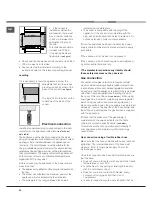
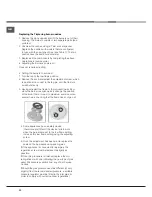
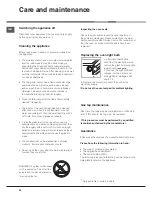
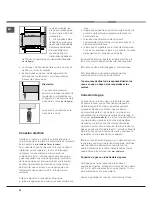
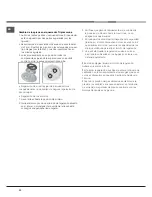
Replacing the Triple ring burner nozzles

1. Remove the pan supports and lift the burners out of their 

housing. The burner consists of two separate parts (see 
pictures).

2. Unscrew the nozzles using a 7 mm socket spanner. 

Replace the nozzles with models that are configured 
for use with the new type of gas (see Table 1). The two 
nozzles have the same hole diameter.

3. Replace all the components by completing the above 

operations in reverse order.

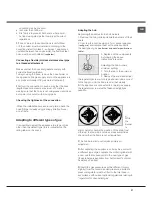
•  Adjusting the burners’ primary air :
Does not require adjusting.

•  Setting the burners to minimum:
1. Turn the tap to the low flame position.
2. Remove the knob and adjust the adjustment screw, which 

is positioned in or next to the tap pin, until the flame is 
small but steady.

3. Having adjusted the flame to the required low setting, 

while the burner is alight, quickly change the position 
of the knob from minimum to maximum and vice versa 
several times, checking that the flame does not go out.

4. Some appliances have a safety device 

(thermocouple) fitted. If the device fails to work 
when the burners are set to the low flame setting, 
increase this low flame setting using the adjusting 
screw.

5. Once the adjustment has been made, replace the 

seals on the by-passes using sealing wax 

!

 If the appliance is connected to liquid gas, the 

regulation screw must be fastened as tightly as 
possible.

!

 Once this procedure is finished, replace the old 

rating sticker with one indicating the new type of gas 
used. Stickers are available from any of our Service 
Centres.

!

 Should the gas pressure used be different (or vary 

slightly) from the recommended pressure, a suitable 
pressure regulator must be fitted to the inlet pipe (in 
order to comply with current national regulations).

Содержание CX65SP1 I /HA S

Страница 1: ...çoes e conselhos 47 Manutençao e cuidados 48 Assistencia técnica 48 Description of the appliance Control panel GB 1 Oven indicator light 2 SELECTOR knob 3 THERMOSTAT indicator light 4 THERMOSTAT knob 5 TIMER knob 6 Hob BURNER control knob IT Descrizione dell apparecchio Panello di controllo 1 La spia del forno 2 Manopola di selezione forno 3 La spia termostato forno 4 Manopola termostato 5 Manopol...

Страница 2: ...υθμιζόμενα ποδαράκια 7 Ηλεκτρικές εστίες 8 ΟΔΗΓΟΙ ολίσθησης των επιπέοων 9 Θέση 5 10 Θέση 4 11 Θέση 3 12 Θέση 2 13 Θέση 1 14 ΓΥΑΛΙΝΟ ΚΑΠΑΚΙ Υπάρχει μόνο σε ορισμένα μοντέλα Περιγραφή της συσκευής Συνολική άποψη GR 1 Quemador de gas 2 Plano de contención eventuales derrames 3 Panel de mandos 4 Rejilla estante del horno 5 Asadera o plano de cocción 6 Patitas regulables 7 Rejilla del plano de cocción...

Страница 3: ...a spegnere l apparecchio e coprire la fiamma per esempio con un coperchio o con una coperta ignifuga Non utilizzare prodotti abrasivi né spa tole di metallo taglienti per pulire lo sportello in vetro del forno in quanto po trebbero graffiare la superficie provo cando così la frantumazione del vetro Le superfici interne del cassetto se presente possono diventare calde Non utilizzare prodotti abrasi...

Страница 4: ...d cooking on a hob with fat or oil can be dangerous and may result in fire NEVER try to extinguish a fire with water but switch off the appliance and then cover flame e g with a lid or a fire blanket Do not use harsh abrasive cleaners or sharp metal scrapers to clean the oven door glass since they can scratch the surface which may result in shattering of the glass The internal surfaces of the comp...

Страница 5: ...o aceites sin vigilancia puede ser peligroso y provocar un incendio NUNCA intente apagar una llama in cendio con agua se debe apagar el aparato y cubrir la llama por ejemplo con una tapa o con una manta ignífu ga No utilice productos abrasivos ni espátulas de metal cortantes para limpiar la puerta de cristal del horno ya que podrían rayar la superficie y qu ebrar el cristal Las superficies interna...

Страница 6: ...ão com gordura e óleo sem vigilância pode ser perigoso e provocar um incêndio NUNCA tente apagar as chamas com água É necessário desligar o aparelho e cobrir as chamas com uma tampa ou com uma manta ignífuga Não utilizar produtos abrasivos nem espátulas de metal cortantes para limpar a porta em vidro do forno uma vez que pode riscar a super fície provocando a ruptura do vidro As superfícies intern...

Страница 7: ...ροκληθεί πυρκαγιά αν αφήσετε φούρνο αφύλακτο με λίπη και λάδια Δεν πρέπει ΠΟΤΕ να προσπαθείτε να σβήσετε μια φλόγα πυρκαγιά με νερό αλλά θα πρέπει να σβήσετε τη συσκευή και να καλύψετε τη φλόγα για παράδειγμα με ένα καπάκι ή μια πυρίμαχη κουβέρτα Μη χρησιμοποιείτε προϊόντα αποξυστικά κι ούτε σπάτουλες μεταλλικές κοφτερές για να καθαρίσετε τη γυάλινη πόρτα του φούρνου επειδή μπορεί να προξενηθούν ξ...

Страница 8: ...terno come descritto sopra Locale adiacente Locale da ventilare A B A Apertura di ventilazione Maggiorazione della per l aria comburente fessura fra porta e pavimento Dopo un uso prolungato dell apparecchio è consigliabile aprire una finestra o aumentare la velocità di eventuali ventilatori Scarico dei fumi della combustione Lo scarico dei fumi della combustione deve essere assicurato tramite una ...

Страница 9: ...re la presa o la spina non usare prolunghe e multiple Ad apparecchio installato il cavo elettrico e la presa della corrente devono essere facilmente raggiungibili Il cavo non deve subire piegature o compressioni Il cavo deve essere controllato periodicamente e sostituito solo da tecnici autorizzati L azienda declina ogni responsabilità qualora queste norme non vengano rispettate Collegamento gas I...

Страница 10: ...tipi di gas È possibile adattare l apparecchio a un tipo di gas diverso da quello per il quale è predisposto indicato sull etichetta di taratura sul coperchio Adattamento del piano cottura Sostituzione degli ugelli dei bruciatori del piano 1 togliere le griglie e sfilare i bruciatori dalle loro sedi 2 svitare gli ugelli servendosi di una chiave a tubo da 7 mm vedi figura e sostituirli con quelli a...

Страница 11: ...ere una piccola fiamma regolare 3 Verificare che ruotando rapidamente la manopola dalla posizione di massimo a quella di minimo non si abbiano spegnimenti dei bruciatori 4 Negli apparecchi provvisti del dispositivo di sicurezza termocoppia in caso di mancato funzionamento del dispositivo con bruciatori al minimo aumentare la portata dei minimi stessi agendo sulla vite di regolazione 5 Effettuata l...

Страница 12: ...i del cassetto scaldavivande larghezza cm 42 profondità cm 44 altezza cm 8 5 Bruciatori adattabili a tutti i tipi di gas indicati nella targhetta caratteristiche Tensione e frequenza d alimentazione vedi targhetta caratteristiche ENERGY LABEL Direttiva 2002 40 CE sull etichetta dei forni elettrici Norma EN 50304 Consumo energia convezione Naturale funzione di riscaldamento X Tradizionale Consumo e...

Страница 13: ...olo per il bruciatore ausiliario quando si utilizzano dei recipienti di diametro inferiore a 12 cm Uso del forno Prima dell uso togliere tassativamente le pellicole in plastica poste ai lati dell apparecchio Alla prima accensione fare funzionare il forno a vuoto per almeno un ora con il termostato al massimo e a porta chiusa Poi spegnere aprire la porta del forno e aerare il locale L odore che si ...

Страница 14: ...biarli di posizione tra loro a metà cottura d Programma GRILL Si attiva la parte centrale dell elemento riscaldante superiore La temperatura elevata e diretta del grill è consigliata per gli alimenti che necessitano di un alta temperatura superficiale bistecche di vitello e di manzo filetto entrecote È un programma dai consumi contenuti ideale per grigliare piatti di ridotte dimensioni Posizionare...

Страница 15: ...beri in pastella Torta rustica di spinaci Panzerotti Lasagne Panetti dorati Bocconcini di pollo 0 3 0 4 0 5 0 3 0 5 0 4 0 4 2 2 2 2 2 2 2 250 200 220 200 200 180 220 12 20 30 35 25 35 25 30 15 20 Precotti Precotti Ali di pollo dorate 0 4 2 200 20 25 Fast cooking Cibi Freschi Cibi Freschi Biscotti di frolla Plum cake Salatini di sfoglia al formaggio 0 3 0 6 0 2 2 2 2 200 180 210 15 18 45 10 12 Mult...

Страница 16: ...lla posizione Non staccare la spina dalla presa della corrente tirando il cavo bensì afferrando la spina Non fare pulizia o manutenzione senza aver prima staccato la spina dalla rete elettrica In caso di guasto in nessun caso accedere ai meccanismi interni per tentare una riparazione Contattare l Assistenza Non appoggiare oggetti pesanti sulla porta del forno aperta Non è previsto che l apparecchi...

Страница 17: ...hietti metallici affilati che possono graffiare la superficie e causare la frantumazione del vetro Gli accessori possono essere lavati come normali stoviglie anche in lavastoviglie Evitare di chiudere il coperchio quando i bruciatori sono accesi o sono ancora caldi Controllare le guarnizioni del forno Controllare periodicamente lo stato della guarnizione attorno alla porta del forno In caso risult...

Страница 18: ...uogo da cui si chiama È attivo 7 giorni su 7 sabato e domenica compresi e non lascia mai inascoltata una richiesta Al costo di 14 26 centesimi di Euro al minuto iva inclusa dal Lun al Ven dalle 08 00 alle 18 30 il Sab dalle 08 00 alle 13 00 e di 5 58 centesimi di Euro al minuto iva inclusa dal Lun al Ven dalle 18 30 alle 08 00 il Sab dalle 13 00 alle 08 00 e i giorni festivi per chi chiama da tele...

Страница 19: ...side as described above Adjacent room Room requiring ventilation A B Disposing of combustion fumes The disposal of combustion fumes should be guaranteed using a hood connected to a safe and efficient natural suction chimney or using an electric fan that begins to operate automatically every time the appliance is switched on see figure Installation A Ventilation opening Increase in the gap between ...

Страница 20: ...atible with the plug ask an authorised technician to replace it Do not use extension cords or multiple sockets Once the appliance has been installed the power supply cable and the electrical socket must be easily accessible The cable must not be bent or compressed The cable must be checked regularly and replaced by authorised technicians only The manufacturer declines any liability should these sa...

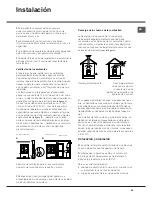
Страница 21: ...ing label on the cover Adapting the hob Replacing the nozzles for the hob burners 1 Remove the hob grids and slide the burners off their seats 2 Unscrew the nozzles using a 7 mm socket spanner see figure and replace them with nozzles suited to the new type of gas see Burner and nozzle specifications table 3 Replace all the components by following the above instructions in reverse Adjusting the hob...

Страница 22: ...he required low setting while the burner is alight quickly change the position of the knob from minimum to maximum and vice versa several times checking that the flame does not go out 4 Some appliances have a safety device thermocouple fitted If the device fails to work when the burners are set to the low flame setting increase this low flame setting using the adjusting screw 5 Once the adjustment...

Страница 23: ... cm Volume 57 l Useful measurements relating to the oven compartment width 42 cm depth 44 cm height 8 5 cm Burners may be adapted for use with any type of gas shown on the data plate Voltage and frequency see data plate ENERGY LABEL Directive 2002 40 EC on the label of electric ovens Regulation EN 50304 Energy consumption for Natural convection heating mode X Traditional mode Declared energy consu...

Страница 24: ...Using the oven The first time you use your appliance heat the empty oven with its door closed at its maximum temperature for at least half an hour Ensure that the room is well ventilated before switching the oven off and opening the oven door The appliance may emit a slightly unpleasant odour caused by protective substances used during the manufacturing process burning away Never put objects direc...

Страница 25: ...shes halfway through the cooking process d GRILL mode The central part of the top heating element is switched on The high and direct temperature of the grill is recommended for food that requires a high surface temperature veal and beef steaks fillet steak and entrecôte This cooking mode uses a limited amount of energy and is ideal for grilling small dishes Place the food in the centre of the rack...

Страница 26: ...d Pizza Courgette and prawn pie Country style spinach pie Turnovers Lasagne Golden Rolls Chicken morsels 0 3 0 4 0 5 0 3 0 5 0 4 0 4 2 2 2 2 2 2 2 250 200 220 200 200 180 220 12 20 30 35 25 35 25 30 15 20 Pre cooked food Golden chicken wings 0 4 2 200 20 25 Fast cooking Fresh Food Biscuits short pastry Plum cake Cheese puffs 0 3 0 6 0 2 2 2 2 200 180 210 15 18 45 10 12 Multi cooking Pizza on 2 rac...

Страница 27: ...not pull on the cable Never perform any cleaning or maintenance work without having disconnected the appliance from the electricity mains If the appliance breaks down under no circumstances should you attempt to perform the repairs yourself Repairs carried out by inexperienced persons may cause injury or further malfunctioning of the appliance Contact Assistance Do not rest heavy objects on the op...

Страница 28: ...the glass to crack The accessories can be washed like everyday crockery and are even dishwasher safe Do not close the cover when the burners are alight or when they are still hot Inspecting the oven seals Check the door seals around the oven regularly If the seals are damaged please contact your nearest Authorised After sales Service Centre We recommend that the oven is not used until the seals ha...

Страница 29: ...que se debe ventilar A B Descarga de los humos de la combustión La descarga de los humos de la combustión debe estar asegurada mediante una campana conectada a una chimenea de tiro natural de óptimo funcionamiento o mediante un electroventilador que comience a funcionar automáticamente cada vez que se enciende el aparato ver las figuras Instalación A Abertura de ventilación para el aire comburente...

Страница 30: ...a placa de características la tensión de alimentación eléctrica esté comprendida dentro de los valores indicados en la placa de características la toma sea compatible con el enchufe del aparato Si no es así sustituya la toma o el enchufe no utilice prolongaciones ni conexiones múltiples Una vez instalado el aparato el cable eléctrico y la toma de corriente deben ser fácilmente accesibles El cable ...

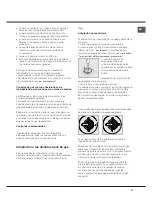
Страница 31: ...ción a los distintos tipos de gas Es posible adaptar el aparato a un tipo de gas diferente de aquel para el cual fue fabricado indicado en la etiqueta de calibrado que se encuentra en la tapa Adaptación de la encimera Sustitución de los inyectores de los quemadores de la encimera 1 quite las rejillas y extraiga los quemadores 2 desenrosque los inyectores utilizando una llave tubular de 7 mm ver la...

Страница 32: ... la varilla de la llave hasta conseguir una pequeña llama regular 3 Verifique que girando rápidamente el mando desde la posición de máximo hasta la de mínimo no se apaguen los quemadores 4 En los aparatos provistos del dispositivo de seguridad termopar si dicho dispositivo no funcionara con los quemadores al mínimo aumente la capacidad de los mínimos utilizando para ello el tornillo de regulación ...

Страница 33: ...cm profundidad 44 cm altura 8 5 cm Quemadores adaptables a todos los tipos de gas indicados en la placa de características Tensión y frecuencia de alimentación ver placa de características ENERGY LABEL Norma 2002 40 CE en la etiqueta de los hornos eléctricos Norma EN 50304 Consumo de energía por convección Natural función de calentamiento X Tradicional Clase Consumo de energía para funcionamiento ...

Страница 34: ...uncionar vacío durante una hora aproximadamente con el termostato al máximo y con la puerta cerrada Luego apáguelo abra la puerta y airee el ambiente en el que se encuentra El olor que se advierte es debido a la evaporación de las sustancias utilizadas para proteger el horno Antes de usar quitar las películas de plástico colocadas a los lados del aparato No apoye nunca objetos en el fondo del horn...

Страница 35: ...cocción es necesario intercambiar sus posiciones d Programa GRILL Se enciende la parte central del elemento calentador superior La temperatura elevada y directa del grill es aconsejada para los alimentos que necesitan una temperatura superficial alta chuletas de ternera y de vaca solomillo entrecote Es un programa de bajo consumo ideal para asar comidas de pequeñas dimensiones Coloque la comida en...

Страница 36: ...e calabacín y cangrejos Torta rústica de espinaca Panzerotti ravioles grandes italianos Lasañas Panecillos dorados Bocaditos de pollo 0 3 0 4 0 5 0 3 0 5 0 4 0 4 2 2 2 2 2 2 2 250 200 220 200 200 180 220 12 20 30 35 25 35 25 30 15 20 Precocidos Precocidos Alas de pollo doradas 0 4 2 200 20 25 Cocción rápida Alimentos Frescos Alimentos Frescos Bizcochos de pastaflora Plum cake Bizcochitos salados d...

Страница 37: ...de la toma de corriente tirando del cable sino sujetando el enchufe No realice la limpieza o el mantenimiento sin haber desconectado primero el aparato de la red eléctrica En caso de avería no acceda nunca a los mecanismos internos para intentar una reparación Llame al Servicio de Asistencia Técnica No apoye objetos pesados sobre la puerta del horno abierta No está previsto que el aparato sea util...

Страница 38: ... quebrar el vidrio Los accesorios se pueden lavar como cualquier vajilla incluso en lavavajillas Evite cerrar la tapa cuando los quemadores estén encendidos o todavía calientes Controlar las juntas del horno Controle periódicamente el estado de la junta que rodea la puerta del horno Si se encontrara dañada llame al Centro de Asistencia Técnica Autorizado más cercano Es aconsejable no usar el horno...

Страница 39: ...o Sala a ser ventilada A B Descarga dos fumos de combustão A descarga dos fumos de combustão deve ser garantida por meio de um exaustor ligado a uma chaminé com tiragem natural de segura eficiência ou por meio de uma ventoinha eléctrica que entre automaticamente em função cada vez que se ligar o aparelho ver figuras Instalação A Abertura para ventilação Aumento do vão entre do ar comburente a port...

Страница 40: ...xtensões nem tomadas múltiplas Depois de ter instalado o aparelho o acesso ao cabo eléctrico e à tomada da corrente deve ser fácil O cabo não deve ser dobrado nem comprimido O cabo deve ser verificado periodicamente e substituído somente por técnicos autorizados A empresa exime se de qualquer responsabilidade se estas regras não forem obedecidas Ligação ao gás A ligação do aparelho à rede do gás o...

Страница 41: ...cado na etiqueta de calibragem na tampa Adaptação ao plano de cozedura Substituição dos bicos dos queimadores do plano 1 retire as grades e desenfie os queimadores das suas sedes 2 desparafusar os bicos utilizando uma chave a tubo de 7 mm ver figura e substituí los com aqueles apropriados para o novo tipo de gás ver tabela Características dos queimadores e dos bicos 3 coloque outra vez todas as pe...

Страница 42: ...te da torneira até obter uma pequena chama regular 3 Verifique se ao girar rapidamente o botão da posição de máximo até a de mínimo os queimadores não se apagam 4 Nos aparelhos equipados com dispositivo de segurança termopar em caso de não funcionamento do dispositivo com os queimadores no mínimo aumente a capacidade dos próprios mínimos mediante o parafuso de regulação 5 Depois de realizar a regu...

Страница 43: ... profundidade 44 cm altura 8 5 cm Queimadores adaptáveis a todos os tipos de gás indicados na placa das características Tensão e frequência de fornecimento veja a placa das características ETIQUETA DE ENERGIA Directiva 2002 40 CE acerca dos fornos eléctricos Norma EN 50304 Consumo de energia com convecção Natural função de aquecimento X Tradicional Consumo de energia da declaração de Classe com co...

Страница 44: ...orno Quando o acender pela primeira vez aconselhamos de fazer funcionar o forno vazio pelo menos durante uma hora com o termóstato posto à temperatura máxima e a porta fechada Em seguida pode apagar abrir a porta do forno e ventilar a sala O odor que se sente deve se à evaporação das substâncias empregadas para proteger o forno Nunca encoste objectos no fundo do forno para evitar riscos de danos a...

Страница 45: ...incipalmente por baixo Se utilizar mais de uma prateleira de cada vez será necessário trocar a posição das mesmas na metade da cozedura d Programa de GRILL Activa se a parte central do elemento aquecedor superior Uma temperatura alta e directa do grill é aconselhada para os alimentos que necessitarem de uma alta temperatura superficial bifes de vitela ou vaca filés entrecôte É um programa de baixo...

Страница 46: ...0 45 40 50 25 30 30 35 20 25 15 20 20 25 20 25 180 Congelados Congelados Pizza Misto abóbora e camarão panado Torta rústica de espinafre Panzerotte Lasanha Pãezinhos doirados Bolinhos de frango 0 3 0 4 0 5 0 3 0 5 0 4 0 4 2 2 2 2 2 2 2 250 200 220 200 200 180 220 12 20 30 35 25 35 25 30 15 20 Pré Pré cozidos cozidos Asas de frango doiradas 0 4 2 200 20 25 Cozinha Rápida Comidas Frescas Comidas Fre...

Страница 47: ... Não puxe pelo cabo para desligar a ficha da tomada eléctrica pegue pela ficha Não realize limpeza nem manutenção sem antes ter desligado a ficha da rede eléctrica Se houver avarias em nenhum caso mexa nos mecanismos internos para tentar repará las Contactar a Assistência Não coloque objectos pesados sobre a porta do forno aberta Não é previsto que este aparelho seja utilizado por pessoas incluso ...

Страница 48: ...superfície e quebrar o vidro Os acessórios podem ser facilmente lavados como quaisquer utensílios inclusive numa máquina de lavar louça Evite fechar a tampa de vidro enquanto os queimadores estiverem acesos ou ainda quentes Verificação das guarnições do forno Verifique periodicamente o estado da guarnição ao redor da porta do forno Se houver danos contacte o Centro de Assistência Técnica Autorizad...

Страница 49: ...ηκε παραπανω Γειτονικος χωρος Χωρος για αερισμο A B Εκκενωση των καπνων καυσης Η εκκενωση των καπνων της καυσης πρεπει να διασφαλιζεται μεσω απορροφητηρα συνδεδεμενου σε καπνοδοχο με φυσικο τραβηγμα σιγουρης αποτελεσματικοτητας η μεσω ηλεκτρικου ανεμιστηρα που μπαινει αυτοματα σε λειτουργια καθε φορα που Εγκατασταση A Ανοιγμα αερισμου Αυξηση της εσοχης μεταξυ για τον αερα καυσης πορτας και δαπεδου...

Страница 50: ...ν η πριζα να ειναι συμβατη με το βυσμα της συσκευης Σε αντιθετη περιπτωση αντικαταστηστε την πριζα Μη χρησιμοποιειτε προεκτασεις και πολυπριζα Αφου εγκατασταθει η συσκευη το ηλεκτρικο καλωδιο και η ηλεκτρικη πριζα πρεπει να ειναι ευκολα προσβασιμα Το καλωδιο δεν πρεπει να διπλωνει η να συμπιεζεται Το καλωδιο πρεπει να ελεγχεται περιοδικα και να αντικαθισταται μονο απο εξουσιοδοτημενους τεχνικους Η...

Страница 51: ...εριου Μπορειτε να προσαρμοσετε τη συσκευη σε ενα τυπο αεριου διαφορετικο απο εκεινον για τον οποιο εχει προετοιμαστει φαινεται στην ετικετα βαθμονομησης στο καπακι Προσαρμογη του πλαισιου εστιων Αντικατασταση των ακροφυσιων των καυστηρων του παγκου 1 βγαλτε τα πλεγματα και τραβηξτε τους καυστηρες απο τις εδρες τους 2 ξεβιδωστε τα ακροφυσια χρησιμοποιωντας ενα κλειδι σωληνωτο των 7 mm βλεπε εικονα ...

Страница 52: ...αχθεί μια μικρή κανονική φλόγα 3 Βεβαιωθείτε ότι στρέφοντας γρήγορα τη στρόφιγγα από τη θέση του μέγιστου σε εκείνη του ελάχιστου δεν παρατηρούνται σβησίματα των καυστήρων 4 Στις συσκευές που διαθέτουν διάταξη ασφαλείας θερμοζεύγος σε περίπτωση μη λειτουργίας της διάταξης με καυστήρες στο ελάχιστο αυξήστε την παροχή των ελάχιστων αυτών ενεργώντας στη βίδα ρύθμισης 5 Αφού γίνει η ρύθμιση αποκαταστή...

Страница 53: ...ρμανσης τροφίμων πλάτος cm 42 βάθος cm 44 ύψος cm 8 5 Καυστήρες προσαρμόσιμοι σε όλους τους τύπους αερίου που αναφέρονται στην πινακίδα χαρακτηριστικών Τάση και συχνότητα τροφοδοσίας βλέπε πινακίδα χαρακτηριστικών ENERGY LABEL Οδηγία 2002 40 CE για την ετικέτα των ηλεκτρικών φούρνων Κανονισμός EN 50304Κατανάλωση ενέργειας Φυσική αγωγιμότητα λειτουργία θέρμανσης X Παραδοσιακός Κατανάλωση ενέργειας ...

Страница 54: ...οιξτε την πορτα του φουρνου και αεριστε το χωρο Η οσμη που αναδυεται οφειλεται στην εξατμιση των ουσιων που χρησιμοποιηθηκαν για την προστασια του φουρνου Μην αποθετετε ποτε αντικειμενα στη βαση του φουρνου διοτι μπορει να προκληθουν ζημιες στο σμαλτο Πριν τη χρήση να αφαιρέσετε οπωσδήποτε τα πλαστικά φιλμ που είναι τοποθετημένα στα πλαϊνά της συσκευής 1 Επιλεξτε το επιθυμητο προγραμμα μαγειρεματο...

Страница 55: ...ιως απο κατω Στην περιπτωση που χρησιμοποιειτε περισσοτερα απο ενα επιπεδα τη φορα πρεπει να αλλαζετε θεση μεταξυ τους στη μεση του μαγειρεματος d Προγραμμα GRILL Ενεργοποιειται το κεντρικο τμημα του επανω θερμαντικου στοιχειου Η υψηλη και αμεση θερμοκρασια του γκριλ συνισταται για τα τροφιμα που απαιτουν υψηλη επιφανειακη θερμοκρασια μοσχαρισιες και βωδινες μπριζολες φιλετο entrecote Ειναι ενα πρ...

Страница 56: ... Πίτσα Παστίτσιο με κολοκυθάκια και καραβίδες Χωριάτικη σπανακόπιτα Ψωμάκια Λαζάνια Τραγανά ψωμάκια 0 3 0 4 0 5 0 3 0 5 0 4 0 4 2 2 2 2 2 2 2 250 200 220 200 200 180 220 12 20 30 35 25 35 25 30 15 20 Προψημένα Φτερά κοτόπουλου ροδοκοκκινισμένα 0 4 2 200 20 25 Fast cooking Φρέσκα Τρόφιμα Μπισκότα πασταφρόλα Plum cake Αλμυρά ζύμης με τυρί 0 3 0 6 0 2 2 2 2 200 180 210 15 18 45 10 12 Πολυ μαγείρεμα Π...

Страница 57: ...α πιανοντας το βυσμα Μην κανετε καθαρισμο η συντηρηση χωρις προηγουμενως να εχετε βγαλει το βυσμα απο την ηλεκτρικη πριζα Σε περιπτωση βλαβης μη επεμβαινετε σε καμια περιπτωση στους εσωτερικους μηχανισμους για να επιχειρησετε την επισκευη Επικοινωνηστε με την Τεχνικη Υποστηριξη Μην αποθετετε βαρια αντικειμενα στην ανοιχτη πορτα του φουρνου Αποφεύγετε να παίζουν τα παιδιά με τη συσκευή Δεν προβλέπε...

Страница 58: ...ση του γυαλιου Τα αξεσουαρ μπορουν να πλενονται ευκολα σαν κανονικα σκευη ακομη και στο πλυντηριο πιατων Αποφευγετε να κλεινετε το καπακι μεχρις οτου οι καυστηρες ειναι αναμμενοικαι ακομα ζεστοι Ελεγξτε τις τσιμουχες του φουρνου Να ελεγχετε περιοδικα την κατασταση της τσιμουχας γυρω απο την πορτα του φουρνου Σε περιπτωση που παθει ζημια να απευθυνθειτε στο πλησιεστερο Κεντρο Τεχνικης Υποστηριξης Σ...

Страница 59: ...59 GR ...

Страница 60: ...60 GR 05 2012 195103671 00 XEROX FABRIANO ...

Отзывы: