4
EN
NOTICE:
Charge only batteries that are cool to the touch
and are not damaged. Look at the battery to make sure it
is not damaged e.g., swollen, bent, broken or punctured.
1. Insert the charger into a USB port.
2. Properly connect the battery to the charger.
3. Always disconnect the fl ight battery from the charger immediately upon completion of charging.
CAUTION:
Only use chargers specifi cally designed to charge the included Li-Po battery. Failure to do so could result
in fi re, causing injury or property damage.
CAUTION:
Never exceed the recommended charge rate.
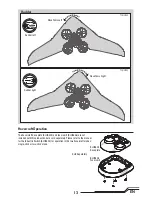
LED Indications
When you make the connection successfully, the LED on the charger turns solid red, indicating charging has begun.
Charging a fully discharged (not over-discharged) 150mAh battery takes approximately 30 minutes. The light goes out
when the charge is complete.
CHARGING
(Solid Red)
MAX CHARGE
(OFF)
CAUTION:
Once charging is complete, immediately remove the battery. Never leave a battery connected to the charger.
Battery Charging
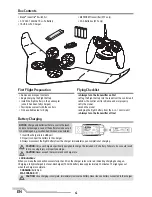
First Flight Preparation
• Remove and inspect contents
• Begin charging the fl ight battery
• Install the fl ight battery in the quadcopter
(once it has been fully charged)
• Familiarize yourself with the controls
• Find a suitable area for fl ying
Flying Checklist
❏
Always turn the transmitter on fi rst
❏
Plug the fl ight battery into the lead from the control unit
❏
Allow the control unit to initialize and arm properly
❏
Fly the model
❏
Land the model
❏
Unplug the fl ight battery from the 5-in-1 control unit
❏
Always turn the transmitter off last
• Blade
®
Inductrix
®
Switch Air
• 3.7V 25C 150mAh 1S Li-Po Battery
• 1S USB Li-Po Charger
• MLP4DSM Transmitter (RTF only)
• 4 AA Batteries (RTF only)
Box Contents


