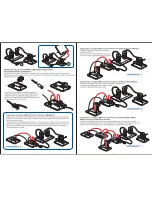
Experiment 8: Using a Wind Turbine to
Power the LED Module
Power the LED module by attaching the wind
turbines cables to their respective slots on the
LED module base. Position turbine to directly face
the direction of wind source.
EXPERIMENT 8
Experiment 10 (alternative): Using the Battery Pack to Perform Electrolysis
(in the case of no sun or wind)
EXPERIMENT 10
Connect the red and black cables to the corresponding terminals located on
the wind turbine and reversible fuel cell. For best results using the WindPitch
to generate hydrogen using the included reversible fuel cell, setup the wind
turbine hub with 3 profiled blades marked C supplied with the kit.
Set the blade pitch to 6 degrees. Make sure that the wind turbine is
generating AT LEAST 2.5 volts. If not, move the wind turbine closer
to the fan until it does. The wind turbine is sensitive to this setting at
high wind speeds.
Allow the table fan and wind turbine to run for about 60 minutes
on high wind speed setting to generate sufficient amounts of
hydrogen and oxygen gases that are stored in the water/gas
tanks.
Procedure for repeated gas production
: Disconnect the small plugs from the tubes connected to the
nozzles on the reversible fuel cell. This will allow water into the inner cylinders to replace the gasses and
reset water levels to “0” line. Re-insert the plugs into the tubes and repeat electrolysis again.
Note: You may also use the battery pack to perform electrolysis (In the case of no wind source)
Make sure the switch on the battery box is in the "off" position before you
place the batteries into the box.
WARNING: If the cable is short circuited the batteries inside could
become hot and potentially cause burns, melting of parts, or create
risk of fire.
Note: Battery’s energy may be consumed after 4-5 times of use.
Please remove the screw from cover of battery box using a screw driver.
Push and slide the cover and open the battery box.
Try NOT to touch the cables when you open the cover.
Place two AA batteries as indicated.
Push and slide the battery box cover to closed position and screw fightly
into place using screw driver.
Push and slide
open the cover
AA Batt
ery
AA Batt
ery
Remove the screw
from the cover
If the wind is sufficient the system will now start to produce
hydrogen and oxygen in the respective cylinders. When
bubbles begin to surface in the hydrogen cylinder the cycle is
complete. Disconnect the reversible fuel cell from the Wind
Turbine.
EXPERIMENT 9
DISCOVERING WIND ENERGY
Assembly of the Wind Turbine
Please refer to the Wind Energy Education Kit Assembly Instructions included in your RESEK for reference
in assembling the Wind Turbine.
Below table indicates expected RPM speed, current, voltage, and power when placing the WindPitch in
constant windspeed of 10mph when connected to load of 50 Ohms. This level of resistance may be applied
using common potentiometer (not provided) or Horizon’s variable resister module.
Experiment 9: Preparation of the Electrolyzer Module and Wind Powered
Hydrogen Production
4
5
Blade Type
Blade A
3
10
50
1.15
28
0.03
400
490
705
0.04
0.125
30
50
1.35
2.50
50
50
10
10
3
3
No. of Blade Wind Speed
(mph)
Load
(Ohm)
Output Voltage
(V)
Output Current
(mA)
Output Power
(W)
Rotor Speed
(RPM)
WindPitchTechnical Specifications:
Blade B
Blade C
Battery
Pack


