background image

External antenna jack, earphone jack, audio/video(AV)

input jack, External power input jack.

Specifications

VHF-L: CH1~5,49.75MHz~91.75MHz; VHF-H:

CH6~12,168.25MHz~222.75MHz;UHF:CH13~57,471.2

5MHz~869.75MHz;

Z1~Z7: 112.25MHz~166.75MHz; Z8~Z35:

224.25MHz~446.75MHz.

Colour TFT-LCD

10.2 Inches

Type

Product name

Receivable

Cable channels

Display component

Screen dimensions

Connectors

26

A102 V W 01

Color TFT-LCD module

Two stereo speaker

Speaker

Содержание ELITE 5.1T

Страница 1: ...T R E A D M I L L Owner s Guide ELITE 5 1T HRC Entertainment...

Страница 2: ......

Страница 3: ...7 USING YOUR THR ZoneTM PROGRAM 28 USING YOUR EXPEDITION PROGRAM 30 TROUBLESHOOTING 31 COMMON QUESTIONS 33 MAINTENANCE PROCEDURES 35 EXERCISE GUIDELINES 36 DEVELOPING A FITNESS PROGRAM IMPORTANCE OF W...

Страница 4: ...nding conductor can result in a risk of electric shock Check with a qualified electrician or serviceman if you are in doubt as to whether the product is properly grounded Do not modify the plug provid...

Страница 5: ...es When the treadmill is in use young children and pets should be kept at least 10 feet away CLEANING Clean with soap and slightly damp cloth only never use solvents OTHER SAFETY TIPS FOR YOUR HORIZON...

Страница 6: ...and enjoying your new machine A more complete knowledge of your new Horizon Fitness treadmill will assist you in realizing your goal of a healthy lifestyle CAUTION BEFORE BEGINNING ANY EXERCISE PROGRA...

Страница 7: ...e ground NOTE on some models the foot lock latch might be on the right hand side MOVING Your Horizon Fitness treadmill has a pair of transport wheels built into the base frame To move make sure the tr...

Страница 8: ...switch is lit You will hear a beep and the console will light up SAFETY KEY Your treadmill will not start unless the safety key is placed on the safety key holder Attach the clip end securely to your...

Страница 9: ...Y O U R T R E A D M I L L WATER BOTTLE HOLDER TOUCH PAD CONSOLE UPRIGHT SUPPORT QUICK INCLINE KEY LEVELERS TRANSPORT WHEEL QUICK SPEED KEY GRIP PULSE HANDLEBARS MOTOR COVER SIDE RAIL END CAP RUNNING...

Страница 10: ...E T T I N G S T A R T E D QUICK START UP Simply press the Start button to begin exercising PAUSE Press the Stop button to pause your workout RESET Press and hold the Stop button to reset the treadmill...

Страница 11: ...mph as well This holds true for the incline based programs as well CHANGING THE ELEVATION When in a program the user is able to change the incline of the treadmill by pressing the plusquick incline k...

Страница 12: ...as been chosen press the select button Once in a program the user may change the difficulty level by pressing the up or down buttons or by pressing the quick speed keys NOTE If one segment is changed...

Страница 13: ...ing your workout DISTANCE Miles traveled during your workout TIME Shown as Minutes Seconds View the time remaining or the time elapsed in your workout PULSE Shown as Beats Per Minute Used to monitor y...

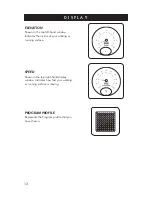
Страница 14: ...cates the incline of your walking or running surface SPEED Shown in the top right hand display window Indicates how fast your walking or running surface is moving PROGRAM PROFILE Represents the Progra...

Страница 15: ...o 30 minutes ROLLING Speed changes time defaults to 30 minutes WEIGHT LOSS Elevation changes time defaults to 30 minutes HILL RUN Elevation and speed changes time defaults to 30 minutes HILL CLIMB Ele...

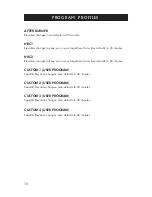
Страница 16: ...ion changes to keep you in your target heart rate time defaults to 30 minutes CUSTOM 1 USER PROGRAM Speed Elevation changes time defaults to 30 minutes CUSTOM 2 USER PROGRAM Speed Elevation changes ti...

Страница 17: ...8 0 9 5 7 5 9 5 7 5 9 0 6 5 9 0 6 5 5 0 3 0 2 5 1 2 3 4 5 6 7 8 9 10 11 12 13 14 15 16 17 18 19 20 21 22 23 24 25 26 27 28 29 30 Level 1 2 5 3 0 3 0 3 5 3 0 3 5 4 5 5 0 4 5 5 0 4 5 5 0 4 5 5 0 4 5 5 0...

Страница 18: ...0 0 0 5 0 5 0 5 0 5 0 5 1 0 1 0 1 0 0 5 0 5 0 5 0 5 1 0 1 0 1 0 0 5 0 5 0 5 0 5 0 5 0 0 0 0 0 0 0 0 0 0 Speed 2 5 3 0 3 5 4 0 3 5 4 0 5 5 6 0 5 5 6 0 5 5 6 0 5 5 6 0 5 5 6 0 5 5 6 0 5 5 6 0 5 5 6 0 5...

Страница 19: ...2 5 4 0 4 5 5 5 5 5 6 0 6 0 6 5 6 5 7 0 7 0 7 5 7 5 8 0 8 0 8 0 7 5 7 5 7 0 7 0 6 5 6 5 6 0 6 0 5 5 5 5 5 0 4 5 3 0 2 5 Speed 2 5 4 0 6 0 8 0 6 0 8 0 6 0 8 5 6 5 8 5 6 5 8 5 7 0 8 5 7 0 8 5 7 0 8 5 7...

Страница 20: ...remove dust or dirt from the television Keep the television away from extreme hot or cold locations The television s storage temperature range is 400C 600C The television s operating temperature range...

Страница 21: ...1 2 1 DISPLAY 2 BUILT IN SPEAKER 3 REMOTE SENSOR 4 VOLUME 5 VOLUME 6 CHANNEL 7 CHANNEL 8 MODE 9 MENU 10 SET 13 13 TV CONNECTION 12 EARPHONE JACK 20 11 VIDEO IN 11 12...

Страница 22: ...Digit key 0 9 and Mirror image setting AV TV slection Main menu Tens digit channel select Setting picture display dimension Volume increase submenu adjust Volume decrease submenu adjust To the next hi...

Страница 23: ...the TV reduces 4 Power power switch Press this button to turn off the TV Press it again to turn on the machine 5 MUTE mute Press this button to mute the sound press it again or VOL VOL to resume norm...

Страница 24: ...s 63 and the minimum value is 0 Note When you press MENU at AV pattern TV screen will only display this picture PICTURE SYSTEM EXIT PRESET 2 SYSTEM 1 The function in this Menu is selecting Colour Syst...

Страница 25: ...on completion of Auto Search Choose the channel in the order of V L V H UHF And return to program NO 0 upon completion 5 All the setting numbers will be preserved automatically 6 Press VOL VOL to choo...

Страница 26: ...Whether the channel is tuned correctly Dark picture Check Whether brightness and contrast are set correctly Check that the ambient temperature is not too low Vague picture or unstable picture Check Wh...

Страница 27: ...9 75MHz 91 75MHz VHF H CH6 12 168 25MHz 222 75MHz UHF CH13 57 471 2 5MHz 869 75MHz Z1 Z7 112 25MHz 166 75MHz Z8 Z35 224 25MHz 446 75MHz Colour TFT LCD 10 2 Inches Type Product name Receivable Cable ch...

Страница 28: ...4 Once the desired Pace Speed and distance has been chosen press the Start key 5 Upon pressing Start the program will be broken up into 10 segments which will not be displayed on console as 8 LED ligh...

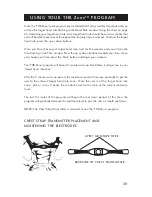
Страница 29: ...tart button and begin your workout The THR Zone program will have a 5 minute warm up time before it will get you in your target heart rate zone After the 5 minute warm up period the resistance level w...

Страница 30: ...bars do not grip tightly Holding the grips tightly may elevate your blood pressure Keep a loose cupping hold It is recommended that you hold the grip pulse handlebars only long enough to see your hear...

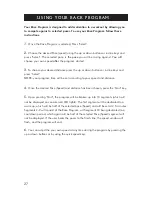
Страница 31: ...l Choose your desired incline level using the up or down buttons or incline keys and press Select 5 Onec you have chosen your desired incline level for all 15 segments you will need to input your name...

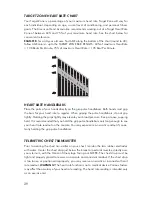
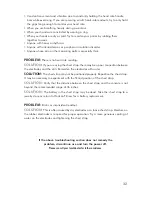
Страница 32: ...all outlet during elevation PROBLEM The running belt does not stay centered during a workout SOLUTION Verify that the treadmill is on a level surface Verify that the belt is properly tightened refer t...

Страница 33: ...e skin Remoisten the electrodes with water SOLUTION The chest strap may not be positioned properly Reposition the chest strap It may be necessary to experiment with the fit and position of the chest s...

Страница 34: ...s long as the sounds your treadmill makes are no louder that a normal conversational tone of voice it is considered normal noise If your treadmill is louder than this you may want to call localdealer...

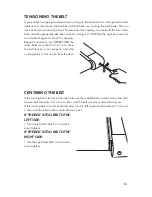
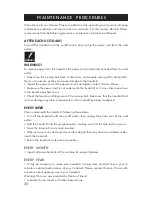
Страница 35: ...r bolts more than 1 4 turn at a time the belt tension is set properly when the running belt is 1 4 of an inch from the deck CENTERING THE BELT If the running belt is too far to the right side use the...

Страница 36: ...n and alignment of the running belt Make sure that the treadmill belt will not damage any other components on the treadmill by being misaligned EVERY WEEK Clean underneath the treadmill following thes...

Страница 37: ...tary during the past year it may be a good idea to keep your exercise times to as little as five minutes initially Your body will need time to adjust to the new activity If your goal is weight loss a...

Страница 38: ...against the back of your thigh for a count of 15 seconds Repeat with your right ankle and hand and continue alternating for a total of 8 repetitions SEATED TOE TOUCH Sit on the floor with your legs t...

Страница 39: ...rable terms and then put your goals in writing The more specific you can be the easier it will be to track your progress If your goals are long term divide them up into monthly and weekly segments Lon...

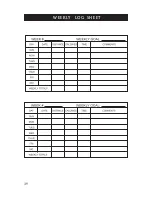
Страница 40: ...WEEKLY LOG SHEET 39...

Страница 41: ...MONTHLY LOG SHEET 40...

Страница 42: ...or maintenance or installation of parts or accessories not originally intended or compatible with the treadmill as sold The warranty does not apply to damage or failure due to accident abuse corrosion...

Страница 43: ......

Страница 44: ...Designed for life TM HORIZON FITNESS Rev 1 0...

Отзывы: