background image

8

9

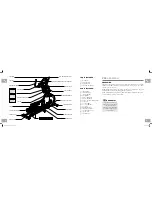
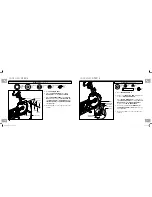
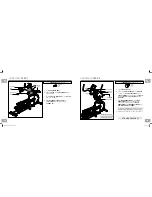
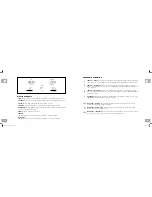
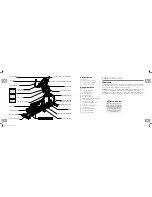
SPRING WASHER (N)

BOLT (M)

FLAT WASHER (O)

WAVY WASHER (L)

FLAT WASHERS (K)

LOWER LINK ARM

PEDAL ARM BRACKET

BOLT (J)

SPRING WASHER (I)

FLAT WASHER (H)

WAVY WASHER (G)

PEDAL ARM

CRANK

PEDAL ARM WHEEL

GUIDE RAIL

CONSOLE MAST

PRE-INSTALLED BOLTS

CONSOLE CABLE

MAIN FRAME

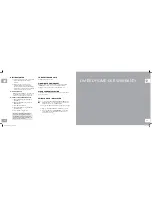
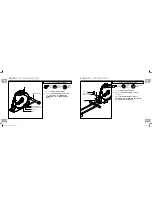
ASSEMBLY 

STEP 3

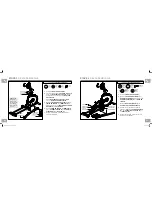
ASSEMBLY 

STEP 4

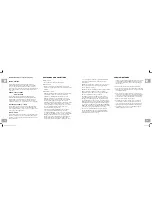
Open 

hardware bag 4

.

Slide 1 

flat washer (K)

, 1 

wavy 

washer (l) 

and another 

flat washer 

(K)

 onto the 

lower linK arm

.

Slide the 

lower linK arm

 into the 

pedal arm bracKet

.

Attach the 

lower linK arm

 to the 

pedal arm bracKet

 using 1 

flat 

washer (o)

, 1 

spring washer (n)


and 1 

bolt (m)

.

Repeat steps B–D on the opposite side of 
the elliptical.

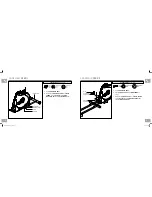
FLAT
WASHER (K)
27 mm
Qty: 4

WAVY
WASHER (L)
29 mm
Qty: 2

SPRING WASHER (N)
15.4 mm
Qty: 2

FLAT WASHER (O)
20 mm
Qty: 2

BOLT (M)
20 mm
Qty: 2

HARDWARE BAG 4

 CONTENTS :

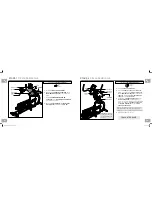
NOTE: Be 

careful not 

to pinch any 

wires while 

attaching the 

console mast.

Open 

hardware bag 3

.

Carefully pull the 

console cable

 through 

the 

console mast

 using the twist tie located 

inside the 

console mast

.

gently slide the 

console mast

 onto the 

main frame

 and attach 

console mast

 to 

main frame

 using 

pre-installed bolts

.

Slide 

wavy washer (g)

 over 

cranK


followed by 

pedal arm

 as shown. Rest 

pedal arm wheel

 on 

guide rail

.

Attach the 

pedal arm

 to the 

cranK

 using 1 

flat washer (h)

, 1 

spring washer (i)


and 1 

bolt (J)

.

Repeat steps D–E on the opposite side of the 
elliptical.

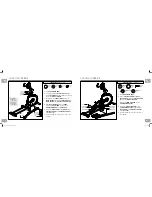
BOLT (J)
20 mm
Qty: 2

SPRING WASHER (I)
15 mm
Qty: 2

FLAT WASHER (H)
20 mm
Qty: 2

WAVY WASHER (G)
22.5 mm
Qty: 2

HARDWARE BAG 3

 CONTENTS :

EX-59-CE5.2-OM-rev1.2.indd   8-9

7/6/10   4:33 PM

Содержание CE5.2

Страница 1: ...TICA Read the ELLIPTICAL guide before using this owner s manual Lire le GUIDE D UTILISATION DE L EXERCISEUR ELLIPTIQUE avant de se servir du pr sent MANUEL DU PROPRI TAIRE Lea la GU A DEL USUARIO DE L...

Страница 2: ...ting noises To prevent damage to the elliptical the assembly instructions must be reviewed and corrective actions should be taken Before proceeding find your elliptical s serial number located on a wh...

Страница 3: ...NT PRECAUCI N KEEP HANDS AND FEET AWAY FROM THIS AREA GARDER LES MAINS ET LES PIEDS LOIN DE CETTE REGION MANTENGA LAS MANOS Y LOS PIES LEJOS DE ESTA AREA TOOLS INCLUDED F F Screwdriver F F 5 mm L Wren...

Страница 4: ...ING WASHERS B ARC WASHERS C STABILIZER TUBE MAIN FRAME ASSEMBLY STEP 2 A Open hardware bag 2 B Align guide rail set with main frame as shown C Attach the guide rail set to the main frame using 4 bolts...

Страница 5: ...R L 29 mm Qty 2 SPRING WASHER N 15 4 mm Qty 2 FLAT WASHER O 20 mm Qty 2 BOLT M 20 mm Qty 2 HARDWARE BAG 4 CONTENTS Note Be careful not to pinch any wires while attaching the console mast A Open hardwa...

Страница 6: ...BER WASHER P 26 mm Qty 2 HARDWARE BAG 5 CONTENTS ASSEMBLY STEP 6 A Open hardware bag 6 B Align end of lower link arm with bracket on bottom of lower handlebar C Place teflon washers S on both sides of...

Страница 7: ...ng the console Attach console to console mast using 4 bolts X D Slide upper handlebars onto lower handlebars making sure handlebars are joined together completely Secure upper handlebars to lower hand...

Страница 8: ...SIC OPERATION section in the elliptical guide has instructions for the following LOCATION OF THE Elliptical POWER GROUNDING INSRUCTIONS FOOT POSITIONING MOVING the elliptical LEVELING the elliptical P...

Страница 9: ...ter used to confirm a selection K Change display press to change display feedback during workout L Fan key press to turn fan on and off M Fan personal workout fan N Speakers music plays through speake...

Страница 10: ...n range from 5 00 99 00 TIME will count down DISTANCE and CALORIES will count up from zero TARGET 2 DISTANCE Allows user to set a target based on distance they would like to complete Distance target c...

Страница 11: ...console GETTING STARTED 1 Check to make sure no objects are nearby that will hinder the movement of the elliptical 2 Plug in the power cord and turn the elliptical ON Switch is located at the bottom...

Страница 12: ...r nature in connection with the purchase use repair or maintenance of the equipment Horizon Fitness does not provide monetary or other compensation for any such repairs or replacement parts SERVICE RE...

Страница 13: ...ser des bruits irritants Pour viter les dommages l exerciseur elliptique relire les instructions d assemblage et prendre les mesures correctives qui s imposent Avant de continuer trouvez le num ro de...

Страница 14: ...LEJADOS DE LA M QUINA ESTE EQUIPO ES S LO PARA EL USO DEL CONSUMIDOR BRAS DE LIAISON INF RIEUR OUTILS INCLUS F F Tournevis F F Cl manche en L de 5 mm F F Cl manche en L de 8 mm F F Cl plate de 13 17 m...

Страница 15: ...de visserie 2 B Aligner le JEU DE GLISSI RES et le B TI voir figure C Fixer le JEU DE GLISSI RES au B TI avec 4 BOULONS D 4 RONDELLES lastiques E et 4 RONDELLES PLATES F RONDELLES PLATES F RONDELLES...

Страница 16: ...m Quantit 2 RONDELLE LASTIQUE I 15 mm Quantit 2 RONDELLE PLATE H 20 mm Quantit 2 RONDELLE ONDUL E G 22 5 mm Quantit 2 CONTENU DU SACHET DE VISSERIE 3 Remarque Veiller ne pincer aucun des fils lors de...

Страница 17: ...m Quantit 2 CONTENU DU SACHET DE VISSERIE 5 TAPE 6 DE L ASSEMBLAGE A Ouvrir le sachet de visserie 6 B Aligner l extr mit oppos e du BRAS DE LIAISON INF RIEUR et le support du bas du LEVIER D EXERCICE...

Страница 18: ...xer la CONSOLE au MONTANT DE CONSOLE avec 4 BOULONS X D Assembler les POIGN ES D EXERCICE sur les LEVIERS D EXERCICE en s assurant que les poign es et les leviers d exercice sont bien attach es l une...

Страница 19: ...ISEUR ELLIPTIQUE comporte des instructions relatives ce qui suit EMPLACEMENT DE L EXERCISEUR ELLIPTIQUE INSTRUCTIONS D ALIMENTATION DE MISE LA TERRE POSITIONNEMENT DES PIEDS D PLACEMENT DE L EXERCISEU...

Страница 20: ...ouche pour faire une pause terminer une s ance d entra nement Tenir la touche pendant 3 secondes pour r initialiser la console H TOUCHES Servent r gler le degr de r sistance I TOUCHES DE R GLAGE RAPID...

Страница 21: ...a DUR E Le d compte de la DISTANCE et des CALORIES progresse partir de z ro TARGET 2 DISTANCE OBJECTIF 2 DISTANCE Permet l utilisateur de fixer un objectif selon la distance qu il veut parcourir Cet o...

Страница 22: ...POUR COMMENCER 1 S assurer qu aucun objet ne risque d entraver le fonctionnement de l exerciseur elliptique 2 Enficher le cordon d alimentation et mettre l exerciseur elliptique sous tension L interr...

Страница 23: ...at l utilisation la r paration ou l entretien de l quipement Horizon Fitness ne consent aucune compensation mon taire ou autre pour de telles r parations ou le co t des pi ces de rechange y compris no...

Страница 24: ...ra evitar da os a la m quina el ptica es necesario repasar las instrucciones de ensamblaje y hacer las correcciones necesarias Antes de proceder favor de encontrar su numero de serie localizado en una...

Страница 25: ...PIVOTANTES JUEGO DE RIELES GU A CUBIERTA POSTERIOR ALTOPARLANTES HERRAMIENTAS INCLUIDAS F F Destornillador F F Llave en L de 5 mm F F Llave en L de 8 mm F F Llave de tuercas plana de 13 17 mm PIEZAS I...

Страница 26: ...TUBO ESTABILIZADOR ARANDELAS DE ARCO C ARANDELAS EL STICAS B PERNOS A BASTIDOR PRINCIPAL A Abra la BOLSA DE TORNILLER A 2 B Coloque el JUEGO DE RIELES GU A alineado con el BASTIDOR PRINCIPAL como se...

Страница 27: ...A E Conecte el BRAZO DEL PEDAL al BRAZO DE MANIVELA con 1 ARANDELA PLANA H 1 ARANDELA EL STICA I y 1 PERNO J F Repita los pasos D E en el lado opuesto de la m quina el ptica PERNO J 20 mm Cantidad 2 A...

Страница 28: ...25 mm Cantidad 4 ARANDELA DE GOMA P 26 mm Cantidad 2 A Abra la BOLSA DE TORNILLER A 6 B Alinee el extremo opuesto del BRAZO ARTICULADOR INFERIOR con la m nsula que est en la parte inferior del BAST N...

Страница 29: ...mm Cantidad 3 A Abra la BOLSA DE TORNILLER A 8 B Conecte los CABLES DE LA CONSOLA a la CONSOLA C Meta con cuidado los CABLES DE LA CONSOLA en el POSTE DE LA CONSOLA antes de sujetar la CONSOLA Sujete...

Страница 30: ...USUARIO de la M QUINA EL PTICA contiene instrucciones para lo siguiente D NDE COLOCAR SU M QUINA EL PTICA INSTRUCCIONES DE CONEXI N EL CTRICA Y DE CONEXI N A TIERRA COLOCACI N DE LOS PIES TRANSPORTE...

Страница 31: ...terminar su sesi n de ejercicio sostenga oprimida esta tecla durante 3 segundos para poner en ceros la consola H TECLAS se usan para regular la resistencia I Teclas DE AJUSTE r pidO se usan para llega...

Страница 32: ...O se cuenta en forma regresiva La DISTANCIA y las CALOR AS comienzan a contarse a partir de cero TARGET 2 DISTANCE META 2 DISTANCIA Le permite al usuario establecer una meta basada en la distancia que...

Страница 33: ...EMPEZAR 1 Verifique que no haya ning n objeto cerca que pudiera impedir el movimiento de la m quina el ptica 2 Conecte el cable de corriente y encienda la m quina el ptica El interruptor de encendido...

Страница 34: ...del equipo Horizon Fitness no ofrece compensaci n monetaria ni de otro tipo por dichas reparaciones ni costos de reemplazo de piezas incluso pero sin limitarse a cuotas de membres a en gimnasios tiem...

Страница 35: ...y rem dier Remarque Lire la section D pannage du GUIDE D UTILISATION DE L EXERCISEUR ELLIPTIQUE avant de contacter le service de soutien technique la client le Pour plus ample information sur le prod...

Отзывы: