background image

 | Chargers | 

228

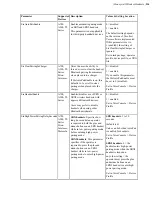
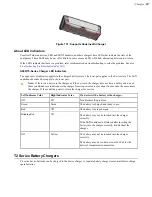
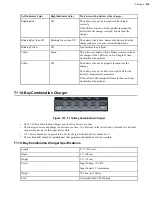
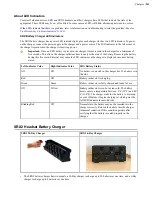
Figure 158: T2 Series Battery Charger

• The T2 series battery charger includes five battery slots. The charger can be used to store and charge up to five

batteries at a time.

• Wall mounts are available that can accommodate a single charger, multiple chargers, and battery chargers.

T2 Series Battery Charger Specifications

Length

Approximately 24" (61 cm)

Length with Desk Mount Feet

Approximately 24" (61 cm)

Width

Approximately 2.5" (6.5 cm)

Width with Desk Mount Feet

Approximately 5" (12.7 cm)

Height

Approximately 5.25" (13.3 cm)

Height with Desk Mount Feet

Approximately 5.375" (13.65 cm)

Power

90-264 Vac 50/60 Hz 72 W
Uses standard IEC 630 cord

Operating Temperature

50° to 140° F (10° to 40° C)

Storage Temperature

-22° to 158° F (-30° to 70° C)

Humidity

Functional to 90% non-condensing

Note: 

 Packaging varies for product shipments. Generally, packing materials are about 15% of the total

shipment weight.

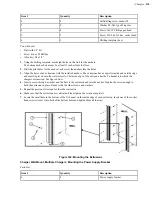
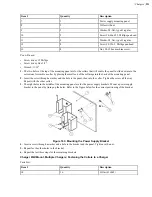
Assembling the Stands for the T2 Charger

You will need a #2 Phillips screwdriver
Parts list:
• Charger stand(s)
• 2 rubber feet per stand
• 4 Phillips screws per stand

Содержание Vocollect

Страница 1: ...Honeywell Vocollect Hardware Reference ...

Страница 2: ......

Страница 3: ...se or disclosure thereof may be made without written permission from Honeywell Warning and Disclaimer Honeywell International Inc HII reserves the right to make changes in specifications and other information contained in this document without prior notice and the reader should in all cases consult HII to determine whether any such changes have been made The information in this publication does no...

Страница 4: ......

Страница 5: ... 26 Understanding Talkman Commands 26 Options for Hearing Impaired Users 27 Part Numbers Vocollect Talkman Devices 27 Part Numbers Talkman Accessories 28 Part Numbers Talkman MP Solutions 29 Choosing the Right Headset 29 Part Numbers Wired Headsets 30 Part Numbers Wired Headset Accessories 31 Part Numbers Wireless Headsets 33 Part Numbers Wireless Headset Accessories 33 Part Numbers Chargers 34 Ch...

Страница 6: ...0 T5 High Performance Batteries Specifications 83 Charging an A500 or T5 Battery in a Device 83 Charging an A500 or T5 Series Battery 84 Removing an A500 T2 Series or T5 Series Device From a Charger 84 Inserting a Battery into a Talkman A500 T5 Series or T2 Series Device 84 Removing a Battery from a Talkman A500 T5 Series or T2 Series Device 85 Battery Warm Up Time 86 About LED Indicators 86 A500 ...

Страница 7: ...VMT Device from Vehicle 120 VMT Installation Best Practices 121 Accessories 123 T5 A500 Adjustable Shoulder Harness 124 Belts and Belt Clips 124 Device Covers 126 Chapter 6 Talkman T2 Series 129 T2 Series Specifications Talkman T2x and Talkman T2 130 Charging a T2 Series Device 131 T2 Series High Capacity Battery Specifications 131 Charging a T2 Series Device 132 Removing an A500 T2 Series or T5 S...

Страница 8: ...set 158 SR 20 Headset Specifications 158 SR 21 Headset Specifications 159 Replacing the Ear Pad on the SR 20 Series Headsets 159 SR 30 Vocollect High Noise Headset 160 SR 30 Headset Specifications 160 SR 31 Headset Specifications 160 SR 35 Vocollect Hard Hat Headset 161 SR 35 Headset Specifications 161 SR 40 Vocollect Dual Cup Headset 162 SR 40 Headset Specifications 162 Care and Use of Headsets a...

Страница 9: ...airing an SRX2 Headset 207 Pairing a Headset by VoiceConsole Pairing 210 More about SRX SRX2 Pairing Modes 211 Breaking a Pairing 212 Headset Pairing FAQ 212 Supervisor Audio with SRX SRX2 Headsets 213 Configuration Parameters for SRX SRX2 Headsets 213 Care and Use of Headsets and Microphones 215 Wearing Headsets General Procedures 216 Adjusting Headsets for Comfort 216 Removing Headsets 217 Using...

Страница 10: ...less Listening Systems UTX B2 and URX P2 252 Setting up the Receiving Radio 252 Setting Up the Transmitting Radio 253 Connecting the Sony Wireless Listening Kit to a Talkman Device 253 Inline Adapter Cables Talkman and Handheld Devices 253 Connecting an Inline Adapter Cable to a Handheld Device 254 Connecting Inline Adapter Training Cables 254 Part Numbers Listening Kits 255 Chapter 13 Troubleshoo...

Страница 11: ...gulatory Compliance 283 Statement of Agency Compliance 284 Federal Communications Commission Compliance 284 Canadian Compliance 286 Cumplimiento de normas mexicana 286 Vietnamese Compliance 286 Japanese Compliance 287 Brazilian Compliance 287 United Arab Emirates Compliance 288 Chinese Compliance 288 Маркировка EAC и соблюдение Российские нормативов Russian Compliance 292 CE Marking European Compl...

Страница 12: ......

Страница 13: ...pherals This document includes the following information Safety information Hardware specifications Installation procedures and basic operating instructions for Honeywell hardware and or third party devices that are compatible with Honeywell software Part numbers Regulatory and compliance statements Troubleshooting guidance Audience This document is intended to be used as a reference resource by a...

Страница 14: ... handling instructions for the battery before and during use The following are general cautions and guidelines only and as such may not include every possible usage scenario The manufacturer will not be liable for actions taken or accidents caused by any use not documented below Warning Do not disassemble open drop mechanical abuse crush bend deform puncture or shred a battery Do not modify or rem...

Страница 15: ...ransit Honeywell batteries can be shipped under Special Provision 188 of 49 CFR 172 102 or IATA exception A45 Never disassemble a battery Do not leave a battery under strong sunshine or expose a battery to rain or water Store batteries in a rugged receptacle and cover with a lid Wearing Securing and Mounting Honeywell Mobile Industrial Devices Honeywell mobile industrial devices are powered by bat...

Страница 16: ...shing event do the following The device is in a flammable area or next to flammable materials Warning DO NOT PICK UP THE DEVICE OR PUT IT ON YOUR BODY Lithium Ion cells that have been crushed can experience an internal short causing the cells to overheat It can take several minutes for the cells to reach temperatures high enough to overheat An overheating lithium ion cell can often be detected by ...

Страница 17: ...o clean equipment Other products have not been tested and may degrade the equipment Cleaning Plastics Cleaning Hard Plastics Clean the hard plastics on headsets devices chargers and batteries with a soft cloth that is wet with a solution of 70 isopropyl alcohol and 30 water Use a soft brush to keep the pocket areas of chargers free of dust and debris that may interfere with the seating of equipmen...

Страница 18: ...lease contact that reseller first for support or purchase questions Honeywell Vocollect Technical Support Submit incidents or questions to http vocollect custhelp com or contact Honeywell Vocollect Technical Support United States Phone 1 866 862 7877 Email vocollectsupport honeywell com Americas outside U S Australia New Zealand Phone 1 412 829 8145 option 3 option 1 Email vocollectsupport honeywe...

Страница 19: ...4 0 1628 55 2900 vocollectEMEA honeywell com Honeywell Vocollect Solutions Latin America North 52 55 5241 4800 x4915 South 1 412 349 2477 vocollectLatin_America honeywell com Honeywell Vocollect Solutions Japan New Pier Takeshiba South Tower 20F 1 16 1 Kaigan Minato ku Tokyo 105 0022 Japan Phone 813 6730 7234 vocollectJapan honeywell com Honeywell Vocollect Solutions Asia Pacific 21 F Honeywell To...

Страница 20: ......

Страница 21: ... VMT Vehicle Mounted Talkman and T5 VMT are A500 and T5 devices with battery adapters mounted to a warehouse vehicle such as a forklift After the device is mounted the battery adapter is placed in the battery area of the device and connected to the vehicle s power source Talkman T1 The Talkman T1 has been specifically designed for light duty light industrial environments Talkman T1 device is a lig...

Страница 22: ...pointed up T1 The Talkman T1 must be holstered with the holster opening facing up Holstering with the opening facing down or to the side places the unit at risk for dropping Always use pads and windscreens with Honeywell headsets to protect the equipment and ensure optimum speech recognition performance Honeywell recommends changing headset windscreens every 90 days to ensure the best performance ...

Страница 23: ...ton until the LED indicator turns red The device will store any data that has not been transmitted After a few seconds the device says Powering off The device turns off and the LED indicator light goes out CAUTION Do not remove the battery until the LED indicator is off If you remove the battery when the device is on or sleeping any data collected could be lost You should not turn off the device i...

Страница 24: ...ve a solid green ring segment or a rotating green ring A700 1 Press the Operator button The device says Current operator is operator name Select menu item 2 Press the button or button until the device says Change operator 3 Press the Operator button 4 The device says Please wait and retrieves a list of operators and teams Wait for the device to say Select team If the device says Current operator i...

Страница 25: ...ch of the voice is at the lowest possible setting it says This is lowest Note You can exit this menu without changing the settings by pressing the Play Pause button before you press the Operator button 5 When the pitch reaches the level you want press the Operator button to save the new pitch setting Adjusting the Volume Using Voice Make sure the device is on or sleeping The LED indicator should b...

Страница 26: ...rent operator is operator name Select menu item 2 Press the or button until it says Change speaker 3 Press the Operator button If you use the button to scroll through the options Change Speaker is the sixth menu item in the list 4 Press the or button to hear the next speaker The device says This is female when it toggles to the female voice or This is male to indicate the male voice Note You can e...

Страница 27: ...he audiologist should be made aware of the options that Honeywell products offer with pitch volume and sidetone so that he or she can make appropriate recommendations that may benefit the user without possible side effects Honeywell Technical Support can talk with the user s audiologist to explain these options and make changes in the Talkman device configuration based on the specific recommendati...

Страница 28: ...0 Shoulder Harness Hl 700 1 T5 A500 Belt with Clip BL 700 1 BL 700 7 T5 A500 Clip BL 700 101B For use with BL 700 1 BL 700 7 and HL 700 1 T2 Belt with Clip Belts BL 601 101 7 T2 Clip BL 602 101 T1 Holster BL 100 101 A700 High Capacity Battery BT 902 A700 High Capacity Battery Box of 24 BT 902 100B A700 Standard Battery BT 901 A700 Standard Battery Box of 24 BT 901 100B A700 Maintenance Cable USB m...

Страница 29: ...nput CM 710 110 Power Supply 18 60 VDC Input CM 710 111 Part Numbers Talkman MP Solutions Device Honeywell Part Number Talkman MP Includes 1 Intermec CN70 CN70AN3KN00W1100 1 Vocollect SRX2 Wireless Bluetooth Headset and Battery 1 Vocollect VoiceClient MP license 1 Vocollect VoiceConsole license Available in EMEA countries only Note CN70 and SRX2 battery chargers are sold separately TM CN70 01 Choo...

Страница 30: ...ith a hard hat that has a slot on the side that accepts a Peltor clip This clip is sold separately by Honeywell part number HD 704 101 and is required with each SR 35 headset HD 704 1 HD 704 2 coiled cord SR 31 Vocollect Universal High Noise Headset HD 703 1 SR 30 Vocollect High Noise Headset HD 702 1 SR 21 Vocollect Universal Headset HD 701 1 right angle connector SR 20 Vocollect Lightweight Head...

Страница 31: ...rpads 30 headband pads 10 earpad mounting disks HD 700 101 Windscreen SR Series Headsets Bag of 25 HD 700 102b Cord Clip SR Series Headsets Bundle of 10 HD 700 103b Leatherette Earpad SR 20 21 Bag of 25 HD 700 104b Earpads Foam w Mounting Disks SR 20 21 50 earpads 25 mounting disks HD 700 105b T Bar Pad SR Series Headsets Bag of 25 HD 700 106b Foam Ear Pads SR 20 Bag of 25 HD 700 107b Mounting Dis...

Страница 32: ...d Smooth Leatherette SR 30 31 35 and 40 Bag of 10 HD 702 102b Earpad Textured Leatherette SR 30 31 35 and 40 Bag of 10 HD 702 103b Mounting Disks SR 30 Bag of 5 HD 702 108b Clip SR 35 Vocollect Hard Hat Headset required to mount the headset to a hardhat HD 704 101 Part SR 40 Wired Headset Part Number Windscreen SR Series Headsets Bag of 25 HD 700 102b Cord Clip SR Series Headsets Bundle of 10 HD 7...

Страница 33: ...dset Accessories Part SRX Wireless Headset SRX is not supported with WT41N0 Wearable Terminal Part Number SR Series Windscreen Bag of 25 HD 700 102b SRX Foam Ear Pads Bag of 25 also fits SR 20 HD 700 107b SRX Headband Pads Bag of 30 also fits SR 20 SR 30 SR35 SR 40 HD 700 109b SRX Maintenance Kit 50 foam ear pads 25 ear pad mounting disks HD 800 105b SRX T Bar Pad Replacement Bag of 25 HD 800 106b...

Страница 34: ...cup Requires electronics module and battery HD 1000 113 SRX2 High Noise Hard Hat Headset Mounting Disks Bag of 10 HD 1000 114B SRX2 Hard Hat Headset Clip Fork Attachment to Cup HD 1000 115 SRX2 Headset Foam Earpads 2 with Mounting Disks 20 Earpads Assembled With Mounting Disks HD 1000 125B SRX2 Headset Foam Earpads 3 with Mounting Disks 20 Earpads Assembled With Mounting Disks HD 1000 126B SRX2 Ba...

Страница 35: ... Charger Wall Mount Kit Multiple Chargers CM 604 1 For use with CM 601 1 T1 10 Bay Combination Charger CM 100 T1 Single Charge Cable and Power Adapter CM 103 Charger Headset Honeywell Part Number SRX 5 Bay Battery Charger SRX is not supported with WT41N0 Wearable Terminal CM 801 1 SRX Single Bay Battery Charger SRX is not supported with WT41N0 Wearable Terminal CM 800 1 SRX2 20 Bay Battery Charger...

Страница 36: ......

Страница 37: ... the A700 solution has a USB port that is used for maintenance loading software and connecting supervisor audio The different appliances share the same standard platform The A700 devices can integrate into various IT environments provide an advanced battery management solution and help customers keep better track of their devices The A710 is designed for use with Bluetooth wireless headsets and pe...

Страница 38: ...as been tested to the following specifications 24 drops at 5 feet 1 5m to steel 12 drops at 6 feet 1 8m to steel Humidity 100 condensing Enclosure Rating IP67 Note Packaging varies for product shipments Generally packing materials are about 15 of the total shipment weight A720 Specifications Weight 5 8 ounces 166 81g With standard battery 8 7 ounces 247 09g With high capacity battery 10 5 ounces 2...

Страница 39: ...9 cm Width 2 5 6 35 cm With high capacity battery 3 046 7 74 cm Depth 1 7 4 32 cm I O Ports Maintenance port with audio out Operating Temperature 8 to 122 F 20 to 50 C Storage Temperature 40 to 158 F 40 to 70 C Drop Tested Meets MIL STD 810F method 514 6 In addition the device has been tested to the following specifications 24 drops at 5 feet 1 5m to steel 12 drops at 6 feet 1 8m to steel Humidity...

Страница 40: ...Configuration CanadaPostActivation 0x0 Enables the Canada Post symbology CanadaPostCodeMark 0x2a A single character inserted before the barcode data to indicate the symbology CanadaPostUDSI P6 User defined symbology identifier Range is 0 4 characters HKEY_LOCAL_MACHINE Software Vocollect Imager Australian Post Australian Post Symbology Configuration AustralianPostActivation 0x0 Enables the Austral...

Страница 41: ...vation 0x0 Enables the Codabar symbology CodabarCodeMark 0x44 A single character inserted before the barcode data to indicate the symbology CodabarCheckDigitVerification 0x0 Enables calculation of the check digit CodabarBarCodeLengthL1 0x6 Length value L1 Range is 0x0 to 0xFF 0 to 255 CodabarBarCodeLengthL2 0x0 Length value L2 Range is 0x0 to 0xFF 0 to 255 CodabarBarCodeLengthL3 0x0 Length value L...

Страница 42: ...deMark 0x2a A single character inserted before the barcode data to indicate the symbology Code39CheckDigitVerification 0x0 Enables various check digit calculations where 0 disabled 1 modulo 43 2 French CIP 3 Italian CPI 4 HIBC and 5 AIAG Code39ReadingTolerance 0x0 Tolerance for reading hard to read barcodes where 0 high 1 medium and 2 low Code39BarCodeLengthL1 0x0 Length value L1 Range is 0x0 to 0...

Страница 43: ... and 2 L1 is min L2 is max length GS1 128Identifier 0x1 Enables transmission of AIM identifier before the barcode data This is ignored if GTIN is active Code128SeparatorCharacter 0x1d Separator between multiple concatenated barcodes Code128ConcatenationTransmission 0x0 Multiple label concatenation where 0 disabled 1 only concatenated and 2 concatenate if possible Code128Concatenation 0x0 Enables n...

Страница 44: ...ngth value L3 Range is 0x0 to 0xFF 0 to 255 Matrix2of5BarCodeLengthMode 0x0 Length verification mode where 0 L1 is min length 1 L1 L2 L3 are fixed lengths and 2 L1 is min L2 is max length Matrix2of5UDSI B4 User defined symbology identifier Range is 0 4 characters HKEY_LOCAL_MACHINE Software Vocollect Imager MSI Code MSI Code Symbology Configuration MSIActivation 0x0 Enables the MSI Code Modified P...

Страница 45: ...ge is 0x0 to 0xFF 0 to 255 Standard2of5BarCodeLengthL3 0x0 Length value L3 Range is 0x0 to 0xFF 0 to 255 Standard2of5BarCodeLengthMode 0x0 Length verification mode where 0 L1 is min length 1 L1 L2 L3 are fixed lengths and 2 L1 is min L2 is max length Standard2of5CheckDigitTransmission 0x0 Enable transmission of the check digit Standard2of5Format 0x0 Specifies read mode where 0 Identicon 6 start st...

Страница 46: ...on 0x1 Enables the EAN 13 symbology ISBNConversionforEAN 13 0x0 Converts EAN 13 barcodes starting with 978 or 979 except for 9790 to ISBN International Standard Book Number format EANUPCAdd On2 0x0 Enables decoding of 2 digit EAN UPC supplements EANUPCAdd On5 0x0 Enables decoding of 5 digit EAN UPC supplements EANUPCAdd OnDigitSecurity 0xa Selects how much time is spent looking for add on digits w...

Страница 47: ... defined symbology identifier Range is 0 4 characters EAN 13UDSI F User defined symbology identifier Range is 0 4 characters HKEY_LOCAL_MACHINE Software Vocollect Imager PDF417 PDF417 Symbology Configuration PDF417Activation 0x1 Enables the PDF417 symbology MicroPDF417Activation 0x0 Enables the micro variant of PDF417 PDF417IrregularPDF 0x0 Enables the reading of labels for a symbol length descrip...

Страница 48: ...CISecurity 0xa Selects how much time is spent looking an ECI number if the Code 39 portion of the label is 6 digits Range is 0x0 0x64 0 to 100 where 0x0 is fastest TLC39CodeMark 0x2a A single character inserted before the barcode data to indicate the symbology TLC39UDSI H0 User defined symbology identifier Range is 0 4 characters HKEY_LOCAL_MACHINE Software Vocollect Imager GS1 DataBar GS1 DataBar...

Страница 49: ...d labels DatamatrixCodeMark 0x2a A single character inserted before the barcode data to indicate the symbology DatamatrixUDSI D0 User defined symbology identifier Range is 0 4 characters HKEY_LOCAL_MACHINE Software Vocollect Imager QR Code QR Code Symbology Configuration QRCodeActivation 0x0 Enables the QR Quick Response Code symbology QRCodeInverseVideo 0x0 Decoding mode for black white inverted ...

Страница 50: ...eteTransmission 0x0 Enables transmission of incomplete multicode after the timeout is reached MulticodeCodeMark 0x2a A single character inserted before the barcode data to indicate the symbology MulticodeCodeMarkOfIncomplete 0x2a A single character inserted before the barcode data to indicate the symbology Used when incomplete transmission is enabled and the timeout is reached MulticodeIDForBarcod...

Страница 51: ...es a fixed number of characters for this symbology Range is 0x0 to 0xFFFF 0 to 32767 where 0x0 is any length MulticodeIncompleteTransmissionTimeout 0x0 Timeout in ms before an incomplete multicode is transmitted MulticodeMaskForBarcode1 A regular expression up to 26 characters to filter what barcodes are included in the multicode See manufacturer s website for details MulticodeMaskForBarcode2 A re...

Страница 52: ...arcode editing scenario ActivationForScenario7 0x0 Enables the barcode editing scenario BarcodeIdentifierForScenario1 0x0 Intermec specific symbology identifier 0x0 is all symbologies See manufacturer s website for details BarcodeIdentifierForScenario2 0x0 Intermec specific symbology identifier 0x0 is all symbologies See manufacturer s website for details BarcodeIdentifierForScenario3 0x0 Intermec...

Страница 53: ...racters to filter which barcodes will be edited See manufacturer s website for details MaskForScenario2 A regular expression up to 26 characters to filter which barcodes will be edited See manufacturer s website for details MaskForScenario3 A regular expression up to 26 characters to filter which barcodes will be edited See manufacturer s website for details MaskForScenario4 A regular expression u...

Страница 54: ...collect Imager Decoding Security Decoding Verification CenterDecoding 0x0 Only decodes a barcode if it is in the center of the frame CenterDecodingTolerance 0x0 Amount of tolerance for what is considered the center Range is 0x0 0x64 0 to 100 where 0x0 is the least tolerant must be aimed exactly HKEY_LOCAL_MACHINE Software Vocollect Imager Imager Imager Configuration DecodeMode 0x1 Decoding mode wh...

Страница 55: ... Installation Best Practices on page 64 for further guidance Talkman A700 VMT Mounting Options The Talkman A700 VMT is designed to be installed using RAM Mounting Systems hardware Honeywell supplies a mounting bracket for the A700 and mounting hardware from RAM Mounting Systems Additional hardware mounting bracket options can be purchased directly from RAM Mounting Systems www ram mount com to cus...

Страница 56: ...owered configurations Battery powered configurations enable you to safely mount the Talkman device without interfacing with the vehicle s electrical system Batteries and chargers are required to support these configurations Table 1 Vehicle Powered Vehicle Mount Configurations A500 A700 BL 710 1 VEHICLE MOUNT HOLDER TALKMAN R T5 SERIES BL 904 POWERED VEHICLE DOCK A700 SERIES BL 710 101 VEHICLE MOUN...

Страница 57: ...R T5 SERIES Order one of the following to attach the arm to the vehicle BL 710 101 VEHICLE MOUNT HOLDER BASE SCREW ON ATTACHMENT TALKMAN R T5 SERIES BL 710 103 VEHICLE MOUNT CLAMP TALKMAN R T5 SERIES BL 710 104 VEHICLE MOUNT CLAW TALKMAN R T5 SERIES CM 710 102 CABLE BATTERY ADAPTER PUSH ON TALKMAN R T5 A500 SERIES BT 710 BATTERY ADAPTER DC DC TALKMAN R T5 SERIES Order one of BT 901 BATTERY A700 SE...

Страница 58: ...figurations using a Honeywell battery without connecting to the vehicle s power source The BL 903 unpowered vehicle dock which has no power components should be used in lieu of the BL 904 No wiring or power converters are required however the Talkman device will need to be removed and placed in a charger to recharge its battery or for updating software Table 2 Battery Powered Vehicle Mount Configu...

Страница 59: ...TERY A700 SERIES STANDARD BT 902 BATTERY A700 SERIES HIGH CAPACITY Position the Talkman A700 VMT Note Do not connect the vehicle mount holder directly to the vehicle Use an approved mounting device to prevent damage to the device from shock and vibration 1 Determine the best position for the device and all the associated components For optimal antenna positioning the device should be placed in the...

Страница 60: ... so far that these pieces touch Route the Electrical Cables You will need the following equipment One fuse holder from Cooper Bussman Honeywell recommends using a Cooper Bussmann HFA series in line waterproof fuse One fuse Honeywell recommends a Cooper Bussmann ABC 20 R fuse Three spade connectors Four small cable ties Input cable part number 236 288 001 Fasteners Important All components used in ...

Страница 61: ...e battery leaving enough of the cable to reach the battery terminals 3 Strip the battery cable jacket back 31 to 36 cm 12 to 14 in 4 Install heat shrink tubing on the battery cable jacket 5 Insert and secure the fuse in the fuse holder assembly 6 Assemble the negative wire 1 Strip 0 60 cm 0 25 in of insulation from the green and white wires 2 Twist the wires together 3 Crimp a 3 8 inch terminal ri...

Страница 62: ...e fuse link terminal ring from the input power cable onto positive battery clamp bolt 4 Place another 3 8 inch washer onto the battery clamp 5 Thread another 3 8 inch nut onto the battery clamp bolt and tighten the nut securely 6 Repeat Steps 1 through 5 for the negative wire 7 Connect the ground wire Connect to the Side Battery Terminal The procedure you use to connect to the vehicle battery depe...

Страница 63: ... the nut installed in Step 2 to secure the washers and cables firmly in place 10 Repeat Steps 1 through 9 for the negative wire 11 Connect the ground wire For help see the next section Fasten the Ground Wire 1 The braided wire on the vehicle battery cable is the grounding strap To ensure proper cable shielding fasten the ground strap to the vehicle sheet metal 2 Drill a small hole into the metal t...

Страница 64: ...ed here are enjoying increased productivity with Talkman devices integrated on their vehicles Do not remove Talkman A700 devices from VMT configurations Talkman VMT devices were designed and intended for easy installation They were not designed for frequent removal The exception is the Talkman A730 which was designed to be removed from the holster for occasional scanning not to exceed approximatel...

Страница 65: ...o place if they might be moved during normal operations The parts used for mounting the Talkman were designed for a fixed position with easy adjustment While unlikely these parts may loosen over time with inadvertent impacts of daily use especially if the mountings have not been firmly secured or if workers attempt to adjust the mounting manually To prevent this issue remove the user adjustable ha...

Страница 66: ...unces 130 41g Electrical Specifications Cells The high capacity battery pack uses two lithium ion cells Nominal voltage 3 7V Capacity 4400mAhr or greater Protection circuit characteristics The pack contains a protection circuit that prevents over and under voltage conditions on the cells and protects the pack from damage as a result of a short circuit between the positive and negative terminals of...

Страница 67: ...the indicator still does not turn on try another charger slot CAUTION Do not attempt to place the device into the charger unless you have first disconnected the headset and any other peripheral devices Do not remove the battery from the device when placing a device into a charger Charging an A700 Device Battery Note A battery is fully charged and can be removed from the charger when the ring LED i...

Страница 68: ...ve the battery until the LED indicator is off If you remove the battery when the device is on or sleeping any data collected could be lost 1 Hold the device in one hand 2 Press the battery release button all the way down until the top of the battery pops out from the battery compartment Figure 10 Removing the Battery From a Device 3 Lift the battery out of the compartment Scanning with the Talkman...

Страница 69: ...Indicators The Talkman A700 products have several LED indicators to inform you of different states The indicators and their blinking patterns are described in the following sections Device State Indicator The device state indicator is a ring that is divided into a larger and smaller segment Figure 11 Ring Segments on Device State Indicator Color Blink Pattern Device State Off Off Off Green Small s...

Страница 70: ...k Pattern Indicator Color Battery Charging State Notes Off Off The battery in the device has no battery health issues In other words the battery is healthy On Red The battery in the device has a health issue A user can use a fully charged battery with a health issue However the supervisor should refer to VoiceConsole to get more information regarding the battery health issue which might mean repla...

Страница 71: ...eral Discoverable Blink Pattern Device Bluetooth is discoverable by other devices Slow Pulse Bluetooth is on and enabled but is not connected not in discovery or paging mode and not discoverable Network Indicator Network Indicator Network State What is Happening When This Occurs On Radio enabled but unconfigured The radio is powered on but the device is not attempting to connect to the network No ...

Страница 72: ...the device with the raised oval on an unconfigured device Ensure that the ovals are fully aligned then hold the two devices steadily against each other Figure 12 Transferring the Configuration Using TouchConfig 6 Watch the device state LED indicator ring on the receiving device to confirm configuration success or failure Successful configuration transfer The receiving device LED indicator ring bli...

Страница 73: ...n where you saved the inf and cat files 7 Select the TalkmanUsbSerial inf file If there is a driver warning or a prompt about proceeding indicate that you want to continue Collecting Platform Debug Logs from A700 Devices When you connect an A700 device to your Windows PC the PC will search for a USB driver to install If the PC is configured to search for drivers online and the connection succeeds ...

Страница 74: ...s buttons and switches Control Location Action Rocker switch Left side Increases and decreases volume Large button Right side Powers on and off Small button Right side Back Options menu Upper left of front Displays options available Joypad Center front Navigates around screen and lets you select items Figure 13 Pidion Display Device Connecting the Pidion BM 170 Display to a Talkman A500 A700 1 Tur...

Страница 75: ...man A list of nearby devices serial numbers that can accept a connection are displayed Figure 15 List of Devices 4 Select the serial number of the Talkman to which you want to connect and confirm your selection Figure 16 Confirming the Connection You will be taken back to the main screen and the display will be connected to the Talkman ...

Страница 76: ...m XXL 46 54 117cm 137cm XXXL 52 60 132cm 152cm Belt Part Specification Belt material Nylon Velcro YKK Hook and Loop Belt fastener ITW Nexus 127 3200 Using the A730 Scanning Device Holster A700 devices have two slots that run the length of the body These can be used to attach the device to a belt 1 Put the belt on with the clip either on your right or left side 2 Position the device so that the slo...

Страница 77: ...lacing a device in a pocket or other enclosed space can cause issues with WiFi performance 1 Attach the holster to the belt 2 Undo the Velcro strips 3 Slide the device into the holster with the buttons facing up 4 Fasten the Velcro strips Figure 19 The A700 Device Holster A700 Holster Specifications Belt material Nylon Belt fastener Non replacable Vehicle Mounts for Talkman A700 The Screw on Mount...

Страница 78: ...tion of the device does not obstruct vehicle controls Check that the device does not obstruct the driver s view Check the position of the device for user comfort over long periods Installing the Mounting Brackets for a Talkman A700 Vehicle Dock The following parts are supplied by Honeywell for attaching the screw on mount Quantity Description 2 Vehicle Mount Holder Base Screw On Attachment 1 Vehic...

Страница 79: ... threads of the clamp mount screws 2 Screw or clamp a base to the location 3 Attach the other base to the other end of the arm and tighten once in the desired location by turning the locking lever clockwise 4 Screw the device holder to the base 5 Insert a device into the holder To prevent vibration the arm of the mounting bracket should not touch the stem of the ball of the base In other words the...

Страница 80: ......

Страница 81: ...ooth technology to connect to display devices as well as other peripherals and headsets In the Vocollect Talkman product line the Talkman A500 offers expanded operations with a more powerful processor more available memory and a more robust radio The A500 uses the same batteries chargers and headsets as the T5 Series devices Both models use the Vocollect VoiceClient voice software but the A500 is ...

Страница 82: ...0 C Drop Tested Meets the MIL STD 810F specification for shock and vibration In addition the device has been tested to the following specifications 25 drops from 5 feet 10 additional drops from 6 feet onto polished concrete 10 drops at varying angles from 5 feet at 20 F 29 C onto polished concrete Humidity 100 condensing Enclosure Rating IP67 Note Packaging varies for product shipments Generally p...

Страница 83: ...temperature and pack identification to the device This information is made available to voice management software Battery Charging The battery pack must be charged only in a Honeywell designated charger Mechanical and Environmental Specifications Drop test specifications The high capacity battery meets the MIL STD 810F specification for shock and transient drop criteria Environmental specification...

Страница 84: ...dicators apply to the charger s battery slots and the lower indicators apply to the devices slots Removing an A500 T2 Series or T5 Series Device From a Charger The device is ready to use when the LED indicator on the device is blinking green If the LED is blinking red the device is not ready to be used Important If a device continuously displays a solid red light contact your system administrator ...

Страница 85: ...uthorized by Honeywell for the product you are using Use of an unqualified battery may present a risk of fire explosion leakage or other hazard See also Honeywell Battery Safety Removing a Battery from a Talkman A500 T5 Series or T2 Series Device Make sure the Talkman device is off CAUTION Do not remove the battery until the LED indicator is off If you remove the battery when the device is on or s...

Страница 86: ...oubleshooting to solve the problem See also Troubleshooting Problems Indicated by LED A500 Device LED Indicators LED Status A500 Device On Device is on Fast Blink The device is in a charger Green Slow Blink One of the following the device is in sleep mode and not in a charger the voice application selection menu is in use certain portions of software are loading On Briefly Device is turning on Dev...

Страница 87: ...m devices The devices must be in standby mode and connected to VoiceConsole Note The Talkman A500 model TT 802 ships as a bare platform device It does not have Vocollect voice software VoiceCatalyst or VoiceClient preloaded 2 In the Advanced Device Settings text box type this parameter distributable 1 The value of 1 marks the device profile as one that can be shared with other devices using the se...

Страница 88: ...e battery area of the A500 device and connected to the vehicle s power source Talkman devices in this configuration may use any wired or wireless equipment headsets scanners etc Honeywell sells the complete solution including mounting kits and power systems to enable any Talkman A500 devices to be used in an A500 VMT configuration CAUTION PLEASE DO NOT LOOK AT DEVICE UNIT WHILE OPERATING MACHINERY...

Страница 89: ...ount com to customize the installation The A500 T5 VMT must be mounted to a sturdy surface Figure 32 Screw On Mounting Parts Figure 33 Screw On Mounting Figure 34 Clamp Mounting Parts Figure 35 Clamp Mounting Figure 36 Battery Adapter Figure 37 Power Supply Note You may provide your own power supply but it must supply 12 15V at 1 Amp and must be limited to less than 250VA Watts If you chose to pro...

Страница 90: ...t over long periods Talkman VMT Parts and Accessories The following device mounting options are supplied by Honeywell Order one part from each line for your configuration Table 1 describes items that support Talkman VMT configurations Several electrical components are common for both Talkman A500 and Talkman A700 configurations Table 2 describes battery powered configurations Battery powered confi...

Страница 91: ...R T5 SERIES Order one of the following to attach the arm to the vehicle BL 710 101 VEHICLE MOUNT HOLDER BASE SCREW ON ATTACHMENT TALKMAN R T5 SERIES BL 710 103 VEHICLE MOUNT CLAMP TALKMAN R T5 SERIES BL 710 104 VEHICLE MOUNT CLAW TALKMAN R T5 SERIES CM 710 102 CABLE BATTERY ADAPTER PUSH ON TALKMAN R T5 A500 SERIES BT 710 BATTERY ADAPTER DC DC TALKMAN R T5 SERIES Order one of BT 901 BATTERY A700 SE...

Страница 92: ...figurations using a Honeywell battery without connecting to the vehicle s power source The BL 903 unpowered vehicle dock which has no power components should be used in lieu of the BL 904 No wiring or power converters are required however the Talkman device will need to be removed and placed in a charger to recharge its battery or for updating software Table 4 Battery Powered Vehicle Mount Configu...

Страница 93: ...ACHMENT TALKMAN R T5 SERIES BL 710 103 VEHICLE MOUNT CLAMP TALKMAN R T5 SERIES BL 710 104 VEHICLE MOUNT CLAW TALKMAN R T5 SERIES BT 700 2 BATTERY T5 A500 HIGH PERFORMANCE Order one of BT 901 BATTERY A700 SERIES STANDARD BT 902 BATTERY A700 SERIES HIGH CAPACITY Connecting Cables to the Power Supply and Attaching the Power Supply to a Vehicle The following parts are supplied by Honeywell for attachi...

Страница 94: ...e four screws from the top of the power supply to expose the screw terminals 3 On the cable from power supply to the vehicle s power source strip the three cables to expose approximately 5mm of copper Ensure the cable is long enough to reach from the power supply to the vehicle s power source 4 On the yellow cable from the battery adapter to the power supply strip the black and brown cable to expo...

Страница 95: ...to a secure surface with cable ties Alternatively the power supply could be secured by bolting it using the mounting slots Figure 39 Power Supply Attached to a Secure Surface on the Vehicle 9 Run the cable that connects the battery adapter to the power supply from the power supply to the location where the A500 T5 VMT will be mounted 10 Connect the yellow wire to the battery adapter by attaching t...

Страница 96: ...0mm of copper on the positive and negative wires 5 Insert the exposed copper into the fuseholders and crimp into the positive and negative wires using an approved tool 6 Connect the green wire to the vehicle s ground 7 Connect the fused white wire to the vehicle s positive power source using an appropriate connector This may need to be crimped onto the wire 8 Connect the fused black wire to the ve...

Страница 97: ...d for easy installation They were not designed for frequent removal The A730 was designed to be removed from the holster for occasional scanning not to exceed approximately six times per hour Even if the A730 is not being removed for scanning it requires a battery for backup power Honeywell does not support configurations of the A700 without a battery Honeywell recommends that Talkman devices cabl...

Страница 98: ...on base attachment BL 710 102 or other parts that use a 1 ball mounting the VMT configuration may require additional parts that can be purchased from RAM Mounts for an optimal installation Figure 43 Screw on mounting using BL 710 1 vehicle mount holder In particular the following standard RAM Mounts parts provide additional mounting flexibility Part Description Part Number Usage Image Double 1 bal...

Страница 99: ...re that it is routed away from sharp edges The cable pictured here will not fall out of alignment and possibly snag anything while the vehicle is in motion Note that there is enough slack in the cable to its right so that the battery adapter can be removed or installed in the Talkman device Figure 44 Cables secured on a vehicle The cable end that connects to the battery adapter should have enough ...

Страница 100: ...ns of Talkman and other devices Handheld and other devices may require specific cables in order to use Honeywell accessories such as headsets See the release notes for the Vocollect Voice software for your device for more information Pidion BM 170 Display The Pidion BM 170 is a display device that can be used along with a Talkman A500 or Talkman A700 device VoiceCatalyst only to run applications w...

Страница 101: ...onnect to a Voice Device button to begin connecting the display to your Talkman A list of nearby devices serial numbers that can accept a connection are displayed Figure 48 List of Devices 4 Select the serial number of the Talkman to which you want to connect and confirm your selection Figure 49 Confirming the Connection You will be taken back to the main screen and the display will be connected t...

Страница 102: ...67 cm Putting a Device on a T5 A500 Shoulder Harness To wear a device using the shoulder harness option attach the device to an adjustable Honeywell harness with a specially designed mounting clip provided with the belt or harness Attach the clip to the harness at the beginning of a shift You can attach the device to and remove the device from the clip as often as necessary throughout the shift Fi...

Страница 103: ...tion attach the device to a Honeywell belt with a specially designed mounting clip provided with the belt or harness T2 Series Slim Blue Belt Clip connects a device to the customized belt T5 A500 Black Belt Clip connects a T5 or A500 device to the belt Attach the clip to the Honeywell belt at the beginning of a shift You can attach the device to and remove the device from the clip as often as nece...

Страница 104: ...f a device cover is not required however Honeywell strongly recommends using the cover to help preserve the appearance and prolong the life of the devices Using the protective cover in a freezer environment prolongs battery life Figure 54 A500 T5 Elastomer SKIN Cover The device cover does not have to be removed before placing the device into a device charger The EXO Skeleton Cover provides additio...

Страница 105: ...e button until the LED indicator turns solid red and then off 2 Disconnect any peripherals 3 Hold the device with the battery compartment facing up and the device s buttons facing toward you 4 Slide the open end of the cover over the connection port end of the device Pull gently on the cover to make sure it slides behind the tab located on the bottom of the device that holds the cover securely in ...

Страница 106: ......

Страница 107: ...rform in the harsh conditions of an industrial environment The Talkman T5m is the enhanced memory version with increased memory and data storage Talkman T5 Series Features Bluetooth compatible radio enables wireless connections to headsets bar code readers printers and other peripherals High performance battery ensures uninterrupted power even in freezing conditions Ergonomic design provides user ...

Страница 108: ... 30 to 50 C Storage Temperature 30 to 140 F 34 to 60 C Drop Tested Meets the MIL STD 810F specification for shock and vibration In addition the device has been tested to the following specifications 25 drops from 5 feet 152 4 cm 10 additional drops from 6 feet 182 88 onto polished concrete 10 drops at varying angles from 5 feet at 20 F 29 C onto polished concrete Humidity 100 condensing Enclosure ...

Страница 109: ...ty battery pack uses two lithium ion cells Voltage 3 7V Watt Hours 19WHr Protection circuit characteristics The pack contains a protection circuit that prevents over and under voltage conditions on the cells and protects the pack from damage as a result of a short circuit between the positive and negative terminals of the battery The battery pack contains custom electronics that provide performanc...

Страница 110: ...er peripheral devices Do not remove the battery from the device when placing a device into a charger Charging an A500 or T5 Series Battery 1 Remove the battery from the Talkman device 2 Hold the battery with its contacts to the bottom and the Vocollect label facing you Figure 60 Inserting a Battery Into the Charger 3 Place the battery into an open battery slot on the top level of the charger When ...

Страница 111: ...e battery or the device If the battery does not snap easily into place reposition the battery in the compartment and try again Make sure the battery is firmly in place and can t be removed without pressing the battery release button Warning Replace a battery only with another battery that has been authorized by Honeywell for the product you are using Use of an unqualified battery may present a ris...

Страница 112: ...30 C 22 F 30 minutes About LED Indicators Vocollect Talkman devices SRX and SRX2 headsets and their chargers have LEDs that indicate the state of the equipment These LEDs may be on off or blink In some cases an LED will blink alternating between two colors If the LEDs indicate that there is a problem refer to information on troubleshooting to solve the problem See also Troubleshooting Problems Ind...

Страница 113: ...tion uses the serial connection between bays in the T5 A500 Combination Charger to distribute configuration files from one device to all devices in the charger This feature allows new installations to quickly complete initial device configuration and simplifies adding new devices or returning repaired devices to service Any of the supported device models T5 T5m and A500 may be configured using thi...

Страница 114: ...reen until the devices determine that they cannot reach VoiceConsole The LED indicators flash orange as the devices attempt to connect to the network to listen for a file broadcast The LED indicators flash green briefly as the devices receive profiles from the configured device and verify the configuration The LED indicators change to solid red as the devices reboot When the devices have applied t...

Страница 115: ...be clamped to oddly shaped or horizontal or vertical surfaces Figure 64 Screw On Mount Figure 65 Clamp Mount Figure 66 Claw Mount Talkman A500 T5 VMT Accessories The Talkman A500 T5 VMT is designed to be installed using RAM Mounting Systems hardware Honeywell supplies a mounting bracket for the A500 T5 and mounting hardware from RAM Mounting Systems Additional hardware mounting bracket options can...

Страница 116: ...5 VMT Accessory Specifications Operating Temperature 30 to 50 C 22 to 122 F Storage Temperature 40 to 70 C 40 to 158 F Positioning the Talkman A500 T5 VMT Determine the best position for the device and all the associated components If a similar device was previously installed check to see if the position it used is suitable for the device Test the installation for at least 30 minutes before instal...

Страница 117: ...touch Connecting Cables to the Power Supply and Attaching the Power Supply to a Vehicle The following parts are supplied by Honeywell for attaching the 12 or 24 volt vehicle s power supply to a device Item Quantity Description 1 1 Power Supply 9 36 VDC Input 2 1 Cable from power supply to battery adapter The following parts are supplied by Honeywell for attaching the 36 or 48 volt vehicle s power ...

Страница 118: ...yellow cable Ensure the cable is long enough to reach from the power supply to the vehicle s power source 5 Connect the cables from the battery adapter to the power supply by performing the steps below Loosen the screws to where the connection will be made on the power supply Match the cables to the correct locations as indicated in the chart below Cable Output Connector Brown Battery Adapter Posi...

Страница 119: ...e You will need the following equipment Two fuse holders from Cooper Bussman Honeywell recommends using a Cooper Bussmann HFA series in line waterproof fuse Two fuses Honeywell recommends a 4A 250V SLO BLO fuse Three spade connectors Four small cable ties Fasteners Honeywell recommends choosing unswitched power as the source for the power supply This will allow Talkman devices to be powered for so...

Страница 120: ...n A500 T5 VMT components are designed for easy removal for occasional vehicle service maintenance or flexible operational needs CAUTION Honeywell does not recommend removing the cables CM 710 102 from the battery adapter except when required for occasional service i e once per month at maximum Excessive removal of these cables may damage the adapter and cable This type of use is not covered under ...

Страница 121: ... VMT battery adapters be left in place after they are installed in vehicles While these components may be removed for maintenance or temporary use in other areas they should not be removed as a part of regular operation If a Talkman device must be removed the battery adapter remains in the battery adapter dock Figure 76 Battery adapter docked in VMT configuration CAUTION Frequent removal of the Ta...

Страница 122: ... This arm and other arm lengths offer options for the best vehicle fit Lock parts into place if they might be moved during normal operations The parts used for mounting the Talkman were designed for a fixed position with easy adjustment While unlikely these parts may loosen over time with inadvertent impacts of daily use especially if the mountings have not been firmly secured or if workers attemp...

Страница 123: ...t at 9 or 10 inches from the cable end connector Using a cable tie maximum 0 1 inch wide attach the wrapped section of the cable to the RAM cradle using the holes on the bottom of the adapter docking area as shown Cabling inside of the vehicle to the battery adapter should also be secured and maintained neatly to prevent cable travel and accidental damage or shorting Cables should be kept clear of...

Страница 124: ... can attach the device to and remove the device from the clip as often as necessary throughout the shift Figure 81 T5 A500 Shoulder Harness Properly Worn Front and Back Views 1 Open the flap on the front of the shoulder harness by unsnapping the two buttons 2 Slide the flap through the slots on the mounting clip then snap the buttons together 3 Unbuckle the large loop 4 Put your left hand through ...

Страница 125: ...lip to the Honeywell belt at the beginning of a shift You can attach the device to and remove the device from the clip as often as necessary throughout the shift Figure 83 Attaching the Device to a Belt Clip Honeywell strongly recommends that the device be worn on the right side of your body with the device s buttons on the top and its connectors toward your back A500 and T5 series devices can als...

Страница 126: ...ective cover in a freezer environment prolongs battery life Figure 84 A500 T5 Elastomer SKIN Cover The device cover does not have to be removed before placing the device into a device charger The EXO Skeleton Cover provides additional drop protection for the device is easy to remove and permits full access to all device features and functions Figure 85 T2 Series Device Cover You must remove the de...

Страница 127: ...tery compartment facing up and the device s buttons facing toward you 4 Slide the open end of the cover over the connection port end of the device Pull gently on the cover to make sure it slides behind the tab located on the bottom of the device that holds the cover securely in place Figure 86 Putting a Cover on a Talkman T5 Series Device 5 Stretch the rounded end of the cover over the rounded end...

Страница 128: ......

Страница 129: ... and corrosive conditions of industrial environments Talkman T2 Series Features Wi Fi network support and ample memory to continue operations during breaks in RF coverage Standard and high capacity battery options meet the varying needs of different warehouses High performance battery ensures uninterrupted power even in freezing conditions Ergonomic design and rugged belt clip provide user comfort...

Страница 130: ... with RS 232 decoded bar code support blue Operating Temperature 22 to 122 F 30 to 50 C Storage Temperature 30 to 140 F 34 to 60 C Drop Tested Meets the MIL STD 810F specification for shock and vibration In addition the device has been tested to the following specifications 25 drops from 5 feet 152 4 cm 10 additional drops from 6 feet 182 88 onto polished concrete 10 drops at varying angles from 5...

Страница 131: ... The pack contains a protection circuit that prevents over and under voltage conditions on the cells and protects the pack from damage as a result of a short circuit between the positive and negative terminals of the battery Thermistor The battery pack contains a negative temperature coefficient thermistor The charger uses the voltage drop across the thermistor to determine that the battery pack i...

Страница 132: ...rom the belt clip 5 Disconnect any other peripherals If the device is in a cover remove the cover 6 Insert the device into one of the device charger slots with the button controls of the device to the top and facing toward the left Figure 89 Inserting a T2 Series Device Into a Charger CAUTION Do not attempt to place the device into the charger unless you have first disconnected the headset and any...

Страница 133: ...rting a Battery into a Talkman A500 T5 Series or T2 Series Device Make sure the battery to be inserted is fully charged 1 Hold the Talkman so that the red and yellow ports are facing away from you 2 Hold the battery with the pins facing away from you and so that the Vocollect logo is on top 3 Place the battery in at an angle pins end first Figure 91 Properly Inserting a Battery 4 Push the back of ...

Страница 134: ...tery pops up from the battery compartment Figure 92 Removing the Battery From a Device 3 Lift the battery out of the compartment Battery Warm Up Time If a battery has been used in a cold environment it will not begin charging until it warms up sufficiently Temperature of battery use Approximate warm up time 4 C 24 8 F 6 minutes 10 C 14 0 F 10 minutes 20 C 4 F 22 minutes 30 C 22 F 30 minutes About ...

Страница 135: ... On Briefly Device is turning on Device is turning off On Continuously Error contact system administrator Blinking One of the following retrieving and loading an operator from VoiceConsole retrieving reading and loading a voice application from VoiceConsole certain portions of software are loading Red Green Alternating Device is attempting to get an IP address from the server If unable to get an I...

Страница 136: ...lip Using the A500 T Series Belts and Clips To wear a device using the belt and clip option attach the device to a Honeywell belt with a specially designed mounting clip provided with the belt or harness T2 Series Slim Blue Belt Clip connects a device to the customized belt T5 A500 Black Belt Clip connects a T5 or A500 device to the belt Attach the clip to the Honeywell belt at the beginning of a ...

Страница 137: ...protective covers for its devices The use of a device cover is not required however Honeywell strongly recommends using the cover to help preserve the appearance and prolong the life of the devices Using the protective cover in a freezer environment prolongs battery life Figure 95 A500 T5 Elastomer SKIN Cover The device cover does not have to be removed before placing the device into a device char...

Страница 138: ...am Clear Vinyl Sleeve Double polished 0 06 Thread T 70 nylon size 69 Cordura 1000 Used for edge binding bias tape Velcro Used to hold the cover flap down Putting a Cover on a T2 Series Device 1 If the device is not already off press and hold the yellow play pause button until the LED indicator turns solid red and then off 2 Disconnect any peripherals Vocollect T2 Series Bluetooth Adapters Specific...

Страница 139: ...nge 32 8 feet 10m Serial COM Interface Standard RS 232 9 pin male Compliance Bluetooth 1 1 Qualified AEO C TPAT WEEE RoHS EMC CE FCC Compliant TAA Bluetooth Profile Serial Port Legacy T2 Series Bluetooth Adapter Antenna Integrated Class 2 Bluetooth Module Baud Rate 9600 bps Operating Temperature 20 to 85 C 4 to 185 F Humidity 5 to 95 non condensing Storage Temperature 40 to 95 C 40 to 203 F Range ...

Страница 140: ...35 VoyagerBT laser bar code scanner and a power source 2 If this is the initial use allow the scanner to charge for several hours before use 3 Set the Vocollect task with the following options no parity 9600 baud 1 stop bit CR LF termination word length 8 and keep power on 4 Use barcode software to generate a barcode for pairing the Vocollect T2x Bluetooth Serial Adapter and Honeywell reader dynam...

Страница 141: ...r and is designed to be used only with the Vocollect SL 4 Light Industrial Behind the Head Headset This device and headset solution is ideal for less noisy work areas because the SL 4 speaker sits farther from the head than in Vocollect s SR Series headsets As a result users must set the device volume to a level appropriate for their environments The Talkman T1 speech recognition performance howev...

Страница 142: ...Specifications Cells The battery pack uses one lithium ion cell Nominal voltage 3 7V Watt Hours 7 3WHr Protection circuit characteristics The pack contains a protection circuit that prevents over and under voltage conditions on the cells and protects the pack from damage as a result of a short circuit between the positive and negative terminals of the battery The battery pack contains custom elect...

Страница 143: ...ry with a T1 Single Charger Cable 1 Grasp and squeeze the sides of the I O connector on the cable 2 Attach the I O connector onto the T1 s connectors and release the I O connector Ensure the flush side of the I O connector faces front with the device s front 3 Insert the other end of the charging cable into the barrel jack on the plug cable 4 Plug the charger into an electrical outlet Removing a T...

Страница 144: ...Removing a Battery from a Talkman T1 Device Make sure the Talkman device is off CAUTION Do not remove the battery until the LED indicator is off If you remove the battery when the device is on or sleeping any data collected could be lost 1 Hold the device in one hand with the battery compartment facing toward you 2 Push the battery release button up and pull the battery out Battery Warm Up Time If...

Страница 145: ...ontinuously Error contact system administrator Blinking One of the following retrieving and loading an operator from VoiceConsole retrieving reading and loading a voice application from VoiceConsole certain portions of software are loading Amber Yellow Off Not charging On Charging Accessories Honeywell offers a variety of accessories for wearing protecting and facilitating the operations of Talkma...

Страница 146: ... protects the device from wear and protects the battery T1 Holster Specifications Belt material Nylon Belt fastener Non replacable T Series Belt Specifications Belt Size Dimensions XS 18 26 46cm 66cm S 24 32 61cm 81cm M 28 36 71cm 91cm L 34 42 61cm 107cm XL 40 48 102cm 122cm XXL 46 54 117cm 137cm XXXL 52 60 132cm 152cm Belt Part Specification Belt material Nylon Velcro YKK Hook and Loop Belt faste...

Страница 147: ...ening on the holster is pointed up 2 Slide the clip down onto a belt 3 Insert the T1 device 4 To remove the device push the T1 from the bottom of the holster CAUTION Do not pull the device out of the holster by the headset cable Damage to the unit may occur ...

Страница 148: ......

Страница 149: ...onal functions of a screen keyboard and integrated scanner It is an effective option for small to medium size enterprises where workers maybe asked to perform multiple functions Versatility The Vocollect SRX2 wireless headset eliminates the distractions and costs associated with wired headsets The solution can also be used in a vehicle mount configuration Rugged solution The CN70 and SRX2 are desi...

Страница 150: ......

Страница 151: ...ts to prevent corrosion Dual strap padded stainless steel headbands for increased comfort and stability Single strap lightweight headbands for a personalized fit Single cup models with single ear cups that pivot vertically and horizontally and can be worn on either ear Dual cup model for added noise reduction in loud work environments Foam ear pads for quick and easy replacement A rotating lever o...

Страница 152: ...01 SL 14 Light Industrial Behind the Head Headset Figure 102 SL 4 Light Industrial Behind the Head Headset The behind the head SL headsets are light industrial headsets designed specifically for speech recognition They come with an adjustable headband giving the user a personalized and comfortable fit The behind the head SL headsets come in both right and left sided configurations identify the con...

Страница 153: ...as possible but outside of your breath stream It should be facing your upper lip and not touching anything for example clothing skin or facial hair 4 Clip the headset cord to the collar or top of your shirt or jacket where it can comfortably fall down your back This keeps the cord away from your chest and arms where it can become tangled with your work 5 Let the cable fall down your back and clip ...

Страница 154: ... Honeywell Wired Headsets 154 ...

Страница 155: ...s with an adjustable headband giving the user a personalized and comfortable fit The behind the head headset comes in a single configuration that can be adjusted by the user to be in a right ear or left ear orientation The SR 10 headset is designed for use in an ambient environment non condensing The symmetrically designed ear loop can be worn on either ear Honeywell strongly recommends securing t...

Страница 156: ...one at the corner of your mouth Position the microphone as close to your mouth as possible but outside of your breath stream It should be facing your upper lip and not touching anything for example clothing skin or facial hair 7 Clip the headset cord to your shirt or jacket where it is comfortable 8 Let the cable fall down your back and clip it to the belt near the device If you are using a device...

Страница 157: ...the clip on the other side Replacing the Headband Cord Clip on the SR 15 Headset 1 Unclip the cord from the headband cord clip by pushing the plunger all the way down and gently pulling the cord out of the clip 2 Remove the two screws part 3 in the figure below Screws require a Phillips 1 driver Note that older headband parts may require a Torx or Allen driver Figure 106 Various Screw Heads for th...

Страница 158: ...ate the microphone speaker assembly back towards the headband You will hear a click when it is in place SR 20 Series Vocollect Lightweight Headset Figure 108 The SR 20 Lightweight Headset The SR 20 Vocollect Lightweight Headset is able to withstand heavy use in challenging warehouse conditions such as extreme temperature differences condensation and accidental drops The SR 20 Headset also remains ...

Страница 159: ...ng Meets IP67 Humidity 100 condensing Noise Reduction Rating Not applicable Replacing the Ear Pad on the SR 20 Series Headsets 1 With headset removed and disconnected rotate the microphone boom so that it is in line with the headset yoke 2 Hold the headset by the yoke in one hand With the other hand rotate the earpiece counter clockwise 10 3 Disengage the earpiece section from the headset 4 Remove...

Страница 160: ...ted 15 drops from 7 feet 2 1 m at minimum and maximum operating temperatures 50 drops from 6 feet 1 8 m at minimum and maximum operating temperatures Enclosure rating Meets IP67 Humidity 5 90 condensing Noise Reduction Rating Average 5 dB Note Packaging varies for product shipments Generally packing materials are about 15 of the total shipment weight SR 31 Headset Specifications Weight 7 3 ounces ...

Страница 161: ...e two fork ends onto the pegs on either side of the earcup Some force is required 3 Position the hard hat clip with the tab pointing into the slot on the side of the hard hat The front of the clip with the screw should face away from the hard hat 4 Slide the clip into the slot until it is firmly seated SR 35 Headset Specifications Weight 6 2 ounces 175 g with cable 4 7 ounces 133 g without cable O...

Страница 162: ...ad on the SR 30 SR 35 and the SR 40 Headsets 1 With headset removed and disconnected hold the headset in one hand 2 At the seam on the bottom of the ear cup housing where the ear pad connects to the plastic ear cup pull the ear pad and plastic mounting plate outward until it disconnects 3 Remove the worn ear pad from the plastic mounting plate and place the new ear pad over the plastic mounting pl...

Страница 163: ...red headset clip the headset cord to your clothing Let the cord fall down your back and clip it to the belt near the device If you use a device cover Honeywell recommends that you clip the bottom clip directly onto the cover 5 Connect or pair the headset to the device Adjusting Headsets for Comfort Honeywell has designed the SR Series headsets based on data for most head shapes and sizes Because t...

Страница 164: ...f a freezer could disrupt recognition Position the microphone as close to your mouth as possible but outside of your breath stream It should be facing your upper lip and not touching anything for example clothing skin or facial hair Keep windscreens dry Water will not damage the equipment however a windscreen can create a water barrier that degrades speech recognition Do not attempt to break ice f...

Страница 165: ...ean them Do not use unapproved liquids to clean the yellow blue and red Talkman Connectors TCOs and any associated headset scanner or device plugs Hand or machine wash dual cupped headset earpad covers in cold or warm water then air dry the covers The covers are made of 100 cotton flannel and may shrink if dried in a clothes dryer Related concepts Cleaning Plastics on page 17 Cleaning the Headband...

Страница 166: ......

Страница 167: ...t SRX and SRX2 wireless headset features include Bidirectional noise canceling microphones for optimal noise cancellation Windscreen to reduce breathing and other background noises that can make it hard for the device to understand what an operator is saying Sealed components to prevent corrosion Padded lightweight headbands for increased comfort and personalized fit Single ear cups that pivot ver...

Страница 168: ...ce the SRX headset volume can only be adjusted using the buttons on the headset When the SRX headset is paired with a device volume can be adjusted by pressing the Plus and Minus buttons on the headset or device The SRX headset remembers its last volume setting when powered off and back on and across battery removals and replacements The last volume setting used while paired with a wearable comput...

Страница 169: ...otects the pack from damage as a result of a short circuit between the positive and negative terminals of the battery The battery pack contains custom electronics that provide performance temperature and pack identification to the device This information is made available to voice management software Battery Charging The battery pack must be charged only in a Honeywell designated charger Charging ...

Страница 170: ...hat slot on the charger are green 2 Hold the headset with the battery compartment facing toward you 3 Place the end of the battery with the contacts into the compartment first so that the contacts on the bottom of the battery line up with the contacts in the compartment 4 Press down on the battery until it snaps into place 5 Make sure the battery is firmly in place and cannot be removed without pr...

Страница 171: ...in the image Figure 116 Feeding the Lanyard Through an Eyelet 3 Feed the lanyard back through the other eyelet in the battery compartment Figure 117 Feeding the Lanyard Back Through 4 Create a secure loop by inserting the end of the mobility strap with the clip through the lanyard s loop and pulling it tight Figure 118 Inserting the Mobility Strap 5 Clip the other end of the mobility strap to the ...

Страница 172: ...ility strap so it fits securely across the back of your head Figure 120 Mobility Strap Worn Properly 4 Swing the microphone into position with the rotating lever at the earpiece Figure 121 Moving the Microphone Into Position 5 Make final adjustments with the flexible boom so that the microphone is positioned correctly Position the microphone as close to your mouth as possible but outside of your b...

Страница 173: ...er mode Hold the Plus and Minus buttons for four seconds Headset disconnects current pairing and enters low power pairing mode Headset attempts to pair with the nearest un paired Bluetooth device Previous pairing erased from headset s memory Constant quick flash four flashes per second 50 ms on 200 ms off No tone when entering mode Three ascending tones upon pairing with a device Switch to high po...

Страница 174: ... in this mode for 10 minutes while it waits for a previously paired device to come within range After 10 minutes of no activity the headset powers off Repeating pattern of three quick flashes then off for about a second Three descending tones when the connection to the master device is dropped Low Battery N A Headset automatically enters this mode when the battery s remaining charge reaches a mini...

Страница 175: ...ied with full shift battery life Separate headband and electronics modules to enable headset sharing Enhanced comfort and ergonomics for long hours of use In addition the modular design of the headset enables a much lower cost per user through the shared use of headset electronic modules across multiple shifts Other features include Faster easier pairing with Vocollect TouchConnect Technology with...

Страница 176: ...y inserted Humidity 5 95 condensing Noise Reduction Rating Not applicable Note Packaging varies for product shipments Generally packing materials are about 15 of the total shipment weight SRX2 Modular Design The SRX2 Wireless Headset introduces a modular design to the Vocollect headset product line The potential for shared use of electronics modules across multiple shifts can lower the cost per us...

Страница 177: ... ID of the electronics module With automatic operator loading operators who always use the same headset can start their shifts faster When multiple operators share an electronics module however automatic operator loading may not be effective Disabling automatic operator loading in the voice software task package settings 1 Using VoiceConsole edit the task package that is being used 2 Set the param...

Страница 178: ...SRX2 Compatibility Honeywell has tested the SRX2 Wireless Headset with the following devices and Vocollect Voice Software versions Support and compatibility of the SRX2 headset is not limited to these products but the customer assumes risks related to untested configurations Device Vocollect Voice Software Vocollect Talkman A700 VoiceClient 3 9 and newer VoiceCatalyst 2 0 and newer Vocollect Talkm...

Страница 179: ...low Headset battery is getting low When battery voltage is critically low and about to turn off Headset battery is getting low Change headset battery now SRX2 Battery Specifications Electrical Specifications Cells The battery pack uses a single lithium ion cell Nominal voltage 3 6V Watt hours 2 7 WHr Protection circuit characteristics The pack contains a protection circuit that prevents over and u...

Страница 180: ...nough spare headsets to permit adequate daily drying of equipment It should also be stressed that continuous use of windscreens is critically important to prevent damage of the microphone for all headsets Equipment that is returned for service which shows evidence that windscreens have not been used will not be replaced as part of normal warranty or service plans but be considered equipment abuse ...

Страница 181: ...arger when the LED ring indicator on the charger port for that battery is green 2 Position the headset electronics module with the buttons facing toward you 3 Hold the battery with the label side down and contacts facing the open end of the electronics module opposite the mic boom 4 Push the battery onto the electronics module until it clicks in place 5 Make sure the battery is firmly in place and...

Страница 182: ... port LED indicator will turn yellow Charging will only begin after the battery reaches the proper temperature range 32 F 0 C to 104 F 40 C It may take up to 30 minutes for the battery to reach a safe temperature If battery temperature does not come into range in about one hour the red LED will blink indicating that there is a charger fault Wearing an SRX2 Wireless Headset 1 Put the headset on and...

Страница 183: ... Headset 1 Hold the headset so that the earpad faces you and the electronics module faces away 2 Locate the knob on the inside of the headband near the earpad 3 Hold the strap so that the end with the hole fits over the knob on the headband and press down firmly so the knob comes all the way up through the hole Figure 130 Pressing the strap onto the earpad side of the headband 4 Turn the headset s...

Страница 184: ...late assembly and rotate them to the left to unlock the plate from the headband 3 Lift the pad and plate assembly off of the headband 4 Install the replacement pad a Remove the ear pad by pulling it away from the ear pad plate b Slide one side of the new pad over the edge of the ear pad plate and gently stretch the pad until it covers the plate c Ensure that the lip of the new pad completely cover...

Страница 185: ...cted device says louder Decrease volume Press the Minus button N A N A Two tone descending sequence If connected device says softer Force disconnect for manual pairing in low power mode With headset connected press the Plus and Minus buttons Headset disconnects current pairing and enters low power pairing mode Solid green No tone when entering mode Three ascending tones upon pairing with a device ...

Страница 186: ... blue on 25 off 75 Three ascending tones upon connecting to master device Paired but connection dropped possibly out of range N A Headset connectable but not discoverable Any Bluetooth device can connect if it knows the headset s address Slow flashing green on 25 off 75 Three descending tones when the connection to the master device is dropped Update headset software Connect headset to computer ru...

Страница 187: ...mperature 22 F to 122 F 30 C to 50 C Storage temperature 40 F to 158 F 40 C to 70 C Drop Tested Excludes clips and attachment 12 drops from 7 feet 2 1 m at minimum and maximum operating temperatures 24 drops from 6 feet 1 8 m at varying angles and at minimum and maximum operating temperatures Enclosure rating Meets IP54 Humidity 5 95 condensing Noise Reduction Rating 10 5 dB Note Packaging varies ...

Страница 188: ... completely in order to fit them over the brim without the clip in place b From the under side of the hat slide the brackets over the brim If the brackets were removed slide the bracket ends back under the screws in the clip c Position the clip on the outside of the hard hat centered on the side of the hat Figure 136 Mounting a brim mount clip on a hard hat d Tighten the screws to secure the brack...

Страница 189: ...g the hard hat with the headset attached The inner position keeps the earcup snug to the ear the outer position enables the headset to be swiveled in the clip without causing wear to headset parts or to the hard hat 1 Hold the hard hat firmly 2 Push the headset earcup in toward the head area of the hat until it snaps into its inner position Figure 138 Headset lock positions 3 Slide the hard hat on...

Страница 190: ...n the side of the hat see figure below to reduce the risk of damage 1 Remove the electronics module from the SRX2 headset The electronics module can be used by another worker or stored separately 2 Detach the microphone cap from the electronics module and dock it in the mic cap pocket located above the headset earcup Figure 140 Docking the mic cap SRX2 Hard Hat or High Noise Headsets 3 Pull the ea...

Страница 191: ...ate 4 Gently pull a new foam earpad around the plate Figure 143 Putting on the new earpad 5 Align the inside posts of the two sections of the earcup 6 Push sections together until they click into place Vocollect SRX2 High Noise Headset The Vocollect SRX2 High Noise headset is an SRX2 headset with a single ear cup that fits entirely over the operator s ear to allow him or her to hear voice instruct...

Страница 192: ...erating temperature 22 F to 122 F 30 C to 50 C Storage temperature 40 F to 158 F 40 C to 70 C Drop Tested 12 drops from 7 feet 2 1 m at minimum and maximum operating temperatures 24 drops from 6 feet 1 8 m at varying angles and at minimum and maximum operating temperatures Enclosure rating Meets IP54 Humidity 5 95 condensing Noise Reduction Rating 10 5 dB Note Packaging varies for product shipment...

Страница 193: ... Headset Vocollect Talkman A730 The Honeywell SRX SL Wireless Headset is the lightweight wireless headset from Honeywell that has been designed for use in non rugged environments such as retail in store direct store delivery transportation and logistics government and on premise inspections The SRX SL headset is also compatible with iOS devices such as an iPhone Android devices that support HFP 1 ...

Страница 194: ...reased adjustability compared to other headset designs for larger variety of head sizes and shapes Components Headband Accessory eModule Buttons There are four buttons on the SRX SL headset The button descriptions follow Button Name Primary Function Volume Up Increases the volume one step Volume Down Decreases the volume one step Power Turns the headset on and off Mute Mutes the microphone Note Se...

Страница 195: ...ute Unmute microphone Mute button Momentary press or rotate the boom up 90 to mute rotate the boom down 90 to unmute Active call or voice application Connect to last device Power button Momentary On and paired but not connected Reset headset restarts the headset in the rare event the SRX SL headset has become unresponsive Power and Mute buttons 5 second All except Off LED and Tones The SRX SL cont...

Страница 196: ...dropped Connectable but not discoverable Any Bluetooth device can connect to it if it knows the address Flashing green Flash frequency is 1 5 seconds On 20 off 80 Three descending tones when connection is dropped Voice link established Example answer call start voice app Normal operation Two low pitch to high pitch tones Voice link dropped Example Hang up call Normal operation Two high pitch to lo...

Страница 197: ...95 F 0 C to 35 C Drop Tested 24 drops from 6 feet 1 83 m at minimum and maximum operating temperatures Humidity 95 relative humidity non condensing Noise Reduction Rating Not applicable Note Packaging varies for product shipments Generally packing materials are about 15 of the total shipment weight Battery Specifications The battery is not user serviceable The specifications below are for a new ba...

Страница 198: ...ned for service Intial Use 1 Charge the SRX SL Headset before use 2 Assemble the SRX SL Headset 3 Turn the headset on by pressing and holding the power button at least 1 2 second and releasing 4 Pair the SRX SL Headset Using Bluetooth or Pair the SRX SL Headset Using Near Field Communication NFC 5 Put On the Headset 6 If the SRX SL headset is used for an extended period of time and the battery lev...

Страница 199: ...C to 40 C If not move the headset to a different area and allow it to heat or cool to an allowable charging temperature If the fault persists contact Customer Service SRX SL Fast Charge If the temperature is 32 F to 95 F 0 C to 35 C the SRX SL supports fast charging Fast charging provides 75 of the battery capacity in less than one hour of charging If the temperature rises above the fast charge th...

Страница 200: ... disconnected state to preserve battery life If the USB cable is attached to charge the internal battery the SRX SL headset disconnects if connected and battery charging begins Initiate paring on the device to pair with the SRX SL headset Pair the SRX SL Headset Using Near Field Communication NFC The SRX SL enters pairing mode as soon as it is powered on If the SRX SL headset is not connected it p...

Страница 201: ... Use of the SRX SL Headset The headsets and microphones used with the Honeywell Voice system are delicate pieces of electronic equipment Proper care and use of these products will ensure that they work well for a long time Important For maximum hygiene Honeywell discourages sharing headbands among operators The design of the SRX SL Wireless Headset features an electronics module that can be remove...

Страница 202: ...s Pairing is the process in which two devices enabled with Bluetooth wireless technology create a secure link in order to share information The pairing process begins when the master device initiates an inquiry to search for discoverable Bluetooth addresses Vocollect wireless headset pairings with Talkman or other devices are initiated by the device and remain paired until broken by user action No...

Страница 203: ...e and headset from all other Bluetooth devices any time that the device is performing an inquiry scan to find the headset or pair manually Cross pairing is extremely unlikely when a user uses touch pairing SRX SRX2 Headset Pairing Methods After an SRX or SRX2 headset enters low or high power pairing mode it is available to accept a pairing initiated by a Talkman A700 series Talkman A500 Talkman T5...

Страница 204: ...ng for a headset This is the preferred method to use with SRX headsets as upon the first connection it will set a parameter on the SRX so that when booted it automatically goes into pairing mode Manual pairing The user determines when to pair a device and headset by pressing buttons on the device Important The first pairing for an SRX headset that has never been paired with a device must be a manu...

Страница 205: ...hen reverts to idle mode If the headset has been paired at least once to a device running VoiceCatalyst version 1 2 or newer voice software it will remain in pairing mode for ten minutes then power off 3 Hold the headset and Talkman device so they are within six inches of each other but not touching The blue LED indicator on the Talkman device turns on may flash a few times and then remains lit Af...

Страница 206: ...d off state The handheld device is not in a charger and there is no wired headset connected to it The device is in sleep mode not in use running an application The device is Bluetooth ready with Bluetooth connection features enabled 1 On the SRX headset press and hold the Plus and Minus buttons for four seconds to place the headset in pairing mode Note Some handheld devices may require the headset...

Страница 207: ...g an SRX2 headset with a Talkman A700 device use the latest SRX2 software version Obtain the latest headset software from your Honeywell portal or reseller and use the Honeywell Accessory Update Utility to upgrade your SRX2 headset Note Data sent through near field communication NFC is not encrypted nor does it follow any specific safety protocol This is because the transfer occurs over such a sho...

Страница 208: ... and you should attempt to perform the read again Figure 147 Using TouchConnect to Obtain Operator Information from the Headband Figure 148 Using TouchConnect to Pair an SRX2 with an A700 Device When the device starts the task VoiceConsole recognizes the pairing Auto Pairing an SRX2 Headset with a T5 A500 or A700 Talkman Device Prerequisites The headset is powered off There is no wired headset con...

Страница 209: ...ut not touching The blue LED indicator on the Talkman device turns on may flash a few times and then remains lit After 20 to 30 seconds the headset beeps three ascending tones and its LED indicator flashes blue These indicators confirm that a pairing has completed 4 Put on the headset You will hear the headset repeat the serial number of the Talkman device to which it is paired 5 Verify that the n...

Страница 210: ... not yet connected The device is connected to the headset Pairing a Headset by VoiceConsole Pairing The VoiceConsole pairing method should only be used if the device headset pairing will be performed once and never changed While manual pairing can also result in this permanent pairing VoiceConsole eliminates the device inquiry step and begins paging immediately for the Bluetooth address Prerequisi...

Страница 211: ...power pairing only if low power pairing fails Use this mode with care While high power pairing mode makes it more likely that the connection will succeed it also increases the likelihood of cross pairing If the configuration parameter SrxAutoPairEnable is enabled and the configuration parameter SrxHighPowerPairingDelaySeconds is set to 0 headsets will skip lower power pairing mode and enter high p...

Страница 212: ...Q Q My device accidentally paired with a different headset What can I do A If you are using an SRX2 headset press the and buttons simultaneously to clear the pairing If you are using an SRX headset perform a manual pairing it will break the connection and initiate another inquiry Note that the user should have his or her headset in pairing mode before performing this step so that the device can fi...

Страница 213: ...power See the release notes for Vocollect Voice software and your device Supervisor Audio offers two listening modes Combined audio the user s microphone audio and the text to speech TTS audio are combined and streamed out of the wired audio port Device audio only the TTS audio only is streamed to the second party Enabling Supervisor Audio To enable this feature set the SrxSupervisorAudioEnable co...

Страница 214: ...nsole Device Profile SrxHeadsetEnable A700 A500 T5 Series Enables disables use of SRX or SRX2 wireless headsets with approved Bluetooth devices Users may prefer to disable headsets when using other Bluetooth peripherals 0 disabled 1 enabled Set in VoiceConsole Device Profile SrxHighPowerPairingDelaySeconds A700 A500 T5 Series Psion Intermec Motorola SRX headsets Specifies how long in seconds an op...

Страница 215: ...A700 A500 T5 Series Motorola Enables Disables the ability to listen in on both sides of the SRX Wireless Headset conversation through the use of a remote listening kit or wired headset plugged into the device Due to increased bandwidth required by Supervisor Audio mode headset audio performance may sound degraded while Supervisor Audio is enabled For optimal performance be sure the parameter is se...

Страница 216: ...or Comfort Honeywell has designed the SR Series headsets based on data for most head shapes and sizes Because the headset is the most personal piece of voice equipment and must remain stable while workers perform very physical tasks users may benefit from these headset adjustment guidelines Placement of the T bar pad The SR 20 SR 21 SR 30 and SRX models have pads called t bars opposite the speaker...

Страница 217: ...er will not damage the equipment however a windscreen can create a water barrier that degrades speech recognition Do not attempt to break ice from a windscreen The pressure can grind ice into the foam and cause a water barrier as it melts Ice build up generally does not degrade performance because Vocollect s Adaptive Speech Recognition compensates for gradual changes in the environment Replace a ...

Страница 218: ...cil eraser to clean them Do not use unapproved liquids to clean the yellow blue and red Talkman Connectors TCOs and any associated headset scanner or device plugs Hand or machine wash dual cupped headset earpad covers in cold or warm water then air dry the covers The covers are made of 100 cotton flannel and may shrink if dried in a clothes dryer Related concepts Cleaning Plastics on page 17 Clean...

Страница 219: ...er and moisture away from the charger at all times If a battery has any condensation from use in a cold environment such as a freezer dry the battery before placing it into the charger Only Honeywell approved batteries should be placed in the battery charger Do not attempt to charge any other type of battery in the charger Note Do not place a device into a charger without a battery attached to it ...

Страница 220: ...ture 32 to 104 F 0 to 40 C Storage Temperature 40 to 158 F 40 to 70 C Charging Temperature 41 to 95 F 5 to 35 C Humidity Functional to 5 to 95 non condensing The battery charger s components will operate in ambient temperatures between 32 and 104 F 0 and 40 C with no adverse effects Functional battery charging is restricted to ambient temperatures between 41 and 95 F 5 and 35 C to limit the intern...

Страница 221: ...se a screw anchor in that hole If you are mounting two chargers side by side you must leave at least 1 in 2 54 cm of space between the two units to allow clearance for the locking arms Rails must be anchored to the wall at least 12 in 30 5 cm from the floor to allow for proper attachment seating and removal of the charger unit If you are mounting a charger directly above another charger Honeywell ...

Страница 222: ...nto a power source until after mounting is complete Before attaching the charger to the rail open the locking arms on the back of the unit by rotating the two levers out on each side of the charger The arms are parallel to the floor in the unlocked position 3 Attach the charger to the DIN rail by hanging the two hooks on the back of the unit on the top lip of the rail 4 Slide the charger horizonta...

Страница 223: ...he charger face that signals the status of the charger Solid green LED Charger power is on No light Charger power is off Solid red LED Charger is experiencing a power fault SRX2 only Note If the charger LED indicator is red unplug the charger power supply from the power source and remove all batteries Plug the power supply into the power source again If the LED remains red the charger may require ...

Страница 224: ...n with other devices being charged at the same time The T5 A500 charger may be fixed to a wall using the available wall mount kit Note Do not place a device into a charger without a battery attached to it If a device that has been on and in use for more than eight hours will automatically power off and then back on after it has been in the charger for five minutes Also a device that has been in a ...

Страница 225: ...ne Frequency 50 60 Hz Output Output 97 5 W 15 V x 6 5 A Cord U S Mexico Canada UL listed and CSA certified 3 conductor 18 AWG Terminated with a molded on plug cap rated at 125V 15A Six feet minimum length Cord other countries Internationally harmonized and marked HAR 3 conductor 0 75mm minimum wire Rated at 300V with PVC insulated jacket Molded on plug cap rated 250V 10A Six feet minimum length Si...

Страница 226: ... unit Installing the T5 A500 Charger Wall Mount Parts You will need 1 mounting bracket 4 self drilling screw anchors 10 4 washers 10 flat type B regular 4 screws 10 Phillips pan head Drill with 1 8 bit Screw driver 2 Phillips Drilling template sheet included 1 Using the drilling template mark four holes for the anchors Note that there are two sets of pilot markers one set for wall studs with 12 in...

Страница 227: ... does not have a battery and one of these conditions occurs disconnect the charger from its power source for about five seconds then reconnect the charger If the condition persists return the charger for service Left Indicator Color Right Indicator Color If a device with a battery is the charger Off Off Troubleshoot the problem Green Green The battery is charged and ready to use Red Off The batter...

Страница 228: ...ximately 2 5 6 5 cm Width with Desk Mount Feet Approximately 5 12 7 cm Height Approximately 5 25 13 3 cm Height with Desk Mount Feet Approximately 5 375 13 65 cm Power 90 264 Vac 50 60 Hz 72 W Uses standard IEC 630 cord Operating Temperature 50 to 140 F 10 to 40 C Storage Temperature 22 to 158 F 30 to 70 C Humidity Functional to 90 non condensing Note Packaging varies for product shipments General...

Страница 229: ...ted power supplies on a wall Customer assembly required Be aware of potential hazards electrical wires waterlines etc when drilling the pilot holes Customer assumes all responsibility for the installation of these units A device charger cannot have another charger placed directly above it A section of dry erase board included must be placed above each device charger If you drill into a wall stud w...

Страница 230: ...t be placed onto the wall correctly The inside edge of the extrusion has the T channel into which the chargers are inserted See figure below 4 Insert a screw through a washer and the hole in the extrusion and into the anchor Tighten the screw enough to hold the extrusion in place Repeat with the other screws and washers 5 Repeat the previous two steps for the other extrusion 6 Make sure that the e...

Страница 231: ...he mounting panel 2 Insert the screw through a washer and the hole in the panel then into the collar Tighten the screw all the way Repeat with the other collar 3 The eight holes in the middle of the mounting panel are for the power supply brackets Mount a power supply bracket to the panel by lining up the holes Refer to the figure below for the correct positioning of the bracket Figure 163 Mountin...

Страница 232: ...stening the Collars 3 Insert a spring into the collar then secure with a screw The screw should bottom out in the channel 4 Repeat these steps for the rest of the collars Charger Wall Mount Multiple Chargers Completing the Assembly At this point you are ready to put the power supply mounting panel the chargers and the dry erase board sections into the extrusions Insert the different pieces into th...

Страница 233: ...ocollect Talkman devices SRX and SRX2 headsets and their chargers have LEDs that indicate the state of the equipment These LEDs may be on off or blink In some cases an LED will blink alternating between two colors If the LEDs indicate that there is a problem refer to information on troubleshooting to solve the problem See also Troubleshooting Problems Indicated by LED T2 and T2x Device Charger LED...

Страница 234: ...ed into the charger The battery may be too hot or too cold Wait for the battery s temperature to normalize If the yellow LED remains lit for more than two hours troubleshoot the problem T1 10 Bay Combination Charger Figure 167 T1 10 Bay Combination Charger The T1 10 Bay Combination Charger can store five devices at a time The charger can store and charge ten batteries at a time five batteries in t...

Страница 235: ...ew head and mounting surface should be approximately 3 16 of an inch Install the battery charger so that the supporting surface and installation will safely support the weight of a fully loaded charger greater than 8 pounds If wall stud mounting is impractical Honeywell recommends using wall anchors that are capable of supporting at least 10 lbs anchor The installer must verify the charger is remo...

Страница 236: ...trusions against the wall and align its holes with the installed anchors The extrusions have a specific inside and outside edge and must be placed onto the wall correctly The inside edge of the extrusion has the T channel into which the chargers are inserted 7 Insert a screw through a washer and the hole in the extrusion then into the anchor Tighten the screw to hold the extrusion in place Repeat ...

Страница 237: ...e Charger Cable allows you to use a commercially available 5V charger to charge a single T1 battery within a T1 device Do not remove the battery from the device when connecting the device to the charger cable T1 Single Charger Cable Specifications Length 21 21 53 9 cm Depth 6 64 16 9 cm Depth with Wall Bracket 6 89 17 5 cm Height 6 12 15 5 cm Power Input Voltage 100 250 Vac ...

Страница 238: ...m SRX Headset Battery Charger Figure 171 SRX Headset Battery Charger The SRX battery charger is available in a five bay model with five battery slots and a single battery charger with one battery slot To power on the charger connect the power supply to the charger and a power source The LED indicator in the left corner of the charger is green when the charger is receiving power SRX headset battery...

Страница 239: ...y 8 cm 3 Depth Approximately 11 cm 5 Height Approximately 6 cm 2 5 Input Input voltage 100 240 VAC Input current 0 9 A maximum Line frequency 50 60 Hz Output 5 W Cord US Mexico Canada UL listed and CSA certified Three conductor 18 AWG Terminated with a molded on plug cap rated at 125V 10A minimum Six feet minimum length Cord Other Countries H05VVF3G1 00 per CENELEC HD 21 marked HAR Three conductor...

Страница 240: ...rger must be reversed 1 Turn the charger over and loosen the screw on the bottom of the stand 2 Flip the stand over and reinstall the screw 3 Drill two pilot holes for wall anchors not included The anchors should be spaced 2 75 apart vertically 4 Install the anchors and screws not included 5 Be sure to use both the keyhole slot and screw slot to hang the charger SRX Battery Charger Wall Mount Moun...

Страница 241: ... Removing the battery during this five second interval may cause the LED indicator on the charger to display an incorrect battery status Left Indicator Color Right Indicator Color SRX Battery Status Off Off No battery is detected in the charger slot If a battery is in the slot Red Off Battery in that slot is charging Green Green Battery in that slot is fully charged and ready for use Off Yellow Ba...

Страница 242: ... charged Power supply output voltage 5V Power supply output power 20W max Less than 10W required to charge 6 batteries from fully depleted to fully charged Cord Uses standard IEC 60320 plug Uses wall adapter with switchable plugs provided in kit Operating Temperature 32 to 104 F 0 to 40 C 32 to 104 F 0 to 40 C Storage Temperature 40 F to 158 F 40 to 70 C 40 F to 158 F 40 to 70 C Humidity 5 95 rela...

Страница 243: ... 5 cm from the floor with the product not exceeding 2 meters 200 cm from the floor If you are mounting a charger directly above another charger Honeywell recommends clearance of at least 10 in 25 4 cm between DIN rails with the product not exceeding 2 meters 200 cm from the floor Figure 173 SRX2 20 Bay charger back view Part Number in Diagram Description 1 power supply 2 rubber stop for leveling c...

Страница 244: ...ing the two levers out on each side of the charger The arms are parallel to the floor in the unlocked position 3 Attach the charger to the DIN rail by hanging the two hooks on the back of the unit on the top lip of the rail Attaching the SRX2 Charger to a DIN Rail 4 Slide the charger horizontally to the desired position on the rail and rotate the locking arms into the locked position flush with bo...

Страница 245: ...exclamation point indicates that there is a battery condition requiring attention When this indicator is on the battery on that charger port may not last a full shift Check VoiceConsole for a specific alert message Figure 174 Battery Port Indicators The following chart describes the patterns for the battery port LED indicator lights Ring LED Charge Status Alert LED Battery Health SRX2 Battery Stat...

Страница 246: ...Part SRX2 Wireless Headset Part Number SRX2 T Bar Pads 2 Bag of 20 HD 1000 140B SRX2 Stability Straps Bag of 20 HD 1000 108B SRX2 Hard Hat Headset Clip Slotted Mount HD 1000 110 ...

Страница 247: ...st inline adapter cables are made for a specific handheld device so be sure to use the correct adapter for your device Additionally inline adapter training cables must only be used with listening systems approved by Honeywell When training new operators you may want to listen in on their progress working with the voice system Honeywell recommends specific listening kits for this purpose Note CV41 ...

Страница 248: ... to listen to the conversation between an operator and a Talkman device or handheld device The Vocollect audio adapter cable with the red connector can be used with Talkman devices A device specific adapter training cable also referred to as a Y or splitter cable must be used with third party handheld devices For more information consult the user manual provided with your listening kit Monitoring ...

Страница 249: ...listening system Be sure to use the correct adapter cable for your device 2 Connect the inline adapter training cable to your Vocollect SR Series headset 3 Connect the other end of the inline adapter training cable to your handheld device 4 Power on the wired listening kit and begin working Samson Wireless Listening Systems TR 605 x The Samson TR 605 x wireless listening kit replaces the TR 604 x ...

Страница 250: ...h a wired barcode reader you will need the TR 603 102 Y adapter cable which connects a scanner and a listening kit transmitter via the red port on the A500 T5 device If you are using a handheld device you will need the AD 300 1 inline Y adapter training cable which provides a connection for a wired Vocollect headset and an audio output connection to go to the listening kit transmitter Talkman devi...

Страница 251: ...crew and use gentle pressure to fully rotate the control screw counterclockwise to set the gain to its minimum setting Use extra care if you use a metal screwdriver as metal may damage the gain controls 3 On the receiving radio locate the control marked 1 Gently rotate the control screw counterclockwise to set the headphone volume to its minimum setting 4 On the gray receiving radio turn the Phone...

Страница 252: ...and a receiving radio which communicate with each other over a particular radio channel This system can be used to monitor several operators by setting each transmitting radio to a different channel and then changing the channel on the receiving radio to that of the transmitter you wish to monitor Important Ensure that you do the following before using the listening system Set the transmitter s Li...

Страница 253: ...ayed on the receiver 5 Power the transmitter off to commit the changes to memory 6 Turn on the transmitter It will be set to the frequency that you chose 7 Verify that the tranmitter s setting matches the frequency or channel bank selected on the receiver Connecting the Sony Wireless Listening Kit to a Talkman Device 1 Connect the Talkman device to the transmitter using a Honeywell cable 2 Connect...

Страница 254: ...R Series headset s connector to the matching end of the adapter cable 2 Connect the other end of the adapter cable to the appropriate port on your handheld device Connecting Inline Adapter Training Cables 1 Connect your Vocollect SR Series headset s connector to the matching end of the training adapter cable 2 Connect the 3 5 mm jack on the training cable to the input jack on your listening device...

Страница 255: ...e TR 603 102 Audio adapter cable Wireless Listening Kit 1 32 or 2 5mm male Worldwide TR 604 101 Audio cable A700 Micro USB to 3 5 mm male TR 900 1 Adapter Audio Splitter Cable for training to Vocollect Headsets AD 300 1 Choosing Cables for Your Training Configurations Device Headset Scanner Cable Configurations Talkman A700 Devices wired connects to A720 YELLOW port or wireless wired or wireless o...

Страница 256: ...red connects to T2x YELLOW port wired connects to T2x BLUE port wireless T2x Bluetooth Serial Adapter connects to BLUE port or no scanner TR 603 101 or TR 604 101 connects wired listening kit or transmitter for wireless kit to T2x RED port Third Party Device wired or wireless built in wireless or no scanner AD 300 1 connects headset SR20 or equivalent wired listening kit or transmitter for wireles...

Страница 257: ...Charger About Sending Equipment Back for Repairs Troubleshooting VMT Configurations Troubleshooting Problems Indicated by LED About Error Messages Sometimes you will not see an LED indicator change or hear an error message but will see some other sign of trouble Find the description below that most accurately describes what you see Follow the steps in sequence until the issue is resolved start wit...

Страница 258: ...s indicates searching verify that the correct Bluetooth address was entered Correct the entry if necessary by following the initial procedure to set up the connection 5 If the scanner beeps several times after a scan it is not connected Verify the connection with the Talkman 6 If the scanner appears to scan and beeps once indicating successful scan but Talkman does not appear to accept input assur...

Страница 259: ...ice The Device Does Not Respond to Button Presses 1 Make sure the device has a fully charged battery 2 Reboot the device 3 Send the device back to Honeywell for repair The Device Will Not Turn On 1 Make sure the battery is properly seated on the device 2 Make sure the device has a fully charged battery 3 Send the device back to Honeywell for repair The Device Keeps Shutting Off 1 Change the batter...

Страница 260: ...repaired This is not able to be corrected by a customer The LEDs on the front of the charger do not indicate that a charge is in progress when a battery is placed in a battery pocket Verify that the DC power line from the charger power brick is also securely connected Have the charger replaced or repaired This is not able to be corrected by a customer The LEDs on the front of the charger do not in...

Страница 261: ... If not follow cleaning procedures and retry Have the charger replaced or repaired This is not able to be corrected by a customer All of the red LEDs for the battery charger s slots are flashing and will only stop if the charger s power is cycled Replace all devices in the charger with a different set of devices power cycle the charger and verify if condition continues Successively remove one devi...

Страница 262: ...t VoiceClient on a handheld device contact the reseller or device manufacturer if you have questions or issues concerning the device Attention Remove ear pads mounting discs cables and cord clips before shipping These consumable items slow down the repair process and units will be shipped back without these consumables installed Honeywell issues RMAs for all returns regardless of the reason for th...

Страница 263: ...currently installed at your site Description of problem or reason for return Whether the product is covered by warranty Extended Service Plan ESP or Depot Express A purchase order number if items are not covered by ESP or Depot Express 3 Include the RMA number on the shipping label if shipping items to Honeywell 4 Package the equipment according to the packaging instructions 5 Address the shipping...

Страница 264: ...s likely a problem with the vehicle power system that needs professional attention If input voltage is being supplied to the power supply check the output voltage If there is input voltage but no output voltage or the output voltage does not match 13 2V DC then the power supply is likely in need of replacement If there is output voltage in the 13 2V DC range then the problem is likely in the cable...

Страница 265: ...ive seconds then reconnect it Test the charger with a battery If the same condition occurs return the charger for service About Error Messages Error messages may be of one of two types Numbered Messages display in VoiceConsole as the numeric value of the error followed by the text message that displays in Debug If you have seen a numbered error message in VoiceConsole see the Numbered Error Messag...

Страница 266: ... 4 Reload VoiceClient 0x1202 Task not loaded No task name available 0x1203 OperLoad failed TmplSend busy 0x1204 Operator load failed 0x1205 Corrupted operator data 0x1206 Noise sample failed 0x1207 There are no operators in this team 0x1208 Unable to retrieve operator files 0x1209 Internal error loading operator 0x120a Task load failed 0x120b Self test mode set but no script file found 0x120c No t...

Страница 267: ...sk audio file Task load failed 0x1402 Communications error Process message service receive error 0x1403 Communications error Process message service send error 0x1406 Communications error Process message service GetIdFromName error 0x140a Communications error Unable to close Vocollect configuration file 0x140f Communications error Unable to delete Vocollect configuration file 0x1410 Communications...

Страница 268: ...t and service information If you need assistance contact Vocollect 0x1427 Unable to send file via socket Unable to open 1 Turn the device off and then turn it back on again 2 Reboot the device 3 Reload VoiceClient 0x142a Invalid Terminal Manager service name or port 0x142c Telnet session manager failed to start 0x142d Telnet client process failed to start 0x142e Telnet VT220 emulation process fail...

Страница 269: ...gain 2 Reload the task 3 Reboot the device 4 Reload VoiceClient 0x1a06 Process history data bins to records write error 0x1a09 Process history data power off error 0x1a0b Process history data process message service initialization data file descriptor failed 0x1e01 Video terminal emulation initialization failed 0x1e02 Video terminal emulation process message service receive failed 1 Turn the devic...

Страница 270: ...ator linked list 0x2112 Flash is full Please wait while Talkman turns off 0x2115 Flash library failed Out of space 0x2116 Flash library failed during reclaim Spoken Error Messages Error Message Solution Battery is very low Powering off Must replace battery after power off complete Change the battery Battery is getting low Change the battery Battery is getting low Change battery now Change the batt...

Страница 271: ...Reload VoiceClient Failed to load task VCF file Task load failed 1 Go to an area of known good coverage 2 Turn the device off and then turn it back on again 3 Reload the task 4 Reboot the device 5 Reload VoiceClient Failed to load device emulation config file Task load failed 1 Go to an area of known good coverage 2 Turn the device off and then turn it back on again 3 Reload the task 4 Reboot the ...

Страница 272: ...o task list file found Task unchanged 1 Reload the task 2 Turn the device off and then turn it back on again 3 Reboot the device 4 Reload VoiceClient Noise sampling procedure failed 1 Sample noise again 2 Go to a quieter location and perform another noise sample 3 Try using another headset and perform the noise sample Note If this solves the problem the first headset might be damaged Noise samplin...

Страница 273: ...t Telnet VT220 emulation process failed to start 1 Turn the device off and then turn it back on again 2 Reboot the device 3 Reload VoiceClient Unable to receive input data 1 Turn the device off and then turn it back on again 2 Reboot the device 3 Reload VoiceClient Unable to retrieve operator files 1 Turn the device off and then turn it back on again 2 Reboot the device 3 Reload VoiceClient Unable...

Страница 274: ...flash memory You must upload your collected data now 1 Go to an area of known good coverage 2 Turn the device off and then turn it back on again 3 Reboot the device 4 Reload VoiceClient 5 Place the device in a charger as soon as possible ...

Страница 275: ...ormation Needed for Most Support Requests Common Questions to Answer when Contacting Support Enabling Device Logging in VoiceConsole This section describes what you will need before contacting technical support with an issue and how to gather the needed files ...

Страница 276: ...t is the current workaround When did the issue first occur How is this impacting the business Has anything about the environment changed Enabling Device Logging in VoiceConsole 1 Select VoiceConsole Device Management Devices 2 Click the name of the device for which you want to enable logging The properties window for that device will appear 3 Enable logging for the device Depending on the version ...

Страница 277: ...ist of Words Training Using the Device Screen All new operators must train their voice templates all the words that he or she will use in the voice directed workflow in order to perform a task with the Vocollect Voice system Supervisors have options for operators to train templates when using a device Note Always speak in your normal tone of voice when training templates ...

Страница 278: ...This process can be improved when used in conjunction with the section Training Using a Printed List of Words as found below Visual Training Devices Figure 188 Pidion BM 170 and QTERM G55 Visual training devices enable operators to read the words that they need to say during the enrollment training process Honeywell recommends using a browser based mobile display with Talkman A500 or A700 devices ...

Страница 279: ...e contrast 2 to decrease the contrast 3 to accept the current setting After you press 3 Baud Rate appears on the training device screen 8 On the training device press 1 until a baud rate of 9600 appears on the screen 9 Press 3 to accept the baud rate setting Bits appears on the training screen 10 On the training device press 3 to accept 8 as the bits setting Parity appears on the training screen 1...

Страница 280: ...ase wait It will then beep periodically until all of the remaining voice templates have been created During the beeping the device periodically repeats the Please wait phrase to alert the user that it is still busy When the remaining voice templates have been created the device says Finished creating voice templates The device then goes to sleep You can begin the task by pressing the Play Pause bu...

Страница 281: ... have the supervisor or current operator train templates for that task and perform the steps above To proceed with the actual training follow the detailed list of instructions in the Training with the Talkman Only section above Training Using the Device Screen Note This is not supported on Talkman devices 1 On the device screen tap Start 2 Tap the Vocollect Voice symbol The Vocollect Voice screen ...

Страница 282: ...y number of times the device will say Creating voice templates Please wait It will then beep periodically until all of the remaining voice templates have been created During the beeping the device periodically repeats the Please wait phrase to alert the user that it is still busy When the remaining voice templates have been created the device says Finished creating voice templates The device then ...

Страница 283: ...AC Russian Compliance CE Marking European Compliance Regulatory Approvals for Bluetooth Radio Devices For Users in the U S A and Canada Laser Compliance and Precaution For Users in the U S A and Canada Imager Compliance and Precaution For Users In Europe Imager Compliance and Precaution Declaration of Conformity RoHS Document 1004616 Rev A Document 1004615 Rev A Document 1004618 Rev A Document 100...

Страница 284: ...erence by one or more of the following measures Reorient or relocate the receiving antenna Increase the separation between the equipment and receiver Connect the equipment into an outlet on a circuit different from that to which the receiver is connected Consult the dealer or an experienced radio TV technician for help RF Exposure Statement Warning Honeywell Wireless products comply with Internati...

Страница 285: ...aux utilisateur prioritaires des bandes de fréquences 5250 5350 MHz et 5650 5850 MHz et que ces radars peuvent provoquer des interférences et ou endommager les périphériques LE LAN Honeywell products contain one of the following radio devices See device label Honeywell Device Card Manufacturer and P N Maximum SAR Value La valeur maximale Appareil de Honeywell Fabricant de la carte et P N FCC ID Ca...

Страница 286: ... exempt RSS standard s Operation is subject to the following two conditions 1 this device may not cause interference and 2 this device must accept any interference including interference that may cause undesired operation of the device Le présent appareil est conforme aux CNR d Industrie Canada applicables aux appareils radio exempts de licence L exploitation est autorisée aux deux conditions suiv...

Страница 287: ... Honeywell Regulatory Compliance 287 Japanese Compliance Brazilian Compliance ...

Страница 288: ...有均质材料中的含量均在GB T 26572标准规定的限量要求以下 Indicates that this hazardous substance contained in all of the homogeneous materials for this part is below the limit requirement in China s GB T 26572 x 表示该有害物质至少在该部件的某一均质材料中的含量超出GB T 26572 标准规定的限量要求 Indicates that this hazardous substance contained in at least one of the homogeneous materials for this part is above the limit requirement in China s GB T 26572 有害物...

Страница 289: ...this part is above the limit requirement in China s GB T 26572 有害物质 Hazardous substance 部件名称 A730 TAP 930 01 条码阅读 器 Barcode Reader 铅 Pb 汞 Hg 镉 Cd 六价铬 Cr6 多溴联 苯 PBB 多溴二苯 醚 PBDE 印刷电路板 PCB X O O O O O 本表格依据SJ T 11364的规定编制 This table is created in accordance to SJ T 11364 o 表示该有害物质在该部件所有均质材料中的含量均在GB T 26572标准规定的限量要求以下 Indicates that this hazardous substance contained in all of the homogeneous material...

Страница 290: ...ce contained in at least one of the homogeneous materials for this part is above the limit requirement in China s GB T 26572 有害物质 Hazardous substance 部件名称 A500 CM 700 1 1 CM 700 1 2 CM 700 1 3 铅 Pb 汞 Hg 镉 Cd 六价铬 Cr6 多溴联 苯 PBB 多溴二苯 醚 PBDE 印刷电路板 PCB X O O O O O 本表格依据SJ T 11364的规定编制 This table is created in accordance to SJ T 11364 o 表示该有害物质在该部件所有均质材料中的含量均在GB T 26572标准规定的限量要求以下 Indicates that this ha...

Страница 291: ...d in at least one of the homogeneous materials for this part is above the limit requirement in China s GB T 26572 有害物质 Hazardous substance 部件名称 SRX2 HCG1000 01 HCG1000 02 铅 Pb 汞 Hg 镉 Cd 六价铬 Cr6 多溴联 苯 PBB 多溴二苯 醚 PBDE 印刷电路板 PCB X O O O O O 本表格依据SJ T 11364的规定编制 This table is created in accordance to SJ T 11364 o 表示该有害物质在该部件所有均质材料中的含量均在GB T 26572标准规定的限量要求以下 Indicates that this hazardous substance cont...

Страница 292: ... T 26572 Маркировка EAC и соблюдение Российские нормативов Russian Compliance Предназначенная для продажи в России Казахстана и Беларуси продукция маркирована специальным образом знак EAC что указывает на соответствие Таможенный союза требованиям и нормам Поправки и дополнения к этим требованиям и нормам также учтены Products intended for sale in Russia Kazakhstan and Belarus are labeled with the ...

Страница 293: ...atings voltage Напряжение 220V 50Hz Соответствие агента Л Н Голубова генеральный директор ООО Дофин 140573 РФ Московская обл Озерский район с Бояркино Compliance agent L N Golubova CEO Dofin Ltd Boiarkino Ozersky area Moscow region 140573 Russia Модель Model Инвентарного номера Part Number Номер модели Model Number Голос устройство Honeywell A700 Series TT 910 TAP910 01 Зарядное устройства для A70...

Страница 294: ...00 в устройстве A700 Device Charger CM 901 TCH901 01 Зарядное устройства для A700 в батарей A700 Battery Charger CM 902 TCH902 01 Made in Mexico сделано в Мексике Ratings voltage Напряжение 100 240V 2A 50 60Hz Представитель в РФ ЗАО Хоневелл 121059 г Москва ул Киевская 7 Compliance agent ZAO Honeywell 121059 Moscow Kievskaya str 7 Модель Model Инвентарного номера Part Number Номер модели Model Num...

Страница 295: ...Model Number A710 A720 A730 TT 910 TT 920 TT 930 TAP910 01 TAP920 01 TAP930 01 This wireless device operates in the 2 4 GHz 5 GHz and 13 56 MHz frequency bands and is intended for light industrial use in all EU and EFTA member states See restrictions below Table 5 European Community Restrictions BE BG CZ DK DE EE IE EL ES FR HR IT CY LV LT LU HU MT NL AT PL PT RO SI SK FI SE UK IS NO LI CH Table 6...

Страница 296: ...e local technical support staff responsible for the wireless network to ensure the Access Point device s are properly configured for European Community operation In order to ensure compliance with the latest European standards VoiceCatalyst 2 1 1 or newer or VoiceClient 3 9 1 or newer voice software must be loaded on A700 devices Nominal Channel Bandwidths 2 4 Ghz band 802 11b 22 MHz 2 4 Ghz band ...

Страница 297: ...doors DFS TPC DFS DFS TPC 116 5580 Indoors DFS TPC DFS DFS TPC 120 5600 Indoors DFS TPC No Access DFS TPC 124 5620 Indoors DFS TPC No Access DFS TPC 128 5640 Indoors DFS TPC No Access DFS TPC 132 5660 Indoors DFS TPC DFS DFS TPC 136 5680 Indoors DFS TPC DFS DFS TPC 140 5700 Indoors DFS TPC DFS DFS TPC Table 10 802 11b Nominal Power Values Transmitter Power EIRP ERP Antenna Gain 2 18 dBi at worst c...

Страница 298: ...42 17 7 20 0 2 3 2472 18 2 20 0 1 8 Table 13 FHSS Transmitter Power EIRP ERP Antenna Gain 2 18 dBi at worst case levels Channel Frequency MHz Average dBm Limit dBm Margin dB 2402 1 5 20 0 21 5 2441 1 5 20 0 21 5 2480 1 6 20 0 21 6 Table 14 5 GHz Channel Frequency MHz 802 11n EIRP 802 11a EIRP 5180 18 1 18 5320 19 1 19 5500 20 19 9 5700 19 4 19 2 Table 15 Maximum Power Values Frequency Band MHz Max...

Страница 299: ...int s radar detection feature will automatically restart operation on a channel free of radar You may consult with the local technical support staff responsible for the wireless network to ensure the Access Point device s are properly configured for European Community operation In order to ensure compliance with the latest European standards VoiceCatalyst 2 1 1 or newer or VoiceClient 3 9 1 or new...

Страница 300: ...n on a channel free of radar You may consult with the local technical support staff responsible for the wireless network to ensure the Access Point device s are properly configured for European Community operation In order to ensure compliance with the latest European standards VoiceCatalyst 2 1 1 or newer or VoiceClient 3 9 1 or newer voice software must be loaded on A500 devices Model Name Part ...

Страница 301: ...ct 21 CFR Subchapter J Part 1040 This product has a maximum output of 1 mW at 630 680 nm CAUTION There are no user serviceable parts inside the A700 Use of controls or adjustments or performance of procedures other than those specified herein may result in hazardous laser light exposure of up to 1 mW at 630 680 nm Note There are no controls or adjustments provided for routine operation or maintena...

Страница 302: ...2011 RoHS 2 applies are compliant with this directive on the restriction of the use of certain hazardous substances in electrical and electronic equipment The parts do not exceed the maximum concentrations by weight in homogenous materials for 0 1 lead Pb 0 1 Hexavalent chromium Cr6 0 1 polybrominated biphenyl PBB 0 1 polybrominated diphenyl ether PBDE 0 01 cadmium Cd or qualify for an exemption t...

Страница 303: ...e ce A710 TAP910 01 A720 TAP920 01 and A730 TAP930 01 est conforme aux exigences essentielles et aux autres dispositions de la Directive 2014 53 UE qui lui sont applicables Härmed intygar Vocollect by Honeywell att denna A710 TAP910 01 A720 TAP920 01 and A730 TAP930 01 står I överensstämmelse med de väsentliga egenskapskrav och övriga relevanta bestämmelser som framgår av Direktiv 2014 53 EU Under...

Страница 304: ...14 53 EU Par la présente Vocollect by Honeywell déclare que l appareil A500 TAP802 01 est conforme aux exigences essentielles et aux autres dispositions pertinentes de la Directive 2014 53 UE Par la présente Vocollect by Honeywell déclare que ce A500 TAP802 01 est conforme aux exigences essentielles et aux autres dispositions de la Directive 2014 53 UE qui lui sont applicables Härmed intygar Vocol...

Страница 305: ...tres dispositions pertinentes de la Directive 2014 53 UE Par la présente Vocollect by Honeywell déclare que ce SRX2 HBT1000 01 est conforme aux exigences essentielles et aux autres dispositions de la Directive 2014 53 UE qui lui sont applicables Härmed intygar Vocollect by Honeywell att denna SRX2 HBT1000 01 står I överensstämmelse med de väsentliga egenskapskrav och övriga relevanta bestämmelser ...

Страница 306: ...are que ce SRX SL HBT1100 est conforme aux exigences essentielles et aux autres dispositions de la Directive 2014 53 UE qui lui sont applicables Härmed intygar Honeywell International Inc att denna SRX SL HBT1100 står I överensstämmelse med de väsentliga egenskapskrav och övriga relevanta bestämmelser som framgår av Direktiv 2014 53 EU Undertegnede Honeywell International Inc erklærer herved at fø...

Страница 307: ...neywell Regulatory Compliance 307 Honeywell International Inc declara que este SRX SL HBT1100 está conforme com os requisitos essenciais e outras disposições da Directiva 2014 53 EU Document 1004617 Rev A ...

Страница 308: ......

Страница 309: ...es 253 Pidion BM 170 display 74 100 T1 device holster 146 Talkman part numbers 28 Talkman devices 73 100 123 136 145 vehicle mount 54 88 114 adapter cables connecting headset to handheld device 254 connecting listening device 254 adjustable shoulder harness specifications 102 124 auto pairing 202 B bar code reader problems won t scan 258 batteries charging A500 device 82 109 charging A700 device 6...

Страница 310: ...charger 228 charging battery 69 cleaning procedures 17 CN70 Talkman MP solution 149 cold battery 86 112 134 144 170 182 combination charger attaching power supply 225 easy configuration 87 113 easy configuration additional devices 87 114 easy configuration setup 87 113 power supply specifications 225 specifications 224 wall mount 226 wall mount installing 226 commands 26 compatibility SRX2 with de...

Страница 311: ...using properly 153 SL 14 headset wearing 153 SL 14 light industrial behind the head 152 SL 4 behind the head 152 SL 4 headset using properly 153 SL 4 light industrial behind the head 153 SR 10 behind the head 155 SR 15 wearing 156 SR 15 behind the head 155 SR 15 specifications 155 SR 20 Lightweight 158 SR 20 Series 159 SR 20 Series Lightweight 158 SR 21 Lightweight 159 SR 30 High Noise 160 SR 30 H...

Страница 312: ... Wireless Listening System 249 scanning 39 scan problems 258 screen 74 100 send back 262 263 263 shoulder harness A500 device 102 124 specifications 102 124 T5 device 102 124 shut down 259 single charger 238 SL 14 behind the head headset specifications 152 using properly 153 wearing 153 SL 4 behind the head headset specifications 153 using properly 153 slower 25 softer 25 25 solutions Talkman MP 2...

Страница 313: ...r 208 battery 179 battery specifications 179 charging 179 compatibility 178 earpad 184 electronics module attaching 177 electronics module removing 178 inserting battery 181 LED indicators 185 manual pair 209 modular design 176 pairing 185 207 removing battery 181 screen based pairing 209 sharing 177 stability strap installing 183 Talkman MP solution 149 TouchConnect 207 wearing 182 SRX2 headset b...

Страница 314: ...icators 112 removing battery 85 111 134 removing from charger 84 110 133 shoulder harness 102 124 T5m charger LED indicators 227 T5m device LED indicators 112 T5 Series devices battery specifications 83 109 T5 series specifications 108 T5 VMT accessories 55 89 115 connecting cables 93 117 installing in vehicle 114 positioning in forklift 59 90 116 Talkman accessories part numbers 28 commands 26 Ta...

Страница 315: ... 26 changing pitch 25 changing speed 25 changing volume 25 25 faster 25 higher 25 louder 25 25 lower 25 slower 25 softer 25 25 voice application load 259 VoiceConsole pairing wireless headsets and devices 210 volume changing with device buttons 25 volume changing with voice 25 W windscreen cleaning 164 217 wired headsets part numbers 30 wired listening kits 248 248 249 wireless headsets about 167 ...

Страница 316: ... Index 316 ...
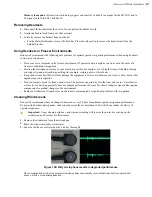
Отзывы: