S9200U1000 UNIVERSAL HOT SURFACE IGNITION INTEGRATED FURNACE CONTROL
69-2075EF—01
6
WARNING
Fire or Explosion Hazard.
Can cause severe injury, property damage, or
death.
1. The integrated furnace control can malfunction
if it gets wet, leading to accumulation of
explosive gas.
— Never install where water can flood, drip or
condense on the control.
— Never try to use an integrated furnace control
that has been wet—replace it.
2. Liquefied petroleum (LP) gas is heavier than air
and will not naturally vent upward.
— Do not operate electric switches, lights, or
appliances until you are sure the appliance
area is free of gas.
WARNING
Electrical Shock Hazard.
Can cause severe injury, property damage, or
death.
1. Make sure to turn power off to the furnace.
Failure to do this may result in electrical shock
or equipment damage
2. Disconnect power supply before beginning
wiring or making wiring connections to prevent
electrical shock or equipment damage.
CAUTION
Equipment Damage Hazard.
Water can cause equipment damage or
malfunction.
If furnace control must be mounted near water or
moisture, provide suitable waterproof enclosure.
Replacing An Existing Furnace
Control
Location
In most cases the integrated furnace control is mounted
on a panel within the circulator compartment of the
furnace. The location must provide:
— Access to the field wiring terminals.
— Operating ambient temperatures between -40°F and
175°F (-40°C and 79°C).
— Relative humidity below 95% non-condensing.
— Protection from water, steam or corrosive chemicals
that are used to clean the appliance.
— Protection from dripping water, such as from an
overfilled humidifier or from condensation.
— Protection from dust or grease accumulation.
IMPORTANT
Be sure to identify the safety timings on the
existing furnace control before any wires are
disconnected. If this information is unavailable,
check with the furnace manufacturer for
recommended settings.
Replacement
To replace the existing furnace control:
1.
Remove the access panel to gain access to the
furnace control.
2.
Unclip the wiring harness from the furnace control
and identify/mark all wires not connected to a wiring
plug.
3.
Once the furnace control is free from all wiring,
either unclip or unscrew the furnace control from
the base plate.
4.
Select the location within the appliance most suit-
able so that all existing cables or required har-
nesses will reach without straining either the cables
or the plugs. We recommend mounting the
S9200U1000 in the same location as the old fur-
nace control, if possible. Ambient temperature at
the S9200U1000 must be within the control specifi-
cations.
5.
The S9200U1000 can be mounted vertically in any
orientation. See Fig. 4 on page 9 for typical mount-
ing orientation.
6.
Secure the board to the mounting panel base plate
with the two sheet metal screws inserted through
the eyelets located on the edges of the board. See
Fig. 1 on page 7.
7.
From Table 1 on page 3, identify the wiring har-
ness(es) required for the quick installation of the
S9200U1000. The provided wiring harness adapt-
ers are intended to connect to the existing wiring
harness. See Table 3 on page 7 and Table 4 on
page 8 for pin-out information for the provided wir-
ing harnesses.
8.
Connect the appropriate end of the wiring harness
to the 12-pin plug on the S9200U1000 (if required)
and the other end to the existing wiring plug (previ-
ously removed from the existing furnace control).
Connect the appropriate igniter/inducer harness (if
required) to the 4 pin plug and the other end to
either the existing plug or spade connectors (previ-
ously removed from the existing furnace control).
IMPORTANT
The provided wiring harnesses are keyed. Do
not force the connection if the plug on the har-
ness and receptacle on the S9200U1000 do not
easily snap closed.
9.
Connect the quick-connect cables to the appropri-
ate contacts on the S9200U1000
10.
Set the Safety timings as required using switch S2.
Refer to Table 10 on page 12 for switch setting
information.
11.
Set the field selectable timings as required using
switch S1. Refer to Table 9 on page 11 for setting
information.
12.
Review the connections to insure no wiring is loose
and there is a proper earth ground to the appliance
chassis.
13.
Turn power ON to the appliance. See “Checkout” on
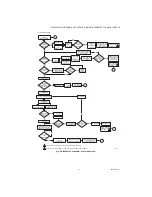
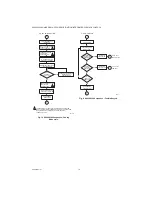
page 13 and the control sequence diagrams, Fig. 9-
Fig. 11 beginning on page 17.
Содержание S9200U1000
Страница 53: ...RÉGULATEUR D APPAREIL DE CHAUFFAGE INTÉGRÉ À ALLUMAGE PAR INCANDESCENCE UNIVERSEL S9200U1000 29 69 2075EF 01 ...
Страница 54: ...RÉGULATEUR D APPAREIL DE CHAUFFAGE INTÉGRÉ À ALLUMAGE PAR INCANDESCENCE UNIVERSEL S9200U1000 69 2075EF 01 30 ...
Страница 55: ...RÉGULATEUR D APPAREIL DE CHAUFFAGE INTÉGRÉ À ALLUMAGE PAR INCANDESCENCE UNIVERSEL S9200U1000 31 69 2075EF 01 ...

