background image

2

PX4ie and PX6ie Cutter Kit Installation Guide

Contents

The cutter kit consists the following,

• Cutter unit

• Two hinges with torx wrench

Installing the Cutter Kit

Follow the procedure to physically install the cutter.

Note:

This procedure applies to both the PX4ie and PX6ie Printers. For simplicity, 
the PX4ie Printer is depicted in the illustrations.

1.

Switch off the power and disconnect the power cord.

2.

Open the printer’s front door.

3.

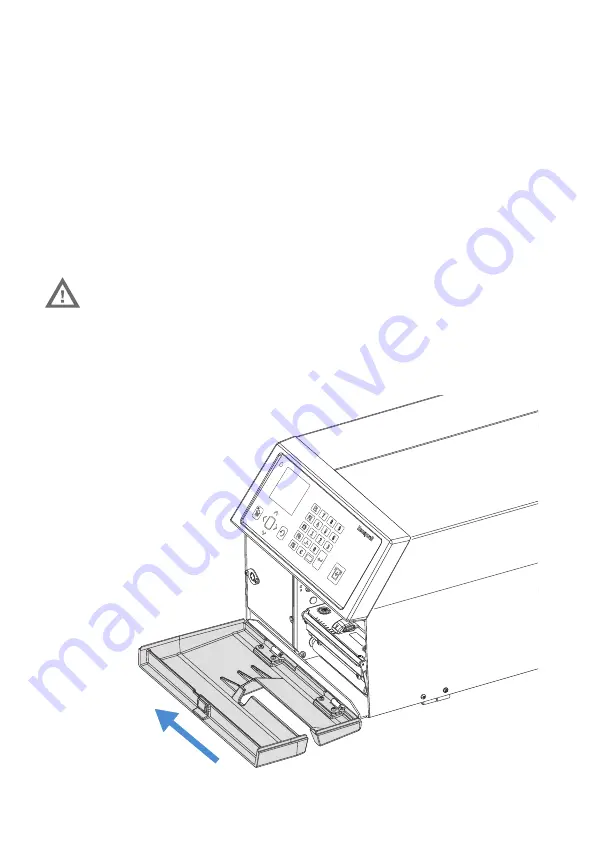
Hold the printer firmly and press the front door sideways to the left so as to 
disengage the hinges.

4.

Remove the door completely. 

Warning: Make sure to turn off the power before beginning to install 

or remove the cutter unit.

Press sideways

Содержание PX4-6IE-CUTR-IG-1

Страница 1: ...Cutter Kit For PX4ie PX6ie Installation Guide PX4 6IE CUTR IG 1 Rev A 01 20 ...

Страница 2: ...y damage the electric motor due to overheating The cutter is intended to cut through continuous non adhesive paper strip or through the backing paper between labels It must not be used to cut through any kind of adhsesive or other soft material that may stick to the cutting parts and render the cutter inoperable and even damage the electric motor by overheating Maximum paper thickness is 175 175 g...

Страница 3: ... applies to both the PX4ie and PX6ie Printers For simplicity the PX4ie Printer is depicted in the illustrations 1 Switch off the power and disconnect the power cord 2 Open the printer s front door 3 Hold the printer firmly and press the front door sideways to the left so as to disengage the hinges 4 Remove the door completely Warning Make sure to turn off the power before beginning to install or r...

Страница 4: ...rinter 6 Replace the hinges with the new ones that came with the cutter unit using the same four T10 Torx screw 7 Fit the cutter unit to the vacant hinges Make sure that the locking plate snaps into the groove of the right hand hinge and that the angled plate at the bottom of the cutter is inserted under the printer s bottom plate ...

Страница 5: ...ted using a T10 Torx screwdriver 10 Plug the printer back in and switch on the power The cutter will perform an idle cycle in order to occupy its home position 11 Switch off the power Tilt down the cutter and route the paper through the cutter unit between the guide plates also see the User s Guide Then tilt up the cutter again and lock it in closed position 12 Check that the printhead is lowered ...

Страница 6: ...PX4ie and PX6ie Cutter Kit Installation Guide 5 Cutter for PX4ie Printer Cutter Installed PX4ie Printer ...

Страница 7: ...6 PX4ie and PX6ie Cutter Kit Installation Guide Cutter for PX6ie Printer Cutter Installed PX6ie Printer ...

Страница 8: ... This section describes how to maintain and troubleshoot the cutter unit Cleaning The cutter mechanism becomes accessible when the cover is opened The cutter shears will need to be cleaned on a regular basis to ensure optimal cutting performance Use isopropyl to clean the cutter Be careful to not dissolve the cutter lubrication Do not force the spring loaded anvil blade open more that 5 10mm 0 2 0...

Страница 9: ...ause Solution Error 1701 Cutter Jammed A cut has been performed but the shear has stopped on its way back to home bottom position Clean the shears from adhesive residue Error 37 Cutter device not found Cutter cable came loose from DIN connector Reconnect cutter cable connector to DIN connector Error 1059 Cutter does not respond Cutter cable came loose from DIN connector Reconnect cutter cable conn...

Страница 10: ...d the reader should in all cases consult HII to determine whether any such changes have been made The information in this publication does not represent a commitment on the part of HII HII shall not be liable for technical or editorial errors or omissions contained herein nor for incidental or consequential damages resulting from the furnishing performance or use of this material HII disclaims all...

Отзывы: