


17
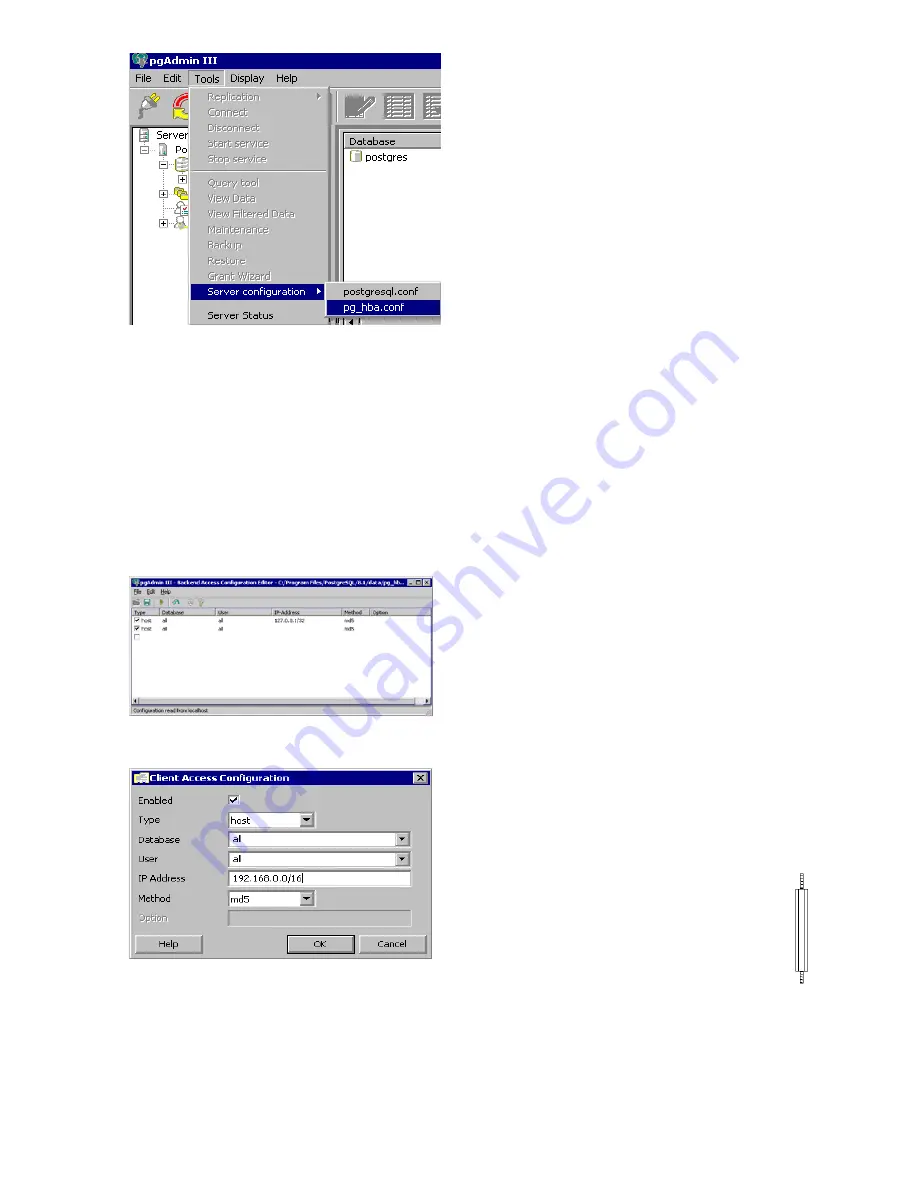
From the “pgAdmin III” screen, access the
Tools menu and select Server Configuration /
pg_hba.conf to access the Backend Access
Configuration Editor.
Three options will be shown the first time this
screen is launched after installation. The
checkbox at the left of each option indicates
whether or not it is enabled. The first two
options may or may not be enabled,
depending on network configuration.
Do not
change them
. The unchecked, final option will
be configured for the Posi3 USB software's
client access.
Double-click the bottom option to configure the
client access settings.
The client access configuration window allows
the user to control access to the Posi3 USB
databases through the PostgreSQL database
server. The settings allow the user to specify
the parameters that need to be met for the
client (external) to access the databases
(internal).
To set up client access, first click on the
checkbox next to "Enabled".
For more information about the choices in any
of the drop-down boxes, click the Help button.
The "Type" setting should be "host", although
other settings are available.
Under "Database", select the database that
should be accessible by the client, or leave it
set to "All". To limit the client's access to only
the PostgreSQL database(s), select
"postgres".
Under "User", enter a specific user account
name or user group as the network would
recognize it.
Enter the IP Address filter for the user or user
group.
See the Posi3 USB Installation help
file for more information and examples or
consult your IT department.
Honeywell Analytics
recommends that
"Method" be set to "md5".
Once Client Access is properly configured,
click the Close “X” button to close the
Backend Access Configuration Editor.
Software installation is now complete.
5. Hardware
Setup
5.1
Installing the test head
The test head must be mounted to the top of
the Posi3 USB chassis. A gasket installed
between the top of the bellows assembly and
the bottom of the test head guards against
leakage. A Tygon
tube connects the static
pressure port located in the left eye of the test
head with a hose barb fitting on the bellows
chamber base plate. The head is secured by
four mounting standoffs and four tightening
knobs.
To install the test head on the Posi3 USB
chassis:
1. Make sure the base of the test head,
gasket, and bellows chamber inlet area
(where the test head will be mounted) are
clean and free of dust and/or other
contaminants.
2. Screw the four standoffs into place at the
top of the Posi3 USB chassis by hand
until they are tight.
No tools are
necessary.
Do not over tighten!
3. Center the head gasket into position on
the bellows chamber inlet between the
standoffs.
Содержание Posi3 USB
Страница 2: ...2 ...