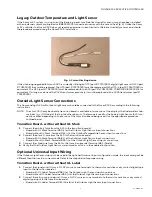
NOVAR ES3.S EXECUTIVE CONTROLLER
31-00366—01
4
INSTALLING EXECUTIVE CONTROLLER
The Novar ES3.S Executive Controller can be mounted on the Savvy or EC base-plate when replacing an existing
xcm.10S, Savvy or EC controller.
NOTE:
Size #2 Phillips screw driver and size 5/64 Hex wrench is required for this installation.
CAUTION
Some installations will require the OTS and OLS to be rewired and/or replaced. See “Wiring” section for
details.
Mounting on Base Plate
When removing the existing controller from the base plate, first verify that the Network Expansion Interface connectors
have been unplugged. Failure to observe this caution may result in damage to the Network Expansion Interface, Network
cables or both.
Use the procedure below to mount the Novar ES3.S Executive Controller on the xcm.10S or Savvy base-plate.
1.
Loosen the two screws at the bottom of the Savvy or EC base-plate with the hex wrench included with the executive
controller and lift off the cover.
2.
Slide the Novar ES3.S electronics assembly down from the top of the base-plate assembly and over the mounting
posts.
3.
Guide the DB25 and DB37 connectors on the Novar ES3.S electronics assembly over the corresponding connectors
on the Savvy transition circuit board.
4.
Tighten the two retaining screws with the hex wrench to secure the Novar ES3.S Executive Controller to the base-
plate.
5.
Connect an Ethernet Cable to the appropriate ports.
6.
Connect Expansion networks (COM-3,5,6) to COM Expansion Interface
7.
Check all wiring connections and replace with appropriate base-plate cover.
WIRING
Replacing Legacy Savvy and EC Panel
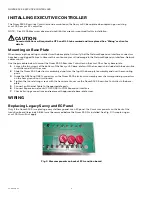
Only if the Novar ES3.S is replacing a very old Savvy panel or an EC panel, the 3 mov components on the back of the
transition board (terminals 58-62) must be removed before the Novar ES3.S is installed. See Fig. 3. If is replacing an
xcm.10S this will not apply.
Fig. 3. Mov components on back of EC transition board.

