

www.honeywellvideo.com
+1.800.796.CCTV (North America only)
Document 800-07015 – Rev B – 09/10
© 2010 Honeywell International Inc. All rights reserved. No part of this publication may be reproduced by any
means without written permission from Honeywell. The information in this publication is believed to be
accurate in all respects. However, Honeywell cannot assume responsibility for any consequences resulting
from the use thereof. The information contained herein is subject to change without notice. Revisions or new
editions to this publication may be issued to incorporate such changes.
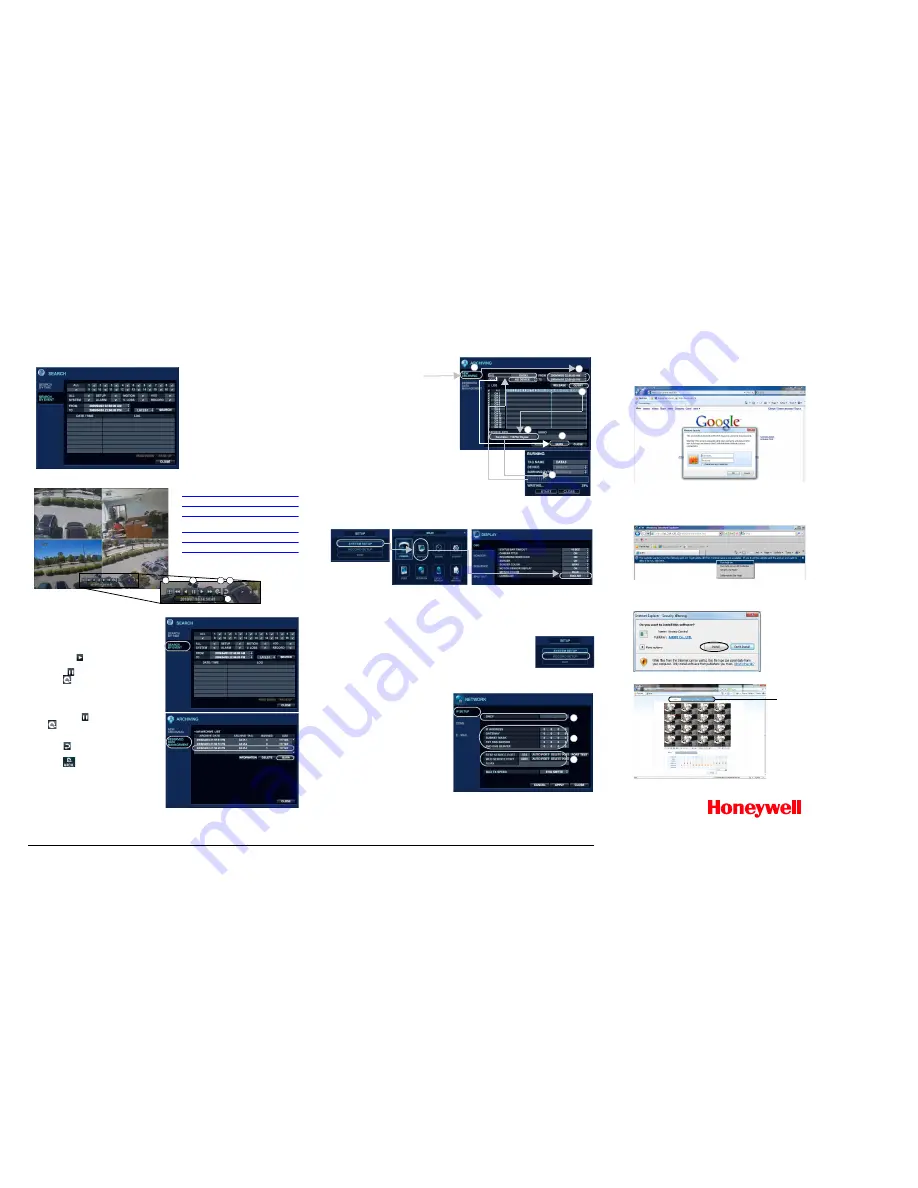
Playback Control
Playback Controls
A DISPLAY
- change multi-view mode
B Playback
Controls
C BACKUP
- start backup/archive to
external device
D RETURN
- exit from playback mode
E Time
indicator
A
B
C D
E
Searching by Event
1.
Select
SEARCH BY EVENT
.
2.
Select search event categories for
the search.
3.
Set a search START/END time.
4.
Click
SEARCH
.
5.
Double-click an event in the
search query results list to play
that clip.
Archiving Searched Video
1.
Click
SEARCH
on the LIVE screen.
2.
Search for recorded video by either
searching by Date/Time or searching by
Event.
3.
Select a starting point for playback,
click
Play
to find the beginning of
the clip you want to archive, then click
Pause
to pause playback.
4.
Click
to mark the beginning of the
video you want to archive.
5.
Enter a
TAG
name, select the cameras
you want to archive, then click
START
.
The display returns to playback.
6.
Click
Pause
to pause playback, click
, then click
STOP
to mark the end of
the clip.
7.
Click
RESERVE
, then click
CLOSE
.
8.
Click
to exit playback mode, then
click
CLOSE
to exit the
SEARCH
menu.
9.
Click
on the main menu.
10. Click
RESERVED DATA
MANAGEMENT
, select the clip by
name in the AVI ARCHIVE LIST, then
click
BURN
.
11. Select a DEVICE and a BURNING
TYPE, then click
START
.
Archiving Video from the LIVE Screen
System Setup
RECORD Menu Setup
Configuring the Network IP Settings
1.
Click
ARCH
on the LIVE screen.
2.
Select
NEW ARCHIVE
.
3.
Set the START/END time for
archiving.
4.
Click
QUERY
.
5.
Check the data size and select the
device to which the data is saved
(CD, DVD, or USB media).
6.
Enter a
TAG NAME
to name the folder
on the device.
7.
Click
BURN
to burn the clip to the
chosen media.
8.
Select a DEVICE and a BURNING
TYPE, then click
START
.
2
3
4
5
5
7
Changing the OSD Language
1.
Click
MENU
.
2.
Select
SYSTEM
SETUP
.
3.
Select
DISPLAY
.
4.
Select
OSD
.
5.
Select the desired language.
6.
Click
APPLY
.
Configuring Recording Parameters
To change the recording configurations from the default settings, select
RECORD SETUP
, then make the desired changes. Refer to your HREP4,
HREP8, HREP16 User Guide.
1.
Select
NETWORK
on the MAIN menu.
2.
Uncheck
DHCP
for static IP setting.
3.
Enter the IP information that you get
from your network administrator.
4.
Check the service ports for WEB and
RTSP (2 ports only).
5.
Use
AUTO PORT
when your router
supports UPNP.
6.
Click
AUTO PORT
to see the
connection address in the ALIAS field.
Note
The default IP setting is DHCP, so you do not need to manually set the IP
address. Your router will assign the IP address automatically.
DDNS Settings
3
4
For information about configuring the DDNS settings, please refer to the DDNS Application note
(document 800-07045).
2
Connecting through the Internet
For connecting through the internet, the 554 and 8080 ports should be set to Port Forwarding at
the router.
1.
Open Internet Explorer.
2.
Enter the IP Address or the URL of your DVR into the IE Explorer Address bar:
•
http://XXX.XXX.XXX.XXX
•
http://XXX.XXX.XXX.XXX:PPPP} (if you are using another Web port)
(PPPP = the assigned web port number)
3.
Enter the Default ID (
ADMIN
) and password (
1234
), then click
OK
.
4.
Allow ActiveX to download.
Note
If you cannot download ActiveX, then go to the Security tab in IE and check all ActiveX
options.
5.
Install ActiveX.
The LIVE view window opens.
In addition to LIVE view, users can
access SEARCH and SETUP,
depending on their User Authority
privileges. Refer to your HREP4,
HREP8, HREP16 User Guide for more
information about User Authority.