HE225 BYPASS FLOW-THROUGH HUMIDIFIER
69-1425EF—01
2
69-1425EF—03
2
Template (entire sheet) Top of Humidifier
Te
mplate (e
nt
ir
e sh
ee
t)
Te
mplate (en
tire
sheet
)
Template (entire sheet)
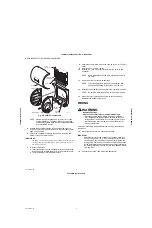
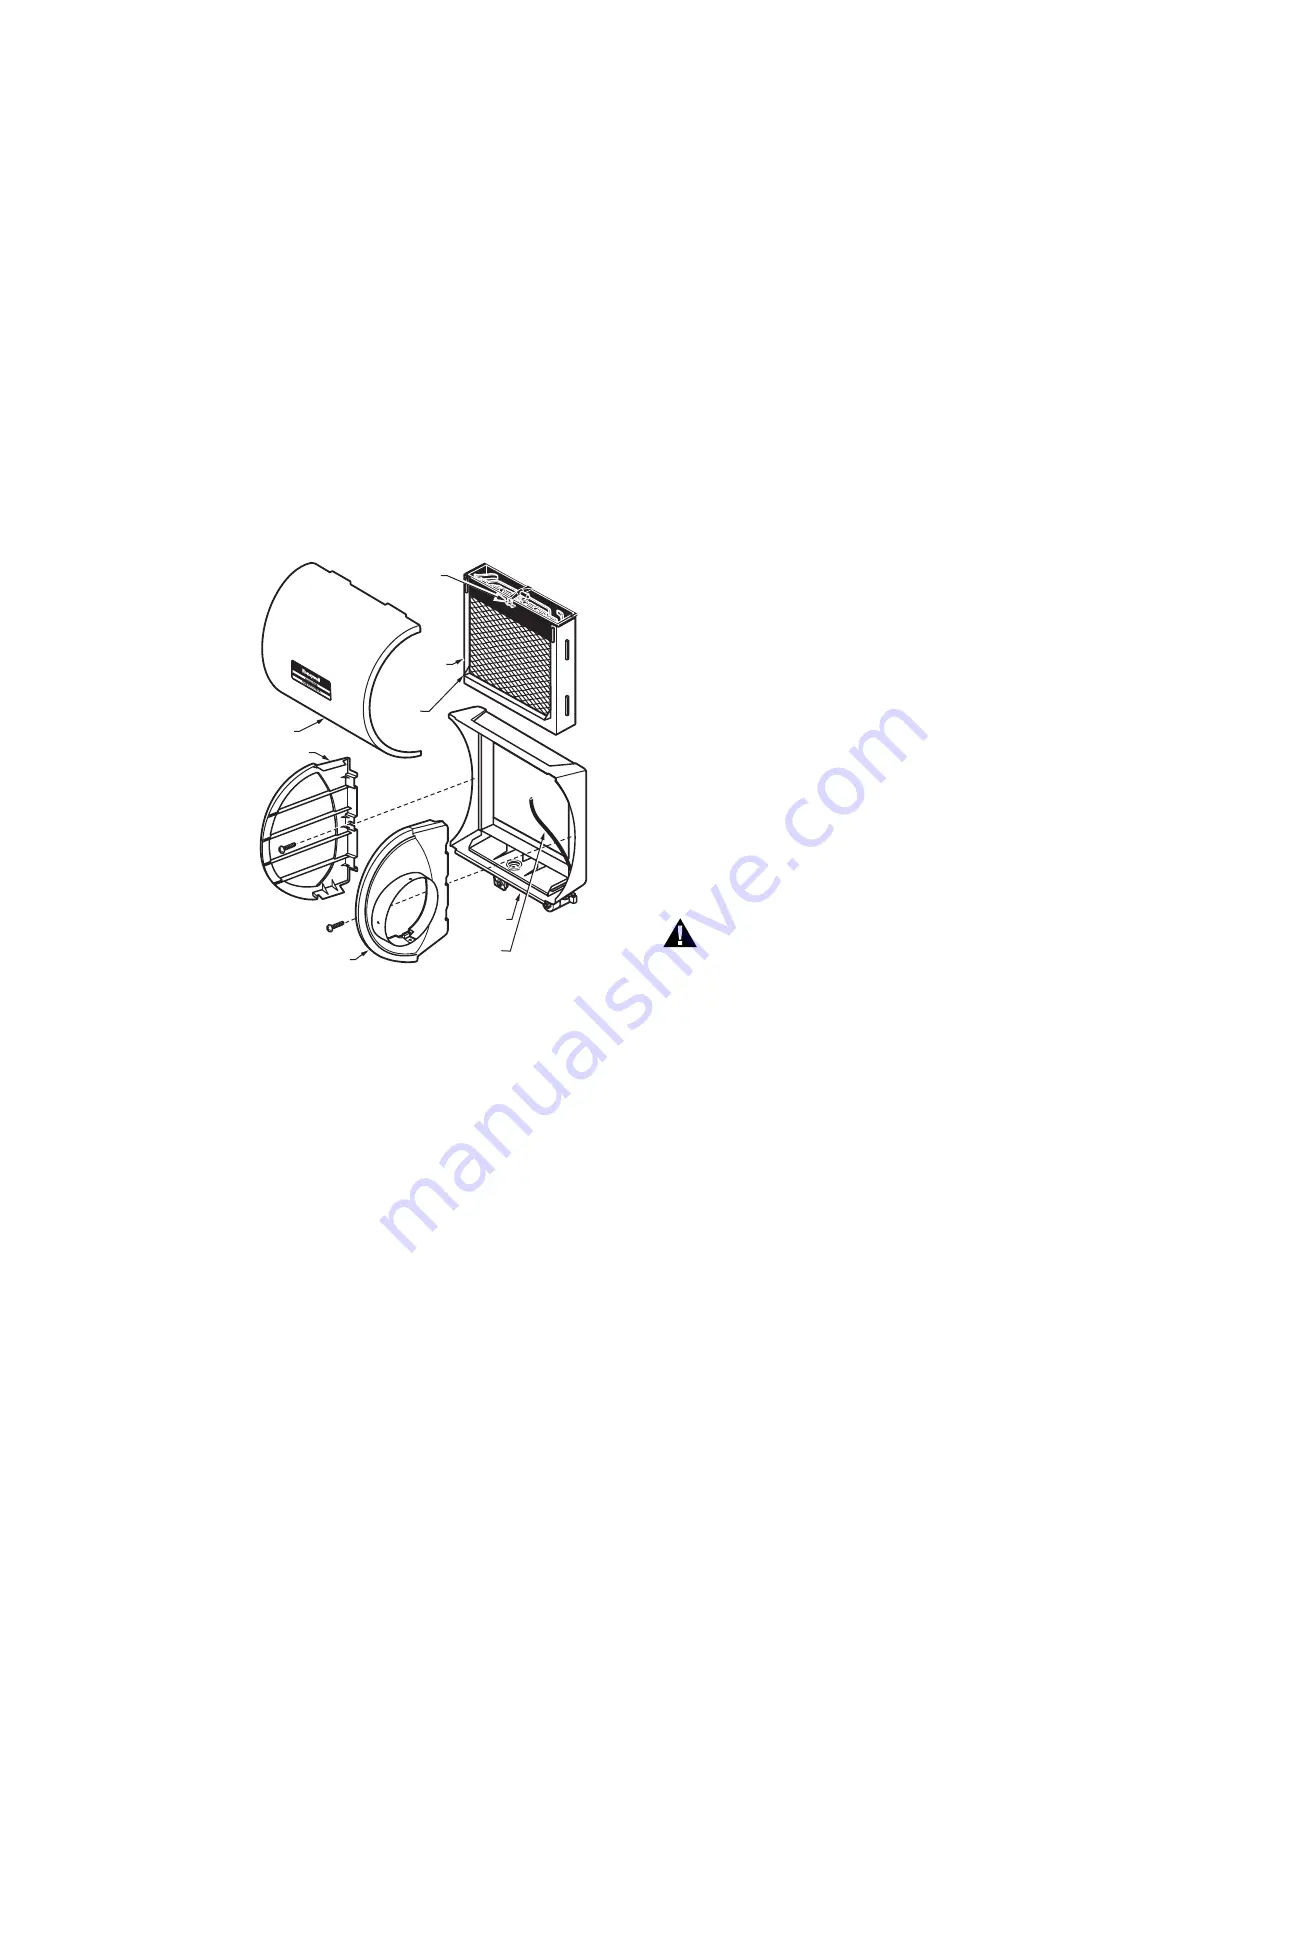
Fig. 2. Humidifier components.
NOTE: Sidewalls are interchangeable for either left or right
bypass installation. To change direction, remove the
screws holding each sidewall, switch sidewall locations
and reinstall the screws.
5.
Position the humidifier housing in the opening (be sure it is
level), so the locking tabs are in place on the lower sheet metal
edge of the opening.
6.
Secure the humidifier housing to the opening at the top and
bottom using sheet metal screws.
IMPORTANT
The damper is specifically designed with snap features for use spe-
cifically with Honeywell humidifiers. It is not intended for use in
any other application.
7.
To install the damper:
a. Insert the damper into the humidifier with the selector knob
aligned with the forward-facing hole in the humidifier collar.
b. Twist the damper until it snaps into place.
8.
Locate the other plenum and cut an opening for a 6 in. (152 mm)
collar.
9.
Install the 6 in. (152 mm) collar.
10.
Install a 6 in. (152 mm) diameter duct from the collar to the
humidifier.
NOTE: Some installations require a 90° elbow attachment to
the collar.
11.
Seal the duct connections with duct tape.
NOTE: To avoid sagging and stress on the humidifier, add
support when ducting is longer than 4 ft (120 cm).
12.
Reinstall the humidifier pad assembly in the humidifier housing.
NOTE: Be sure the water feed tube is not pinched or kinked.
13.
Hinge the cover in place and secure with the thumbscrew
located at the bottom of the cover.
WIRING
WARNING
Hazardous Voltage.
Can cause personal injury or equipment damage.
• Disconnect power supply before installing or servicing.
• On multispeed blower applications, do not wire the high
voltage side of the transformer to the same power source
that services the furnace blower or the transformer may
burn out prematurely.
All wiring must comply with applicable local codes, ordinances and
regulations.
14.
Mount the transformer in a convenient location.
IMPORTANT
Install transformer on the outside of a grounded metal junc-
tion box using only a 7/8 in. (22 mm) knockout hole. Place
mounting tabs into the knockout hole and firmly tighten the
locking screw. Field wiring connections and grounding means
for the transformer and enclosure shall be in accordance with
the National Electrical Code (NEC) and the Canadian Electri-
cal Code (CEC).
15.
Connect wires to the 120V side of the transformer.
M31022
WATER
FEED NOZZLE
FRAME
HUMIDIFIER
HOUSING
WATER
FEED TUBE
HUMIDIFIER
PADASSEMBLY
COVER
SIDEWALL
BY-PASS SIDEWALL


