GB
ExiLED
Surface Mounted
Honeywell Life Safety AS, Po. Box 3514, N-3007 Drammen, Norway
http://www.hls-nordic.com
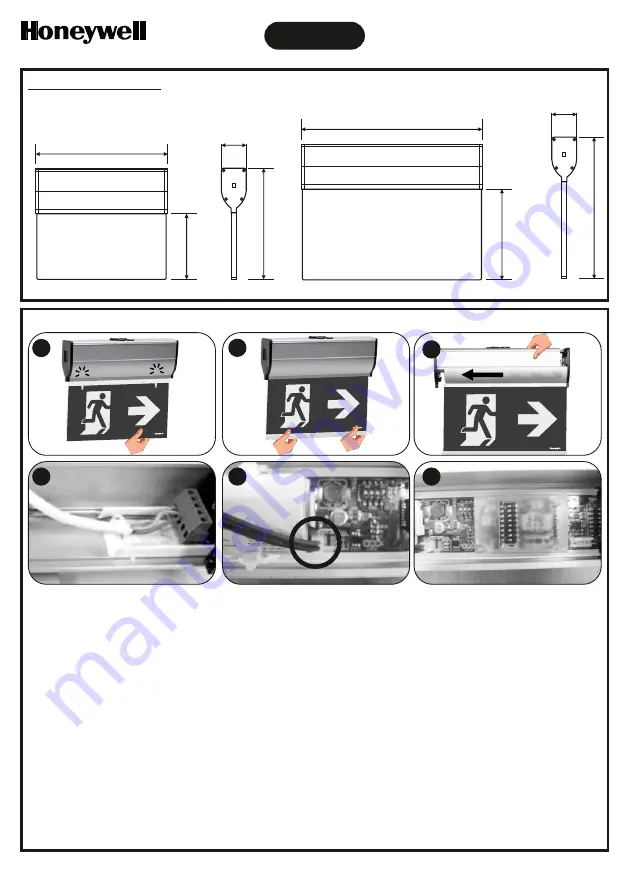
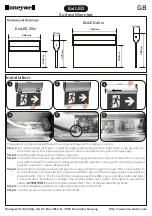
Installation:
Dimensional Drawings:
266mm
132mm
223mm
53mm
ExiLED 25m
366mm
199mm
289mm
53mm
ExiLED 40m
Step 1:
For double sided pictogram, install the appropriate pictograms to both sides, push up until you
hear click sound. For single sided pictogram, there is one blind pictogram in the package.
Step 5:
Connect the battery cable to its respective connector on the PCB.
Step 2:
Install the retaining clip to hold the pictograms.
Step 3:
Dismantle the luminaire by sliding the mounting part as shown in picture. Fasten the mounting
part (with screws from within) to either wall bracket(supplied), ceiling (with or without supplied
spacers), pendulum, wire or flag bracket.
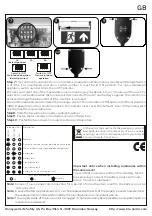
Step 4.
Drill a hole on a black grommet and pass the mains cables through it. Connect the mains cables to
terminal blocks: L for live wire, N for neutral and PE for ground. Power supply cables cross section
2
should be 0.8 - 3 mm . The C1 and C2 terminals are used for elBus communication optional), DALI
communication (optional), or voltage free contact (optional). Tighten the cable tie around the
cables.
ATTENTION!!:
Pass the tie through one (NOT two), of the available fixing holes.
Step 6:
In case you use a module connect it on the PCB.
The product contains bracket for wall mounting and spacers for ceiling mounting.
5
6
4
click
click
click
click
2
1
3


