background image

6

Sul 

relè wireless

1

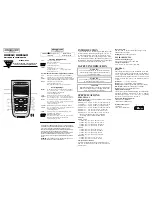
   Premere il pulsante    per 3 sec. Il LED dovrebbe 

lampeggiare ARANCIONE una volta.

2

   Tenere premuto il pulsante    per 3 sec. Il LED 

dovrebbe lampeggiare ARANCIONE continuamente.

Sul

 termostato

3

  Tenere il termostato a una distanza di circa 1 m 

dal relè e premere i pulsanti 

MENU

 e   insieme per 

3 secondi per accedere al menu di associazione.

Se 

14A

 e 

0

 lampeggiano, seguire i passaggi 4-8


Se 

14A

 e 

1

 lampeggiano, seguire i passaggi 9-12

4

   Premere il pulsante  . 

0

 dovrebbe 

iniziare a lampeggiare.

5

   Premere il pulsante  . 

1

 dovrebbe iniziare a 

lampeggiare. Un piccolo 

1

 apparirà sul lato 

sinistro. Se appare uno 

0

, ripetere la procedura.

6

   Premere il pulsante 

 finché non viene visualizzato 

SAVE

. Il LED sul relè dovrebbe cambiare in 

VERDE

.

7

   Premere il pulsante   per tornare 

alla schermata principale.

8

   Aumentare e ridurre la temperatura di qualche 

grado per verificare che il relè si accenda 

e si spenga (l’operazione di commutazione 

potrebbe richiedere alcuni minuti).

Se 

14A

 e 

1

 lampeggiano, seguire questi passaggi

9

   Premere il pulsante 

 finché non 

viene visualizzato 

14C: 0.

10

   Premere il pulsante  . 

0

 dovrebbe 

iniziare a lampeggiare.

11

   Premere il pulsante  . 

1

 dovrebbe iniziare a lampeggiare.

12

  Premere il pulsante 

 per salvare (verrà


 visualizzato 

SAVE

) e seguire i passaggi 

3-8

IT

Содержание T3R

Страница 1: ...WIRELESS BINDING GUIDE T3R Programmable Thermostat EN 2 NL 3 FR 4 DE 5 IT 6 ES 7 BG 8 CZ 9 HU 10 PL 11 RO 12 TR 13...

Страница 2: ...should start flashing 5 Press the button 1 should start flashing A small 1 will appear on left side If a 0 appears repeat 6 Press the button until SAVE is displayed The LED on the Relay Box should cha...

Страница 3: ...p 1 zal gaan knipperen Een kleine 1 zal links worden getoond Indien een 0 verschijnt druk dan nogmaals 6 Druk op de knop totdat SAVE wordt getoond De LED op de ketelmodule zal nu groen zijn 7 Druk op...

Страница 4: ...on 0 devrait commencer clignoter 5 Appuyez sur le bouton 1 devrait commencer clignoter Un petit 1 appara tra sur le c t gauche Si un 0 appara t r p tez 6 Appuyez sur le bouton jusqu ce que SAVE s affi...

Страница 5: ...blinken beginnen 5 Die Taste dr cken 1 sollte zu blinken beginnen Die kleine 1 erscheint auf der linken Seite Sollte eine 0 erscheinen erneut dr cken 6 Die Taste dr cken bis SAVE angezeigt wird Die LE...

Страница 6: ...be iniziare a lampeggiare Un piccolo 1 apparir sul lato sinistro Se appare uno 0 ripetere la procedura 6 Premere il pulsante finch non viene visualizzato SAVE Il LED sul rel dovrebbe cambiare in VERDE...

Страница 7: ...t n 0 deber comenzar a parpadear 5 Pulsar el bot n 1 deber comenzar a parpadear Un peque o 1 aparecer en el lado izquierdo Si aparece un 0 repetirlo 6 Pulsar el bot n hasta que se muestre SAVE El LED...

Страница 8: ...8 1 RF 3 2 flame 3 3 1 MENU 3 14A 0 4 8 14A 1 9 12 4 0 5 1 1 0 6 SAVE 7 8 14A 1 9 14C 0 10 10 0 11 1 12 SAVE 3 8 BG...

Страница 9: ...0 za ne blikat 5 Stiskn te tla tko Bude blikat 1 Na lev stran se objev mal 1 Jestli e se objev 0 proces opakujte 6 Stiskn te tla tko aby se zobrazilo SAVE Komunika n LED dioda na sp nac jednotce by m...

Страница 10: ...meg a gombot 0 kezd villogni 5 Nyomja meg a gombot 1 kezd villogni Egy kis 1 fog megjelenni a bal oldalon Ha 0 jelenik meg ism telje meg a l p st 6 Tartsa lenyomva a gombot am g a SAVE felirat megjele...

Страница 11: ...Nacisn przycisk 0 powinno zacz miga 5 Nacisn przycisk 1 powinno zacz miga Po lewej stronie pojawi si ma e 1 Je li pojawi si 0 nale y powt rzy czynno 6 Naciska przycisk a pojawi si komunikat SAVE Dioda...

Страница 12: ...va ncepe sa clipeasc 5 Ap sa i butonul 1 va incepe sa clipeasca In partea stanga va aparea un mic 1 Daca apare 0 repetati 6 Ap sa i butonul pana cand se afiseaza SAVE LEDul de pe receptor ar trebui sa...

Страница 13: ...izleyin 4 tu una bas n 0 yan p s nmeye ba lamal d r 5 tu una bas n 1 yan p s nmeye ba lamal d r Sol tarafta k k 1 g r necektir 0 g r n rse tekrar edin 6 SAVE g r nt lenene kadar tu una bas n R le kut...

Страница 14: ...e Honeywell Home trademark is used under license from Honeywell International Inc This product is manufactured by Resideo Technologies Inc and its affiliates Pittway Sarl Z A La Pi ce 4 1180 Rolle Swi...

Отзывы: