background image

2

3

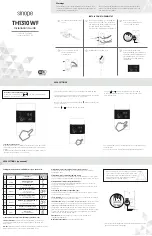
Presione y sostenga 

 (botón del clima) durante 

5 segundos para acceder al Menú principal. 

Utilizando 

t

, marque 

Device Details

 (detalles del 

dispositivo) y presione 

OK

 (aceptar). Utilizando 

t

encuentre la contraseña de 4 dígitos (código de 
fecha) y regístrela. Presione 

OK

 para salir.

Utilizando 

s

, marque 

Set up

 (configurar) y 

presione 

OK

 (aceptar).

Utilizando 

t

, marque 

Contractor

 (contratista) y 

presione 

OK

 (aceptar).

Setup (configurar): Menús en pantalla

_ _ _ _

Ingrese la contraseña presionando   o 

t


para 

seleccionar el primer dígito y presione 

OK


(aceptar). Continúe con todos los cuatro dígitos 

Marque 

Set up

 (configurar) y presione 

OK


(aceptar).

Presione 

s

 o 

t

 para marcar la configuración y 

presione 

OK

 (aceptar). Continúe hasta que todas 

las configuraciones se hayan efectuado. 

Para una 

lista completa de las opciones de configuración, 
consulte “Opciones de configuración” en la 
página 3.


Nota:

 Para salir de la configuración con 

anticipación, presione 

t

 para marcar 

EXIT

 (salir) 

y presione 

OK

 (aceptar).

Cuando todas las configuraciones se hayan 
efectuado, guarde los cambios. Para guardar 
y confirmar, marque 

Yes

 (Sí) y presione 

OK


(aceptar). Para salir sin guardar, presione 

t

 para 

marcar 

No

 y presione 

OK

 (aceptar).

Содержание Round TH8732WFH5004

Страница 1: ...switch to 2 Wire 2 Wiring Terminal Designations L Heat pump system monitor K Optional C wire adaptor C Common wire from secondary side of cooling transformer if 2 transformers G Fan relay W2 AUX 2nd s...

Страница 2: ...Enter the password by pressing or t to select the first digit and press OK Continue for all four digits 6 Highlight Set Up and press OK 7 Press s or t to highlight the setting and press OK Continue un...

Страница 3: ...er hour 1 12 3260 Heat cycles per hour stage 2 1 12 3280 Backup heat cycles per hour 1 12 4120 Adaptive intelligent recovery 0 No 1 Yes ISU Description Setting 4160 Minimum setpoint Note Setting appli...

Страница 4: ...device complies with part 15 of the FCC Rules Operation is subject to the following two conditions 1 This device may not cause harmful interference and 2 This device must accept any interference rece...

Страница 5: ...1 Wire 1 fil Pour les produits deux fils r glez le commutateur sur 2 Wire 2 fils 2 C blage D signations des bornes L Moniteur du syst me thermopompe K Adaptateur de fil C en option C Fil commun du c...

Страница 6: ...le premier chiffre puis appuyez sur OK Proc dez de m me pour tous les autres chiffres 6 S lectionnez Set Up Configuration et appuyez sur OK 7 Appuyez sur s ou t pour s lectionner le r glage puis appu...

Страница 7: ...e chauffage de secours heure 1 12 4120 Syst me de r cup ration intelligent adaptatif 0 Non 1 Oui N ISU Description R glage 4160 Point de consigne min Remarque ce param tre s applique aux points de con...

Страница 8: ...15 du r glement de la FCC Son fonctionnement est soumis aux deux conditions suivantes 1 1 Ce dispositif ne doit pas causer d interf rences nuisibles et 2 2 Ce dispositif doit accepter toutes les inter...

Страница 9: ...itor del sistema de bomba de calor K Adaptador del cable C opcional C Cable com n procedente del lateral secundario del transformador de refrigeraci n si tiene 2 transformadores G Rel del ventilador W...

Страница 10: ...seleccionar el primer d gito y presione OK aceptar Contin e con todos los cuatro d gitos 6 Marque Set up configurar y presione OK aceptar 7 Presione s o t para marcar la configuraci n y presione OK a...

Страница 11: ...calefacci n de reserva por hora 1 12 ISU N Descripci n Configuraci n 4120 Reactivaci n inteligente adaptable 0 No 1 S 4160 Punto de referencia m nimo Nota La configuraci n se aplica a ambos puntos de...

Страница 12: ...a Comisi n Federal de Comunicaciones FCC El funcionamiento est sujeto a las dos condiciones siguientes 1 1 Este dispositivo no debe causar interferencia perjudicial 2 2 Este dispositivo deber aceptar...

Отзывы: