background image

15

OPERATION

This chapter tells how to operate your pump safely and effectively.

Read this chapter completely before operating the pump. Take time to 
familiarize yourself with the controls and how they operate. The small 
amount of time spent in familiarization will reward you with greater 
efficiency and reduced risk.

SAFE OPERATING PRECAUTIONS

To safely realize the full potential of this pump, you need a complete 
understanding of its operation and a certain amount of practice with its 
controls.

Before operating the pump for the first time, please review the 

IMPORTANT SAFETY INFORMATION

 on page 6 and the chapter 

titled

BEFORE OPERATION

.

For your safety, avoid starting or operating the engine in an enclosed 
area, such as a garage. Your engine's exhaust contains poisonous 
carbon monoxide gas which can collect rapidly in an enclosed area 
and cause illness or death.

Do not pump drinking water. Pump only non-potable water, muddy 
water, and water containing solids. Pumping flammable liquids, such 
as gasoline or fuel oils, can result in a fire or explosion, causing 
serious injury. Pumping sea water, beverages, acids, chemical 
solutions, or any other liquid that promotes corrosion can damage the 
pump.

Содержание WDP20X

Страница 1: ...1996 2004 American Honda Motor Co Inc All Rights Reserved Owner s Manual DIAPHRAGM PUMP WDP20X WDP30X...

Страница 2: ...at the time of approval for printing American Honda Motor Co Inc reserves the right to discontinue or change specifications or design at any time without notice and without incurring any obligation w...

Страница 3: ...o help you avoid damage to your pump other property or the environment We suggest you read the warranty policy to fully understand its coverage and your responsibilities of ownership The Distributor s...

Страница 4: ...u must use your own good judgment You will find important safety information in a variety of forms including Safety Label on the pump Safety Messages preceded by a safety alert symbol and one of three...

Страница 5: ...E YOU READY TO GET STARTED 12 Knowledge 12 IS YOUR PUMP READY TO GO 13 Check the General Condition of the Pump 13 Check the Suction and Discharge Hoses 14 Check the Engine 14 OPERATION 15 SAFE OPERATI...

Страница 6: ...DIAPHRAGM REASSEMBLY 48 STORAGE 51 STORAGE PREPARATION 51 Cleaning the Engine 51 Cleaning the Pump 51 Fuel 52 Engine Oil 54 PLACING IN STORAGE 55 REMOVAL FROM STORAGE 55 TRANSPORTING 56 BEFORE LOADIN...

Страница 7: ...66 Pump Performance Curve 67 Wiring Diagram 67 CONSUMER INFORMATION 68 Honda Publications 68 Distributor s Limited Warranty 69 Emission Control System Warranty 70 Customer Service Information 73 INDEX...

Страница 8: ...place when the engine is running Be sure that anyone who operates the pump receives proper instruction Do not let children operate the pump Keep children pets and bystanders away from the area of oper...

Страница 9: ...cool before transporting the pump or storing it indoors To prevent fire hazards keep the pump at least 3 feet 1 meter away from building walls and other equipment during operation Do not place flamma...

Страница 10: ...fully This label is considered a permanent part of your pump So if the label comes off or becomes hard to read contact your authorized Honda pump dealer for a replacement DO NOT PUMP FLAMMABLE LIQUIDS...

Страница 11: ...PONENT IDENTIFICATION PUMP GREASE FITING ACCESS PLUG SUCTION PORT OIL FILLER CAP DIPSTICK IGNITION SWITCH DISCHARGE PORT STARTER GRIP FUEL VALVE LEVER CHOKE LEVER THROTTLE LEVER LIFTING BRACKET FUEL F...

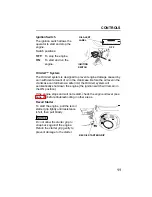
Страница 12: ...ghest output volume Moving the throttle toward the idle position will decrease the output volume of the pump Choke Lever The choke is used to provide an enriched mixture when starting a cold engine Mo...

Страница 13: ...ut down the engine the ignition switch will remain in the ON position If the engine stops and will not restart check the engine oil level see page 29 before troubleshooting in other areas Recoil Start...

Страница 14: ...in preparation will significantly reduce your risk of injury Knowledge Read and understand this manual Know what the controls do and how to operate them Familiarize yourself with the pump and its ope...

Страница 15: ...n Do not place flammable objects close to the engine Before beginning your preoperation checks be sure the pump is on a level surface and the ignition switch is in the OFF position Check the General C...

Страница 16: ...Check that the strainer is in good condition and is installed on the suction hose see page 18 Check the Engine Check the oil level see page 29 To avoid the inconvenience of an unexpected shutdown by t...

Страница 17: ...Before operating the pump for the first time please review the IMPORTANT SAFETY INFORMATION on page 6 and the chapter titled BEFORE OPERATION For your safety avoid starting or operating the engine in...

Страница 18: ...ead discharge vertical height and head loss due to friction Head loss makes it impractical for the static discharge head to exceed 25 feet Pumping to a static discharge head greater than 25 feet can d...

Страница 19: ...next to the hose so the motor vehicle weight does not shut off the discharge as vehicles cross over the hose Driving over a discharge hose while the pump is running or even possibly when the pump is s...

Страница 20: ...h Using a longer suction hose will increase the self priming time Tighten the hose connector to the suction hose with a hose clamp to prevent air leakage and loss of suction Verify that the connector...

Страница 21: ...ng under high pressure Pump Priming Pump priming is not required if the vertical distance from water to the pump suction head is less than 14 feet on WDP20X or 16 feet for a WDP30X The suction head ca...

Страница 22: ...e the choke lever to the CLOSED position Do not use the choke if the engine is warm or the ambient temperature is high 3 Turn the ignition switch to the ON position 4 Move the throttle lever slightly...

Страница 23: ...he choke lever to the OPEN position 7 Set the throttle at the desired speed to produce the best pumping conditions The pump output can be controlled by adjusting the throttle lever to the desired posi...

Страница 24: ...n 2 Turn the ignition switch to the OFF position 3 Turn the fuel valve to the OFF position 4 If the pump is not going to be used again for the rest of the day or is going to be stored for a long perio...

Страница 25: ...ied mechanic The maintenance schedule applies to normal operating conditions If you operate your pump under severe conditions such as sustained high load or high temperature operation or use in unusua...

Страница 26: ...whenever you operate the engine Burns from hot parts Let the engine and exhaust system cool before touching Injury from moving parts Do not run the engine unless instructed to do so Read the instruct...

Страница 27: ...or 100 hours Every year or 300 hours Refer to page Engine oil Check level O 26 Change O O 27 Air cleaner Check O 30 Clean O 1 Replace O 1 Spark plug Check adjust O 32 Replace O Spark arrester optional...

Страница 28: ...stick 3 If the oil level is low fill to the edge of the oil filler hole with the recommended oil see page 29 4 Screw in the filler cap dipstick securely NOTICE Running the engine with a low oil level...

Страница 29: ...ainer 2 Reinstall the drain bolt and sealing washer Tighten the plug securely NOTICE Improper disposal of engine oil can be harmful to the environment If you change your own oil please dispose of the...

Страница 30: ...op of the oil filler neck see page 29 NOTICE Using nondetergent oil can shorten the engine s service life and using 2 stroke oil can damage the engine 4 Screw in the oil filler cap dipstick securely U...

Страница 31: ...ded for general use Other viscosities shown in the chart may be used when the average temperature in your area is within the recommended range The SAE oil viscosity and service classification are in t...

Страница 32: ...vent dirt from entering the air duct that leads to the carburetor 6 Install the foam element over the paper element and install the assembled air filter Secure the air filter with the inner wing nut M...

Страница 33: ...Never try to brush the dirt off brushing will force dirt into the paper fibers Replace the paper element if it is excessively dirty or damaged 2 To clean the foam filter element wash the element in a...

Страница 34: ...efore servicing the spark plug 1 Disconnect the spark plug cap and remove any dirt from around the spark plug area 2 Use a 13 16 in 21 mm spark plug wrench to remove the spark plug 3 Visually inspect...

Страница 35: ...g wrench to compress the washer If installing a new spark plug tighten 1 2 turn after the spark plug seats to compress the washer If reinstalling a used spark plug tighten 1 8 1 4 turn after the spark...

Страница 36: ...d remove the muffler protector 3 Remove the 4 mm screw from the spark arrester and remove the spark arrester from the muffler 4 Use a soft brush to remove carbon deposits from the spark arrester scree...

Страница 37: ...ts barbecues electric appliances power tools etc Spilled fuel is not only a fire hazard it causes environmental damage Wipe up spills immediately 1 Remove the filler cap and check the fuel level 2 Ref...

Страница 38: ...may hear light spark knock or pinging metallic rapping noise while operating under heavy loads This is no cause for concern If spark knock or pinging occurs at a steady engine speed under normal load...

Страница 39: ...stop screw to obtain the standard idle speed Standard Idle Speed 1 400 rpm Sediment Cup Cleaning 1 Turn the fuel valve to the OFF position 2 Remove the sediment cup and O ring and wash them in nonfla...

Страница 40: ...filter from the tank Inspect the fuel line and replace if cracked or worn 5 Clean the filter with nonflammable solvent and check that the filter screen is not damaged Replace as necessary 6 Clean the...

Страница 41: ...ing lift the suction side of the pump and allow water to drain out the discharge side Pump Hoses and Strainer 1 Check both hoses to make sure they are not torn or cracked It is especially important th...

Страница 42: ...rk plug cap and pull the recoil starter until the grease fitting is below the access opening 3 Wipe the grease fitting clean to prevent dirt from getting into the bearing Using a manual grease gun pum...

Страница 43: ...e engine for 10 minutes to warm up the gear box oil Warm oil drains quickly and completely 2 Shut off the engine 3 Remove the two 8x16 mm bolts from the connecting rod cover and remove the cover CONNE...

Страница 44: ...ar box oil Type SAE 80W 90 GL5 gear oil NOTICE Avoid getting gear oil on the diaphragm Drain the oil into a drain pan to prevent oil from running down the pump case onto the diaphragm If gear oil come...

Страница 45: ...rench and remove the nuts and flat washers from both the suction and discharge ports 6 Remove both ports 7 The clappet valves are directional so when removing the valves note of the water flow directi...

Страница 46: ...positioned correctly 11 Apply several drops of Hondalock 2 or equivalent thread lock to the stud threads Hand tighten the nuts then torque evenly to 20 ft lb 27 N m 2 8 kg m 12 After tightening the n...

Страница 47: ...pump chamber refer to page 39 4 Lift the suction side of the pump and allow all the water to drain out the discharge fitting 5 Remove the hardware securing the pump handle and springs 6 Connect a hois...

Страница 48: ...a felt tip marker to mark the outside of the connecting rod for reassembly 9 Pull the recoil starter to rotate the connecting rod to the down position 10 Remove the bolts and the lower pump case usin...

Страница 49: ...aphragm to allow it to be installed in the same position With a 19 mm wrench remove the four nuts securing the connecting rod to the lower flange Remove the diaphragm For reassembly note the shoulder...

Страница 50: ...damage follow the torque sequence shown below NOTICE The pump case and or diaphragm may be damaged if the torque sequence is not followed Torque Start in one corner increasing the amount or torque 1 8...

Страница 51: ...necting rod bearing 3 Rotate the crank arm to the bottom by pulling the recoil starter Install the diaphragm and connecting rod into the pump case then install the connecting rod with the mark made du...

Страница 52: ...making sure the diaphragm is centered and not pinched between the case stops Tighten the hardware following the torque procedure on page 48 7 If removed install the clappet valves Refer to page 43 8...

Страница 53: ...r or engine causing damage Water contacting a hot engine can cause damage If the engine has been running allow it to cool for at least half an hour before washing Cleaning the Pump 1 Flush the pump ch...

Страница 54: ...e gasoline was not fresh when you filled the fuel tank The Distributor s Limited Warranty does not cover fuel system damage or engine performance problems resulting from neglected storage preparation...

Страница 55: ...fuel valve to the ON position This will allow fuel in the fuel tank to drain through the carburetor bowl 3 Reinstall the drain screw and gasket WARNING Gasoline is highly flammable and explosive You...

Страница 56: ...ylinder 5 Slowly pull the recoil starter rope a few times to distribute the oil in the cylinder 6 Reinstall the spark plug 7 Pull the starter rope slowly until resistance is felt Continue pulling slow...

Страница 57: ...f fuel leakage Place the pump on a level surface Tilting can cause fuel or oil leakage With the engine and exhaust system cool cover the pump to keep out dust A hot engine and exhaust system can ignit...

Страница 58: ...transporting the pump 1 Turn the ignition switch to the OFF position 2 Turn the fuel valve to the OFF position 3 Drain the pump chamber refer to page 39 LOADING AND UNLOADING Have two people lift the...

Страница 59: ...el should flow out freely Spark Plug 1 Is the ignition switch ON page 11 2 Make sure the oil level is correct page 26 3 Remove the spark plug and clean gap or replace as necessary page 32 4 If the eng...

Страница 60: ...Does the pump require priming page 19 8 Is debris under the clappet valves or are the valves damaged page 43 9 Is the diaphragm torn page 45 10 If the pump still does not pump take the pump to an auth...

Страница 61: ...l Number Locations Record the frame and engine serial numbers in the space below You will need these serial numbers when ordering parts and when making technical or warranty inquiries see page 73 Fram...

Страница 62: ...perform this carburetor modification This engine when operated at high altitude with the carburetor modifications for high altitude use will meet each emission standard throughout its useful life Eve...

Страница 63: ...er service station or switch to another brand of gasoline Fuel system damage or performance problems resulting from the use of an oxygenated fuel containing more than the percentages of oxygenates men...

Страница 64: ...ation and maintenance of emission control systems The following instructions and procedures must be followed in order to keep the emissions from your Honda engine within the emission standards Tamperi...

Страница 65: ...the original design and quality may impair the effectiveness of your emission control system A manufacturer of an aftermarket part assumes the responsibility that the part will not adversely affect e...

Страница 66: ...ption is intended to provide you with information relating the engine s emission durability period The descriptive term indicates the useful life period for the engine s emission control system See yo...

Страница 67: ...3 600 rpm Cooling system Forced air Ignition system Transistorized magneto PTO shaft direction Counterclockwise Pump type Diaphragm with spring type connecting rod Suction port diameter thread type 2...

Страница 68: ...ane rating of 86 or higher See page 36 Engine oil SAE 10W 30 API SH SJ or SL See page 29 Gear box oil SAE 80W 90 GL5 gear oil See page 41 Spark plug type NGK BPR6ES DENSO W20EPR U See page 32 Maximum...

Страница 69: ...between the pump discharge capacity and the total dynamic head based on clear water at sea level As you increase the total head the discharge capacity will decrease Wiring Diagram SPARK PLUG IGNITION...

Страница 70: ...ons available to you and tells you how to contact us if you have a question or a warranty repair problem Honda Publications This publication will give you additional information about maintaining your...

Страница 71: ...se to any Honda Power Equipment dealer in the United States Puerto Rico or the U S Virgin Islands who is authorized to sell that product during the dealer s normal business hours If you are unable to...

Страница 72: ...plain the emission control system warranty on your Honda Power Equipment engine In California new utility and lawn and garden equipment engines must be designed built and equipped to meet the State s...

Страница 73: ...is warranty become the property of American Honda Motor Co Inc A list of warranted parts is on the reverse side of this warranty statement Normal maintenance items such as spark plugs and filters that...

Страница 74: ...Warranties AMERICAN HONDA MOTOR CO INC DISCLAIMS ANY RESPONSIBILITY FOR INCIDENTAL OR CONSEQUENTIAL DAMAGES SUCH AS LOSS OF TIME OR THE USE OF THE POWER EQUIPMENT OR ANY COMMERCIAL LOSS DUE TO THE FA...

Страница 75: ...olved in this way If you are dissatisfied with the decision made by the dealership s management contact the Honda Power Equipment Customer Relations Office You can write to American Honda Motor Co Inc...

Страница 76: ...Discharge Total 65 I Ignition Switch 11 L Liquid Pumping Recommendations 6 M Maintenance Safety 24 Maintenance Schedule 25 O Oil Alert System 11 Oil Engine Change 27 Level Check 28 Recommendations 29...

Страница 77: ...INDEX 75 T Throttle Lever 10 Transporting Your Pump 56 Troubleshooting Engine Will Not Start 57 Pump Will Not Pump 57 W Warranty Service Information 73 Warranty Emissions 70 Wiring Diagram 67...

Страница 78: ...76...

Страница 79: ...PR6ES DENSO W20EPR U Gap 0 028 0 031 in 0 70 0 80 mm page 32 Carburetor Idle speed 1 400 rpm page 37 Maintenance Before each use Check fuel level page 35 Check engine oil level page 27 Check air clean...

Страница 80: ...31TDP601 00X31 TDP 6010 IPC 1000 2004 04 POM52831 B PRINTED IN U S A Printed on Recycled Paper EM3 M...

Отзывы: