background image

13

TRANSPORTING

If the engine has been running, allow it to cool before loading the 
mower on the transport vehicle. A hot engine and exhaust system can 
burn you and can ignite some materials.

Turn the fuel valve to the OFF position. This will prevent carburetor 
flooding and reduce the possibility of fuel leakage.

If a suitable loading ramp is not available, two people should lift the 
mower on and off the transport vehicle while holding the mower level.

Position the mower so all four wheels are on the bed of the transport 
vehicle. Tie the mower down with rope or straps, and block the 
wheels. Keep the tie-down rope or straps away from the controls, 
adjustment levers, cables, and the carburetor.

Fold the handlebar so the mower will take up less space (

page 14

).

STORAGE

Proper storage preparation is essential for keeping your lawn mower

trouble free and looking good. To help keep rust and corrosion from

impairing your lawn mower’s function and appearance, and to make

the engine easier to start after storage, follow the instructions

described in this section to:
• Drain or treat the fuel
• Change the oil and coat the engine cylinder
• Clean the mower and engine
• Choose a storage location

Fuel

See “AVOIDING FUEL-RELATED PROBLEMS” on 

page 17

 for a list

of recommended procedures to avoid fuel related problems.
The 

DISTRIBUTOR’S LIMITED WARRANTY

  (

page 19

) does not

cover fuel system damage or engine performance problems resulting

from neglected storage preparation.

Cleaning

Mower Deck

Before washing the underside of the mower deck, stop the engine and 
turn the fuel valve to the OFF position. Rest the mower on its right 
side, so the fuel cap side is up. This will help to prevent fuel leakage 
and hard starting due to carburetor flooding. Wear heavy gloves to 
protect your hands from the blade.

Be careful to avoid getting water into controls and cables.

Engine

Wash the engine by hand, and be careful to prevent water from

entering the air cleaner and exhaust opening.

NOTICE

Using a garden hose or pressure washing equipment can force water

into the air filter. Water in the air cleaner will soak the paper element

and can enter the carburetor or engine cylinder, causing damage.

Water contacting a hot engine can cause damage. If the engine has

been running, allow it to cool before washing.

Drying

After washing the lawn mower, wipe dry all accessible surfaces.

Place the mower with its wheels on a level surface. Start the engine 
outdoors and let it run until it reaches normal operating temperature to 
evaporate any water remaining on the engine.

Stop the engine and allow it to cool.

After the lawn mower is clean and dry, touch up any damaged paint,

and coat other areas that may rust with a light film of oil.

Oil

Change the engine oil (see 

page 11

).

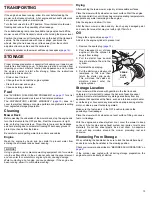
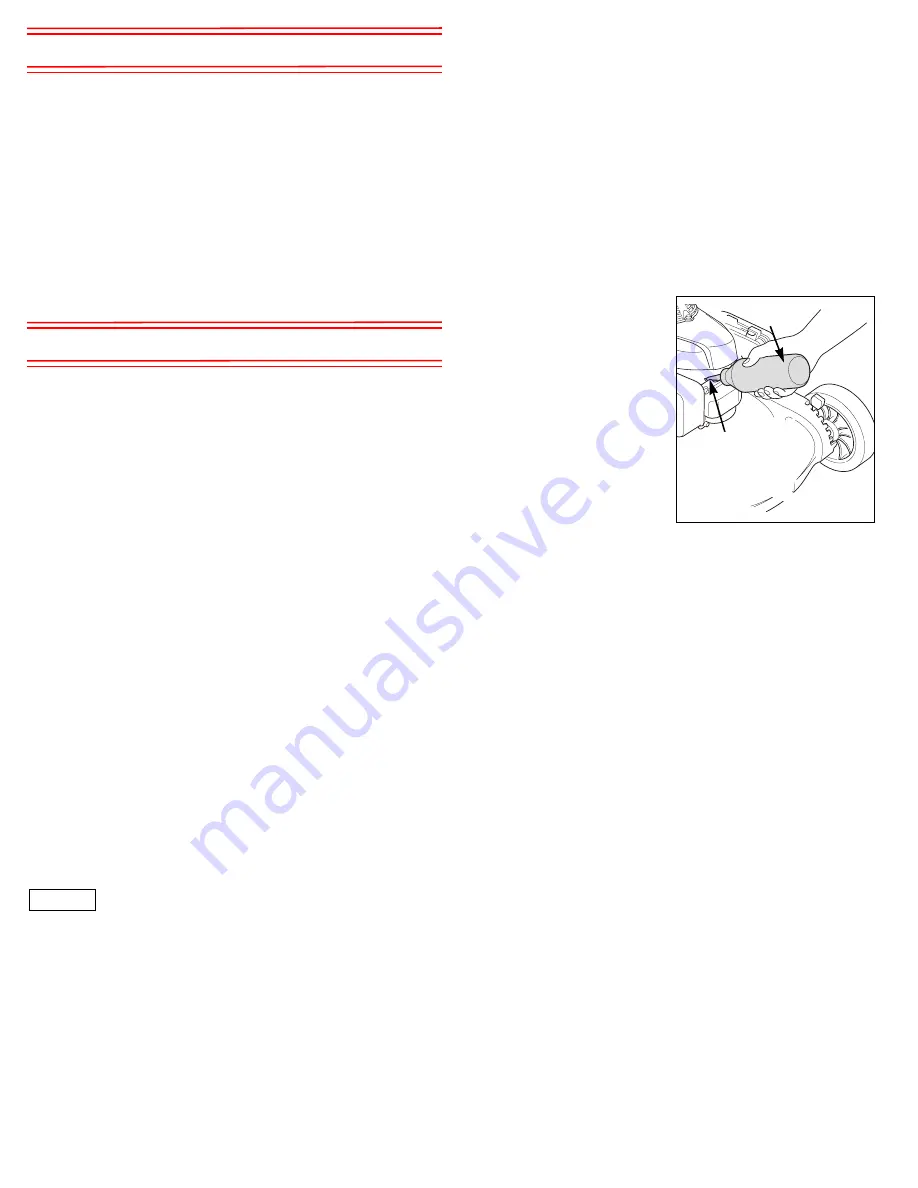
Add oil in the engine cylinder to prevent rust.

1. Remove the spark plug (

page 12

).

2. Pour a teaspoon (5 cc) of clean

engine oil into the cylinder to

keep it from rusting.

3. Pull the starter rope several

times to distribute the oil in the

cylinder.

4. Reinstall the spark plug.
5. Pull the starter rope slowly until

resistance is felt, and then

return the starter grip gently.

This will close the valves so

moisture cannot enter the

engine cylinder.

Storage Location

If your mower will be stored with gasoline in the fuel tank and 
carburetor, it is important to reduce the hazard of gasoline vapor 
ignition. Select a well-ventilated dry storage area away from any 
appliance that operates with a flame, such as a furnace, water heater, 
or clothes dryer. Also avoid any area with a spark-producing electric 
motor, or where power tools are operated.

Make sure the fuel valve is in the OFF position to reduce the 
possibility of fuel leakage.

Place the mower with its wheels on a level surface. Tilting can cause 
fuel or oil leakage.

With the engine and exhaust system cool, cover the mower to keep

out dust. A hot engine and exhaust system can ignite or melt some

materials. Do not use sheet plastic as a dust cover. A nonporous

cover will trap moisture around the mower, promoting rust and

corrosion.

Removing From Storage

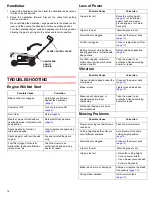
When unfolding the handlebar, be sure to lock the handlebar adjust 
knobs to secure the handlebar in the mowing position.

Check your mower as described in “BEFORE EACH OPERATION” on

page 4

.

If the cylinder was coated with oil during storage preparation, the

engine may smoke briefly at startup.

OIL

SPARK
PLUG
HOLE

Содержание HRS216PKAA

Страница 1: ...park Plug 12 Spark Arrester optional part 12 Blade Control Check 12 TRANSPORTING 13 STORAGE 13 Fuel 13 Cleaning 13 Oil 13 Storage Location 13 Removing From Storage 13 Handlebar 14 TROUBLESHOOTING 14 Engine Will Not Start 14 Loss of Power 14 Vibration 14 Mowing Problems 14 TECHNICAL INFORMATION 15 Serial Number Locations 15 High Altitude Operation 15 Emission Control System 15 Air Index 16 Specific...

Страница 2: ...r Instructions how to use this mower correctly and safely Safety Messages preceded by a safety alert symbol and one of three signal words DANGER WARNING or CAUTION Each message tells you what the hazard is what can happen and what you can do to avoid or reduce injury These signal words mean Damage Prevention Messages you will also see other important messages that are preceded by the word NOTICE T...

Страница 3: ...Do not overfill the engine with oil If the engine is overfilled the excess oil may get transferred to the air cleaner housing and air filter An indication of overfilling is white or blue smoke coming from the muffler when the engine is running After filling the engine with oil screw the filler cap dipstick in and remove the hang tag near the recoil starter grip that says The engine has no oil Plea...

Страница 4: ... Their safety is your responsibility Use extra care when approaching blind corners shrubs trees or other objects that may block your view of a child Check the height and condition of the grass Adjust your lawn mower cutting height ground speed and mowing swath accordingly See page 7 for mowing tips and recommendations Rear Shield During normal use the rear shield is subject to deterioration and we...

Страница 5: ... it clicks Move the mower at least 10 feet 3 meters away from the fueling source and site before starting the engine NOTICE Fuel can damage paint and plastic Be careful not to spill fuel when filling your fuel tank Damage caused by spilled fuel is not covered by the DISTRIBUTOR S LIMITED WARRANTY page 19 Check the Oil Level 1 Unscrew and remove the filler cap dipstick and wipe it clean 2 Insert an...

Страница 6: ...tection reduce the risk of injuries from thrown objects Sturdy shoes with aggressive soles will help protect your feet and give you better traction on slopes or uneven ground Stop the Engine When Not Mowing If you need to leave the mower for any reason even just to inspect the lawn ahead stop the engine by releasing the blade control lever Avoid Slopes Avoid steep slopes of more than 20 Mow across...

Страница 7: ... growing conditions in your area Most grass has stems and leaves If you cut off the leaves you ll scalp the lawn Let the grass recover between mowings Your mower will work better and your lawn will look better Cutting grass that is too tall or mowing the lawn too quickly can clog the mower deck with grass and may cause the engine to stall If your grass gets too tall cut it once at the highest cutt...

Страница 8: ...ce replacement or repair of the emission control devices and systems may be performed by any engine repair establishment or individual using parts that are certified to EPA standards Maintenance Safety Some of the most important safety precautions follow However we cannot warn you of every conceivable hazard that can arise in performing maintenance Only you can decide whether or not you should per...

Страница 9: ...dule could result in non warrantable failures Item Action Before each use 5 hours of use or first month First 25 hours of use 50 hours of use or every 6 months 100 hours of use or every year 150 hours of use or every two years See page Rear shield Check O 4 Blade Inspect O 10 Blade mounting bolts Inspect O 10 Engine oil Check O 5 Change O O 2 O O 11 Air filter Check O 11 Clean O 1 O 1 O 1 Replace ...

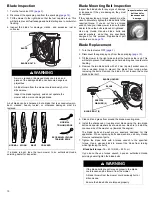
Страница 10: ...the two blade bolts with a 14 mm 6 point socket wrench Use a wooden block to prevent the blade from turning when removing the bolts Remove the blade Do not loosen the center blade holder bolt 5 Clean dirt and grass from around the blade mounting area 6 Install the sharpened or replacement blade using the two blade bolts and special washers as shown above Be sure to install the concave side of the ...

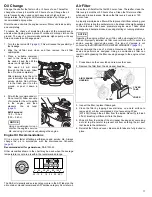
Страница 11: ...your area is within the recommended range The SAE oil viscosity and service category are in the API label on the oil container Honda recommends API service category SJ or later oil Air Filter Clean the air filter after the first 25 hours of use Thereafter clean the filter every 6 months or 50 hours of use Clean the filter more often when used in dusty areas Replace the filter every 2 years or 150 ...

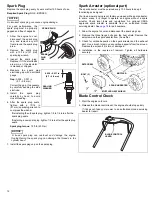
Страница 12: ...ngine Overtightening the spark plug can damage the threads in the cylinder head 7 Install the spark plug cap on the spark plug Spark Arrester optional part The spark arrester must be serviced every 100 hours to keep it functioning as designed Your lawn mower engine is not factory equipped with a spark arrester In some areas it is illegal to operate an engine without a spark arrester Check local la...

Страница 13: ...leaner will soak the paper element and can enter the carburetor or engine cylinder causing damage Water contacting a hot engine can cause damage If the engine has been running allow it to cool before washing Drying After washing the lawn mower wipe dry all accessible surfaces Place the mower with its wheels on a level surface Start the engine outdoors and let it run until it reaches normal operati...

Страница 14: ... tall Raise the cutting height page 4 cut a narrower swath push at a slower ground speed or cut more frequently Grass is too wet Allow the grass to dry Mower deck is clogged Clean out the mower deck page 13 Air filter is clogged Clean or replace the air filter page 11 Bad fuel mower stored without treating gasoline or refueled with bad gasoline Refuel with fresh gasoline page 5 Fuel filter clogged...

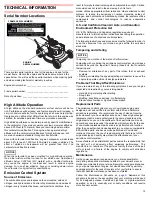
Страница 15: ...all manufacturers to furnish written instructions describing the operation and maintenance of emissions control systems The following instructions and procedures must be followed in order to keep the emissions from your Honda engine within the emissions standards Tampering and Altering NOTICE Tampering is a violation of federal and California law Tampering with or altering the emissions control sy...

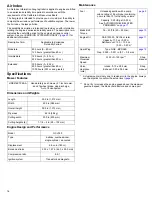
Страница 16: ...rotary push mower 21 inch mower deck flywheel brake side discharge Auto Choke System Length 59 5 in 1 512 mm Width 22 9 in 582 mm Overall height 39 9 in 1 013 mm Dry mass 62 lb 28 kg Cutting width 20 9 in 530 mm Cutting heights 6 1 1 8 4 in 28 102 mm Model GCV160 Type 4 stroke overhead cam single cylinder air cooled Displacement 9 8 cu in 160 cc Bore and stroke 2 52 x 1 97 in 64 0 x 50 0 mm Compre...

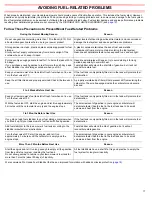
Страница 17: ...promote fuel deterioration Keep the air filter clean and properly serviced Check it before each use A properly maintained air filter will help prevent dirt from entering the carburetor The small passages inside the carburetor can become blocked 3 to 4 Weeks Before Next Use Reason Keep your lawn mower s fuel tank full of fresh fuel when not in use Turn the fuel valve OFF If the fuel tank is only pa...

Страница 18: ...information and specifications included in this publication were in effect at the time of approval for printing American Honda Motor Co Inc reserves the right however to discontinue or change specifications or design at any time without notice and without incurring any obligation whatever No part of this publication may be reproduced without written permission Shop Manual This manual covers comple...

Страница 19: ...limitations on how long an implied warranty lasts and or do not allow the exclusion or limitation of incidental or consequential damages so the above exclusions and limitations may not apply to you This warranty gives you specific legal rights and you may also have other rights which vary from state to state Honda Parts Accessories and Apparel This warranty is limited to Honda Power Equipment part...

Страница 20: ...warranty repairs and must be provided without charge to the owner A list of warranted parts is shown in the table below All emission related parts are under warranty for the remainder of the warranty period Normal maintenance items such as spark plugs and filters that are on the warranted parts list are warranted up to their required replacement interval only Honda will also replace other engine c...

Страница 21: ...21 NOTES ...

Страница 22: ...22 NOTES ...

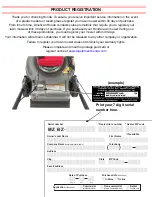
Страница 23: ...ll remain confidential It will not be released to any other company or organization Failure to register your lawn mower does not diminish your warranty rights Please complete and mail the postage paid card or register online at powerequipment honda com Print your 7 digit serial number here example commercial rental users check one private homeowner use for hire use Owner s Last Name Company Name A...

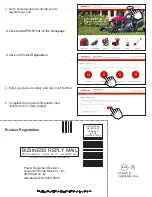
Страница 24: ...d click 6XEPLW It s that simple Power Equipment Division American Honda Motor Co Inc 4900 Marconi Dr Alpharetta GA 30005 9956 NO POSTAGE NECESSARY IF MAILED IN THE UNITED STATES Product Registration BUSINESS REPLY MAIL FIRST CLASS MAIL ALPHARETTA GA PERMIT NO 117 POSTAGE WILL BE PAID BY ADDRESSEE 2 Click the SUPPORT link on the homepage HPE 2021 01 PRINTED IN U S A EM5 K7 ...

Отзывы: