Assembly Instructions 4/5
C
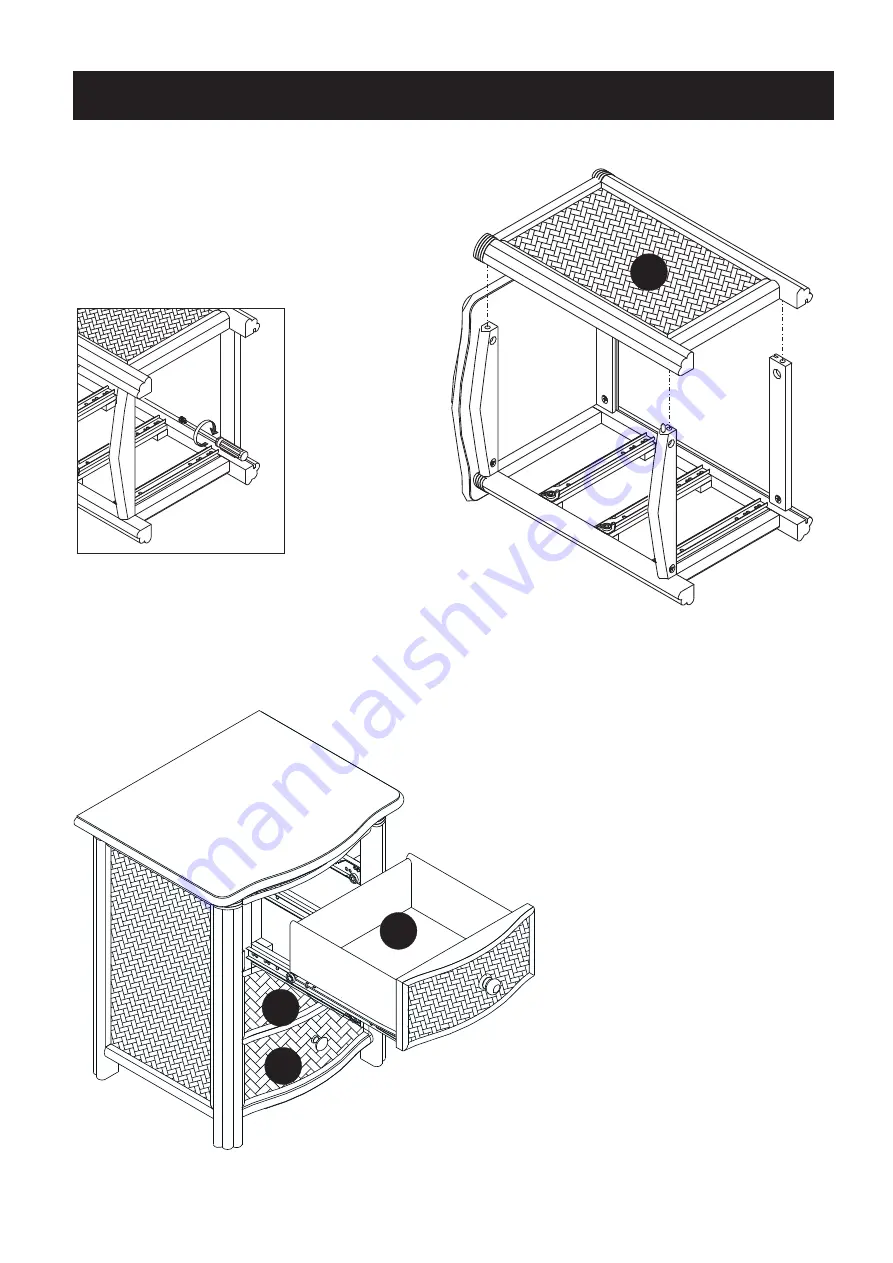
STEP 5
STEP 6
Attach Side Panel (C) to unitwith Cam Locks.(See Figure 3)
Slide Drawers (D) into position.
Figure 3
D
Страница 1: ...Cam Lock 8 pcs 4 extra Cam Lock Screw 8 pcs 1 extra Pull Handle 3 pcs 1 1 2 Round Head Screw 3 pcs 1 extra 1 1 4 Flat Head Screw 24 pcs 1 extra Tools required for assembly Phillips screwdriver Home Styles Consumer Assistance www homestyles furniture com servicedesk homestyles furniture com 888 680 7460 877 831 0319 88 5544 42 Marco Island Night Stand Knock Down Construction please refer to the las...
Страница 2: ...lled holes of Side Panels B and C IMPORTANT Do not tighten up all the screws until each part is properly assembled Use a soft cloth between these parts and the floor Attach Front Piece E and Back Piece F to Side Panel B with Cam Locks See Figure 1 STEP 2 Figure 1 B C F E B ...
Страница 3: ...Assembly Instructions 3 5 Attach Top A to unit with Cam Locks See Figure 2 Slide Back Panel G into position STEP 3 STEP 4 A F B E Figure 2 G ...
Страница 4: ...Assembly Instructions 4 5 C STEP 5 STEP 6 Attach Side Panel C to unit with Cam Locks See Figure 3 Slide Drawers D into position Figure 3 D D D ...
Страница 5: ...rawer D Part List D1 Front Part 3 pcs STEP 1 Attach Side Part D3 to Front Part D1 and Back Part D2 using 1 1 4 Flat Head Screws STEP 2 Insert Base Part D5 into the groove Attach Side Part D4 to unit using 1 1 4 Flat Head Screws STEP 3 Assemble Pull Handle with 1 1 2 Round Head screw D1 D2 D2 D3 D4 D5 D1 ...