background image

6

5

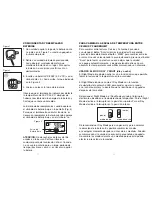
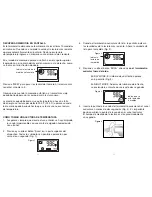
INSERTING AND REPLACING BATTERIES

1. Carefully remove the battery cover as 

shown in Figure 1 using a small flat 
instrument.

2. Carefully remove the battery by pressing

down on the metal clip holding the battery 
in place. Do not use metal tweezers or a 
screwdriver to remove the battery.

3. Insert one CR-2032 (3.0 V dc) battery with 

the plus symbol (+) up as shown in 
Figure 2.

4. Replace the battery cover.

Note that the thermometer will display a
default temperature of 00.0˚F/00.0˚C after
battery power is restored and until a 
measurement is taken. 

When the low battery symbol appears on the
display (Figure 3), the battery should be
replaced. When the low battery symbol
appears with the “Lo” symbol, the battery
must be replaced in order for the ear 
thermometer to function.

NOTE: Do not discard used lithium batteries
in trash. Please turn in at an official collection
point. If the monitor will not be used for an
extended period of time (three months or
more), please remove battery.

CHANGING TEMPERATURE SCALE BETWEEN 
CELSIUS AND FAHRENHEIT

To switch between Celsius and Fahrenheit readings, press and hold
the “Scan” button while the unit is on and immediately press the
“MEM” button to toggle between scales. Once the desired scale is
selected, press the “Scan” button to take a new reading or allow the
unit to turn off automatically and then turn it back on to view the 
converted temperatures stored in memory.

USING NIGHT MODE & DAY MODE
Night Mode is a unique feature that allows a temperature reading to
be taken in a dark setting.

Night Mode functions like Day Mode with the addition of an LED
flashlight feature to aid in guiding the probe into the ear canal and 
a display that will illuminate for 5 seconds after measurement.

Select Night Mode or Day Mode by using the slide switch on the
right side of the device.  For Night Mode, slide the switch into the 
up position.  For Day Mode, slide it into the down position.

Day Mode is recommended for general use in order to preserve 
battery life.  Modes can be changed at any time before or after
measurement.  They can also be changed regardless of whether 
the unit is turned on/off.  Do not change modes during measure-
ment as the accuracy of the reading may be affected.

°

°

Figure 3

Figure 1

Figure 2

(UP)

(DOWN)

Day Mode

Night Mode

Low battery
warning

Содержание TT-200

Страница 1: ...ndo entre otras aquellas garantías implícitas de idoneidad y comerciabilidad están limitadas a la duración total de dos años a partir de la fecha de compra original Para obtener un servicio cubierto por la garantía para su producto HoMedics puede entregar la unidad personalmente o enviarla por correo junto con su recibo de compra fechado como prueba de la compra el franqueo pagado junto con un che...

Страница 2: ...ep thermometer in its storage case and out of the reach of children Never attempt to insert any object into the probe tip Please observe the following regarding batteries Battery liquid can be harmful to the ear thermometer if leakage occurs When the ear thermometer will not be used for an extended period of time three months or more batteries should be removed A worn battery should be replaced im...

Страница 3: ... visual notice on the display a frowning face and a double beep audio alert visual alert only in memory mode At readings above this temperature it is LIKELY that a fever is present Note A temperature reading at or below 100 F 37 8 C does not mean that a fever is not present Likewise a temperature above 100 F 37 8 C does not guarantee the presence of a fever Each individual s physiology is differen...

Страница 4: ...tch between Celsius and Fahrenheit readings press and hold the Scan button while the unit is on and immediately press the MEM button to toggle between scales Once the desired scale is selected press the Scan button to take a new reading or allow the unit to turn off automatically and then turn it back on to view the converted temperatures stored in memory USING NIGHT MODE DAY MODE Night Mode is a ...

Страница 5: ...ays make sure that the waterproof probe has been cleaned with a cotton swab moistened with alcohol since its previous usage 2 Press and release the SCAN button on the top of the device All display symbols will appear for approximately one second Figure 1 3 When the ear thermometer is ready the display will next show the results of the most recent reading The unit is ready for measurement at this p...

Страница 6: ...s should wait at least 5 seconds between readings to ensure accuracy Use the ear thermometer at room temperature as extremes in environmental temperature can impact accuracy Unit should be stored at room temperature Before use the unit must be at room temperature for at least 30 minutes Clean the waterproof probe with a cotton swab moistened with alcohol between readings Always keep rubbing alcoho...

Страница 7: ...or ear drops have been placed in the ear canal Ear infection of any kind is present Individual has been bathing or swimming as this may lead to injury of ear tissue as well as inaccurate readings CARE MAINTENANCE CLEANING Clean the unit carefully with a soft dry cloth Do not use any gas strong detergent or solvents to clean the device Clean the waterproof probe with a cotton swab moistened with al...

Страница 8: ...nsistent low temperature readings Lo Temperature reading is below measurement range below 50 F 10 C Product Design Measurement range is 50 F 10 C to 122 F 50 C Contact your physician if you have or suspect any medical problems The probe is not positioned properly in ear Make sure probe is properly positioned against the opening of the ear canal The waterproof probe is dirty Clean the probe with a ...

Страница 9: ...y type of incidental consequential or special damages All implied warranties including but not limited to those implied warranties of fitness and merchantability are limited in the total duration of two years from the original purchase date To obtain warranty service on your HoMedics product either hand deliver or mail the unit and your dated sales receipt as proof of purchase postpaid along with ...

Страница 10: ...te reparar esta unidad Cuando no lo usa guarde el termómetro en su estuche y fuera del alcance de los niños No trate nunca de insertar algún objeto en la punta de la sonda En referencia a las baterías por favor tome nota de lo siguiente El líquido de las baterías si se presentara alguna pérdida puede ser dañino para el termómetro auricular Cuando no se use el termómetro auricular para un largo per...

Страница 11: ...C por medio de un aviso visual en la pantalla un ceño fruncido y de una alerta sonora de un pitido doble alerta visual solo en modo de memoria Con lecturas encima de esta temperatura es PROBABLE que se presente fiebre ATENCIÓN Una temperatura de o debajo de 100 F 37 8 C no quiere decir que no haya fiebre Igualmente una temperatura por encima de 100 F 37 8 C no garantiza que haya necesariamente fie...

Страница 12: ...elsius y Fahrenheit presione y sostenga el botón Scan mientras la unidad está encendida y presione inmediatamente el botón MEM para cambiar entre las escalas Una vez seleccionada la escala deseada presione el botón Scan para tomar una lectura nueva o dejar que la unidad se apague automáticamente y luego enciéndala otra vez para observar las temperaturas convertidas almacenadas en memoria USANDO EL...

Страница 13: ...RATURA 1 Asegúrese siempre que desde el uso anterior se haya limpiado la sonda impermeable con una mota de algodón humedecido con alcohol 2 Presione y suelte el botón Scan en la parte superior del dispositivo Todos los símbolos en pantalla aparecerán por cerca de un segundo Fig 1 Indica la lectura de la medida y el número 3 Cuando el termómetro auricular está listo la pantalla indicará los resulta...

Страница 14: ...ebe esperar 5 segundos entre lecturas para asegurar la precisión Use el termómetro auricular a temperatura ambiente puesto que las temperaturas exteriores extremas pueden comprometer la precisión La unidad debe guardarse a la temperatura ambiente Antes del uso la unidad debe encontrarse a temperatura ambiente por no menos de 30 minutos Entre las lecturas limpie la sonda impermeable con una mota de...

Страница 15: ...ue el termómetro pueda quedar propiamente insertado en el canal auricular Se han aplicado medicinas o gotas para el oído en el canal auricular Hay presencia de infección auricular de cualquier tipo La persona se ha bañado o ha nadado puesto que esto puede llevar a lesiones del tejido auricular y a lecturas imprecisas CUIDADO MANTENIMIENTO Y LIMPIEZA Limpie la unidad cuidadosamente con un paño suav...

Страница 16: ...ajo del rango de medida debajo de 50 F 10 C Rango Operacional El rango de medida es de 50 F 10 C a 122 F 50 C Si tiene o sospecha tener cualquier problema de salud póngase en contacto con su médico La sonda no está posicionada correctamente en el oído Asegúrese de que la sonda esté posicionada correctamente en la apertura del canal auricular La sonda impermeable está sucia Limpie la sonda con una ...

Отзывы: