background image

REMOTE CONTROL OPERATION

DO NOT

 press F/R while the fan is turning. Wait for it to stop completely before changing 

the direction of its rotation.
This remote operates with a range of 30 feet (10 m). It uses 2 1.5V AAA batteries (not 

included). If the remote will not be used for a prolonged period, it is recommended to 

remove the batteries for better service life.

Starts the fan at low speed

Starts the fan at medium speed

Starts the fan at high speed

Stops the fan

Turns the light on or off

Runs the fan for 1 hour and then turns it off

Runs the fan for 2 hours and then turns it off

Runs the fan for 4 hours and then turns it off

Reverses the fan’s direction

Key

Function

LOW

MED

HI

STOP

LIGHT

1H

2H

4H

F/R

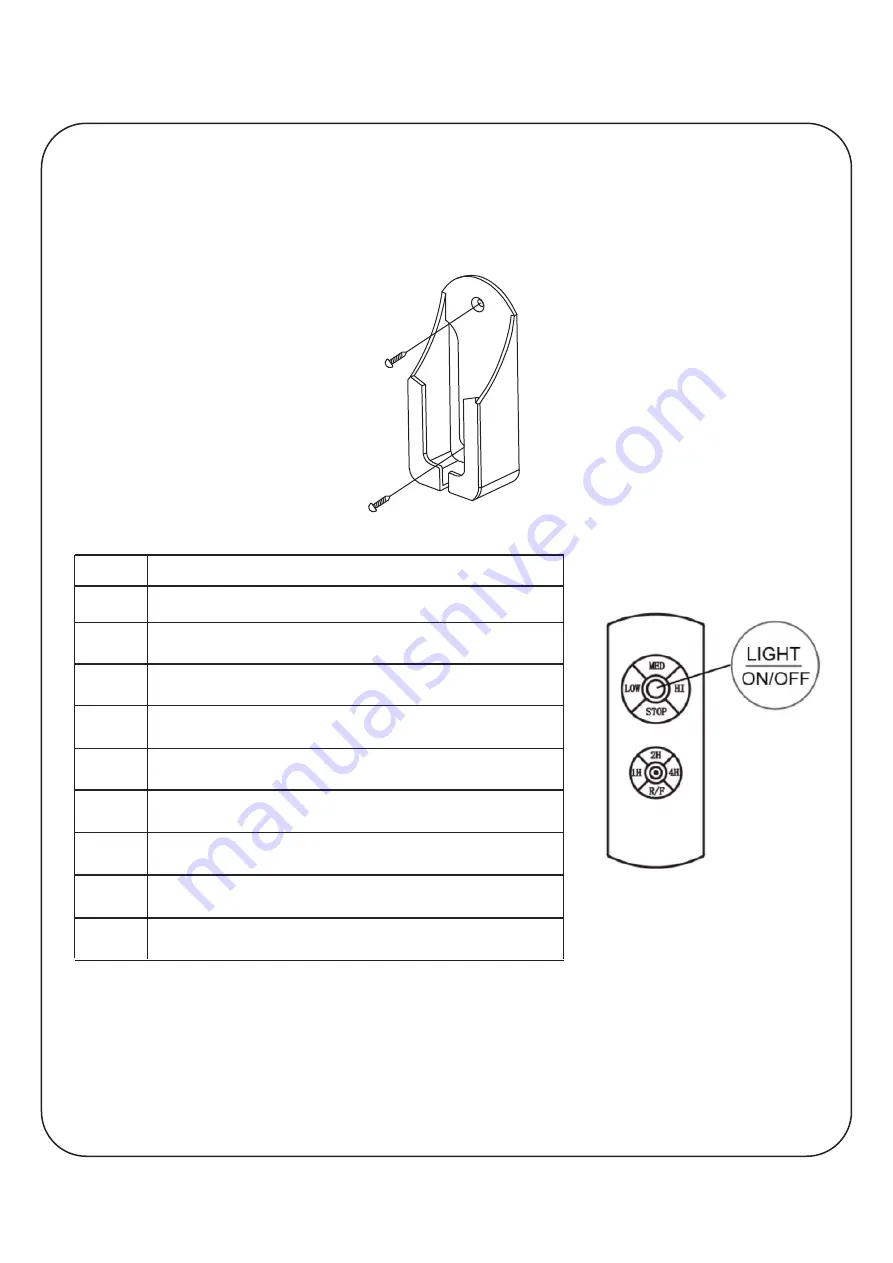
Install the remote control holder onto any wall or suitable flat surface using the two steel 

screws. Upon first use, connect the remote control to its receiver in the fan by pressing the 

emitter's "LI" and "Hi" button for 3 seconds. There should be a beep to announce that the 

remote has successfully connected to its receiver. (Note that this programming cannot be 

done for the first 30 seconds after the receiver is turned on.)

10

Содержание Merra CFN-1054

Страница 1: ...CFN 1054 Instruction Manual V20210254 Read Completely Before Installation Use and Keep for Future Reference ...

Страница 2: ...oduct read the package list on page 2 and ensure all parts are present and display no defects If any part is missing or damaged contact customer service and do not attempt to install the product Read all of the safety information on page 3 before installation or use Estimated assembly time 120 minutes Additional tools required for assembly Electrical tape flathead Phillips screwdriver pliers safet...

Страница 3: ...ounting Bracket Balance Kit Mounting Screws 4 Wire Nuts 10 Flat Washers 4 Lamp Shade LED Light Kit Light Plate Blade Bolts 2 Star Washers 4 Mounting Bolts 2 Spring Washers 4 Canopy Downrod Coupling Cover Fan Motor Assembly Canopy Cover MED HI LOW STOP 2H 4H 1H R F LI ...

Страница 4: ...and pushed carefully up into outlet box The wires should be spread apart with the grounded conductor and the equipment grounding conductor on one side of the outlet box 7 The fan must be mounted with a minimum of 7 feet clearance from the trailing edge of the blades to the floor 8 Do not use the reverse switch while the fan blades are in motion To prevent damage and ensure long use the fan must be...

Страница 5: ...materials Do not use plastic boxes The outlet box and its supports must be able to support the MOVING weight of the fan at least 50 lb and be rated for fan support 3 Choose a Suitable Location Ensure the blades will be at least 30 inches from any obstruction and at least 7 feet above the floor In locations without a ceiling joist a hanger support bar may be required Do not install in clamp locatio...

Страница 6: ...r hole in the ceiling mounting bracket Secure the bracket to the outlet box with the provided mounting screws or bolts and spring or star washers INITIAL INSTALLATION Outlet Box Ceiling Mounting Bracket Hook 120V Wires Mounting Screws Bolts Washers ...

Страница 7: ...nto the yoke aligning the holes inserting the pin through the downrod and reinstalling the clip Retighten the bolts Step 4 Place the downrod s mount into the bracket on the outlet box Rotate the entire assembly until the tab has dropped into the mount s slot and locked into place The motor assembly should no longer rotate if seated properly Failure to reattach the hitch pin and or properly seat th...

Страница 8: ...o the 5 identically colored lead wires from the fan motor Secure each set with the provided wire nuts Step 3 Connect the 2 colored wires from the remote receiver to the 2 identically colored lead wires from the outlet box Secure each set with the provided wire nuts Step 4 Connect the green or bare copper ground wire from the outlet box to the ground wires from the ceiling mounting bracket and the ...

Страница 9: ...Making sure the blades are straight secure them by replacing and retightening the bolts and washers Insert the receiver into the tray with the receiver facing the ceiling For best results make sure the white antenna on the end of the receiver remains extended and not tangled with any of the electrical wires Flat Washer Blade Bolt Blade Ceiling Mounting Bracket Canopy Mounting Screws Bolts Receiver...

Страница 10: ... LED light kit to the wire connectors blue to blue and white to white Step 5 Fit the lamp shade onto the light plate and screw it into place Ensure it is firmly connected to avoid loosening during use COLOR TEMPERATURE ADJUSTMENT The LED light has 3 different color setting Warm White 3000K Daylight 4500K and Cool White 6000K To adjust the light settings 1 Press LIGHT on the remote control to turn ...

Страница 11: ...rns the light on or off Runs the fan for 1 hour and then turns it off Runs the fan for 2 hours and then turns it off Runs the fan for 4 hours and then turns it off Reverses the fan s direction Key Function LOW MED HI STOP LIGHT 1H 2H 4H F R Install the remote control holder onto any wall or suitable flat surface using the two steel screws Upon first use connect the remote control to its receiver i...

Страница 12: ... in Cut off power to the fan and check that the wire nut connections are not rubbing against one another or the inner housing If you have installed a solid state variable speed control cut off power to the fan and disconnect this control from the device See if using the remote resolves the problem which can be caused by erratic signals from such controls Check that all bolts screws and fasteners a...

Отзывы: