1
Installing the wall mounting
bracket to the wall
Installation
7
HOMEDEPOT.COM/HOMEDECORATORS
Please contact 1-800-986-3460 for further assistance.
WARNING:
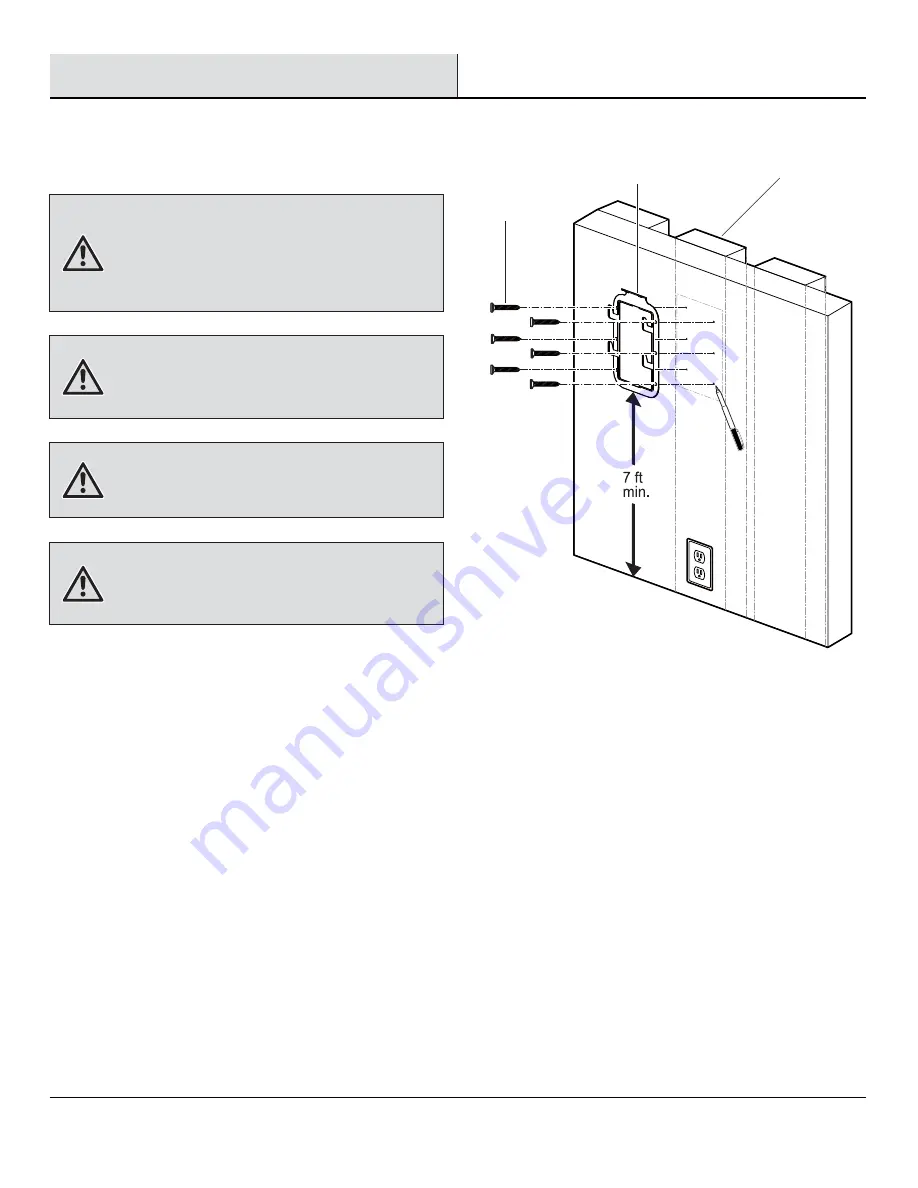
To reduce the risk of the fan falling, use all six
mounting holes in the wall mounting bracket (B) when
installing the wall mounting bracket (B).
WARNING:
It is very important that you use the proper
hardware when installing the wall mounting bracket (B) as
this will support the fan assembly (A).
AA
B
GG
□
Determine the approximate position of where you
want the fan to be located on the wall. Then, locate
the stud (GG) in the wall. Position the wall mounting
bracket (B) on wood stud or wood post and mark the
location of the six holes using a pencil or a marker
(not included).
□
Use 3/32-in. drill bit (not included) to drill pilot holes
at marked locations. Then, install wall mounting
bracket (B) to the wall with wood screws (AA).
CAUTION:
Carefully open the packaging and take out items
from styrofoam. Please lift the motor head with two hands by
gooseneck arm and base, and DO NOT remove the plastic
binder from the motor head until fan installation is completed.
Removing the plastic binder from the motor head before or
during installation will damage the oscillating mechanism.
CAUTION:
If you are going to attach the fan assembly (A) to
a wood stud or wood post, the stud or wood post must be
wide enough and thick enough to sustain the wall mounting
bracket (B) and the weight of the fan assembly (A)
.


