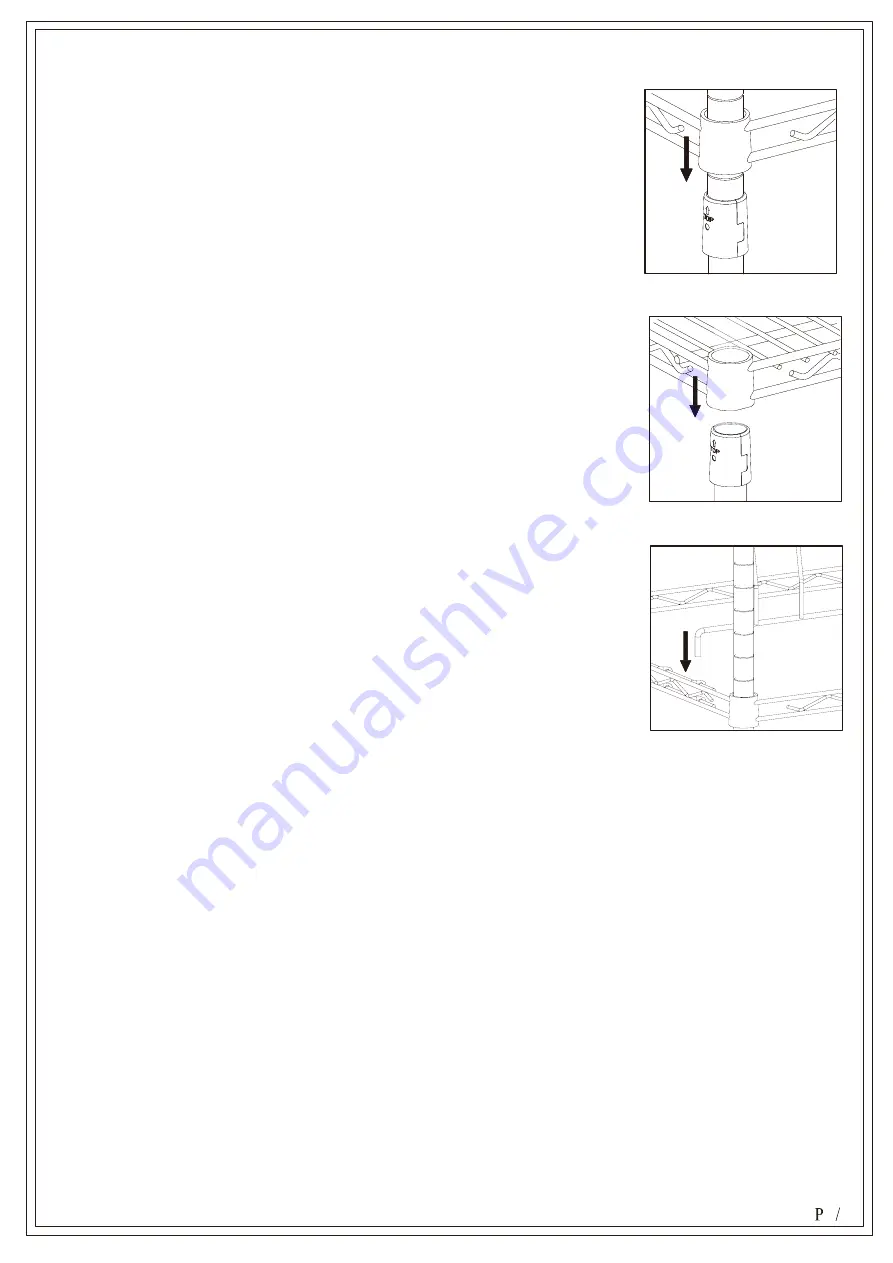
Step 3
Step 3: Shoe frame assembly, locate the desired position of the
bottom shoe frame (F). Insert two halves of the tapered sleeves into
the posts. Slide the shoe frame down from the top of the posts and
onto the tapered sleeves. Place shoe frame on its side and slide each
post with tapered sleeves through the bottom of the shoe frame
until snug. Ensuring that shoe frame is in the fully locked position.
Repeat step 3 for remaining shoe frames.
Step 4: Locate the desired position of the top shelf (E). Snap two
halves of plastic tapered sleeves with arrow pointing up at the
desired height on post. Push down on each corner shelf, ensuring
that the shelf is in the fully locked position.
Step 5: Hang the shoe rack (G) on the side of each tier as shown.
Repeat for remaining racks. Ensure the rack is firmly fixed into
the frame.
WARNING:
Failure to follow these guidelines can result in property damage or personal injury.
•
Do not climb, stand or step on the shelving unit.
•
Do not tilt or lift the rack. The shelving unit will tip over if it is inclined.
•
Do not allow children to climb or play in or around the shelves.
•
Assembly recommended on a soft surface, such as carpet, to avoid scratching flooring
finish.
•
Heaviest object must be stored on lower racks and lighter objects on upper racks to
prevent the unit from being top-heavy.
•
Do not place heavy items on top shelf
Step 4
3
3
Step 5


