background image

ii 

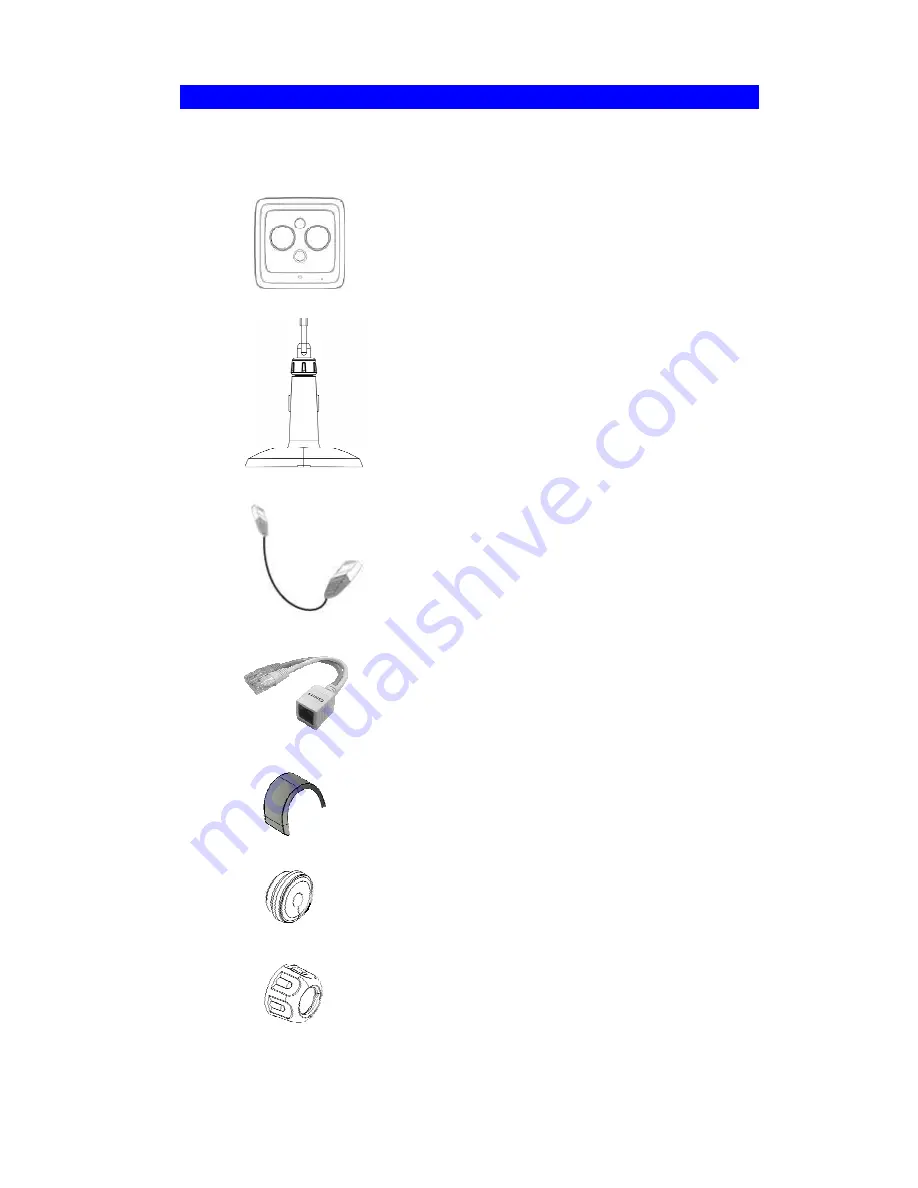
Package Contents  

The following items should be included: If any of these items are 
damaged or missing, please contact your service provider immediately. 

1. 

Broad View Camera * 1 


2. 

Wall-mount Stand * 1 


3. 

Ethernet cable 8P8C (length 5M) * 1 


4. 

Y-cable (RJ45) * 1  


5. 

Cable Clip * 1 


6. 

RJ45 Rubber Hood * 1 


7. 

Screw/Anchor * 2 


Содержание VistaCam 1100

Страница 1: ...i VistaCam 1100 Waterproof HD IP Camera Setup Guide Document Version 1 0 Copyright 2015 All Rights Reserved All trademarks and trade names are the properties of their respective owner ...

Страница 2: ... included If any of these items are damaged or missing please contact your service provider immediately 1 Broad View Camera 1 2 Wall mount Stand 1 3 Ethernet cable 8P8C length 5M 1 4 Y cable RJ45 1 5 Cable Clip 1 6 RJ45 Rubber Hood 1 7 Screw Anchor 2 ...

Страница 3: ...iii 8 RP131 Wireless PoE Adapter 1 ...

Страница 4: ...r Features Standalone Design The Waterproof HD IP Camera is a standalone system with built in CPU and Video encoder It requires only a power source and a connection to your Router Dual Video Support The Waterproof HD IP Camera can support H 264 and MJPEG video for different image compression Day Night Switch With the day night switching feature you are able to view and record better images even in...

Страница 5: ...net IP address of the gateway used by the Waterproof HD IP Camera But if the Gateway has a dynamic IP address DDNS Dynamic DNS is required Since many existing Gateways do not support DDNS this function is incorporated into the Waterproof HD IP Camera NTP Network Time Protocol Support NTP allows the Waterproof HD IP Camera to calibrate its internal clock from an Internet Time Server This ensures th...

Страница 6: ... required Physical Details VistaCam 1100 Waterproof HD IP Camera Front Panel VistaCam 1100 Waterproof HD IP Camera Figure 1 Front Panel Waterproof HD IP Camera 1 Light Sensor This sensor is used to detect light condition in the environment 2 Lens No physical adjustment is required or possible for the lens but you should ensure that the lens cover remain clean The image quality is degraded if the l...

Страница 7: ...ile booting Fast Blinking Green Data is being transmitted or received via the LAN port On Blue Firmware upgrade is failed Off Blue Firmware upgrade is successful Blinking Blue The LED will be blinking rapidly during the FW upgrading On Red The heater is active Off Red The heater is off Rear Panel VistaCam 1100 Waterproof HD IP Camera Figure 2 Rear Panel Waterproof HD IP Camera ...

Страница 8: ... to the camera The wireless interface will be disabled only when the RP131 is power off or disconnected 2 Reset Button This button is recessed a pin or paper clip can be used to press it It can be activated at any time when the camera is powered on Reset to default manufacturer values and reboot When pressed and held for 10 seconds settings of the Waterproof HD IP Camera will be set to their defau...

Страница 9: ...nnector of the provided Y cable to the Wireless PoE Adapter and the white connector to a Home Gateway B Use the Ethernet cable to connect the LAN port of Y cable and the camera C Connect Wireless PoE Adapter to the power outlet Please refer to the manual for the WiFi configuration VistaCam 1100 3 Check the LEDs The Power LED will start blinking during startup After startup is completed the Power L...

Страница 10: ... Waterproof HD IP Camera and ensure they are correct you can unplug the Y cable and power off the camera The Waterproof HD IP Camera will be in wireless interface when you power on the camera again Step 2 Installation Portal Server Home Monitor Gateway RP131 Wi Fi PoE Adapter VistaCam 1100 1 Disassemble the Camera A Unplug the Y cable and power off the camera B Locate the camera and the Wireless P...

Страница 11: ...tion for mounting the camera 2 Install and drive two screws 2 3 of the way into the wall 3 Remove the cover of the stand 4 Align the two mounting holes at the bottom of the camera stand with the two screws and mount the camera stand onto the wall 5 Attach the Ethernet cable to the notch of the camera stand and use the cable clip to control the cable ...

Страница 12: ...9 6 Attach the cover back to the stand 7 Connect one end of the Ethernet cable to the LAN port of the camera and the other end to Wireless PoE Adapter 8 Screw attach the camera onto the camera stand ...

Страница 13: ...10 9 Make sure the Waterproof HD IP Camera is firmly fixed on the wall Adjust the camera to the preferred position ...

Страница 14: ...ference to radio or television reception which can be determined by turning the equipment off and on the user is encouraged to try to correct the interference by one of the following measures Reorient or relocate the receiving antenna Increase the separation between the equipment and receiver Connect the equipment into an outlet on a circuit different from that to which the receiver is connected C...

Страница 15: ...other antenna or transmitter CE Approvals The Waterproof HD IP Camera and the Ethernet Waterproof HD IP Camera meet the guidelines of the European Union and comply with the 99 5 EEC and RTTE 99 5EG directives including the following standards EN60950 1 EN55024 EN55022 24 This is a Class B product In a domestic environment this product may cause radio interference in which case the user may be requ...

Отзывы: