background image

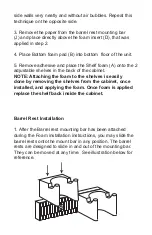
side walls very neatly and without air bubbles. Repeat this 

technique on the opposite side.

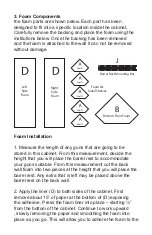
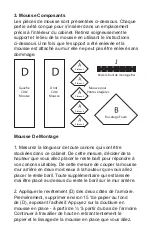
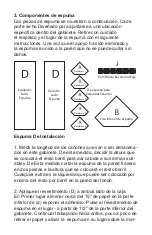
3. Remove the paper from the barrel rest mounting bar 

(J) and place directly above the foam insert (D), that was 

applied in step 2.

4. Place Bottom foam pad (B) into bottom  floor of the unit.

5. Remove adhesive and place the Shelf foam (A) onto the 2 

adjustable shelves in the back of the cabinet. 

NOTE: Attaching the foam to the shelves is easily 

done by removing the shelves from the cabinet, once 

installed, and applying the foam. Once foam is applied 

replace the shelf back inside the cabinet.

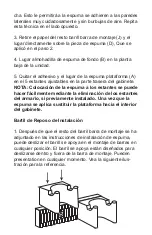
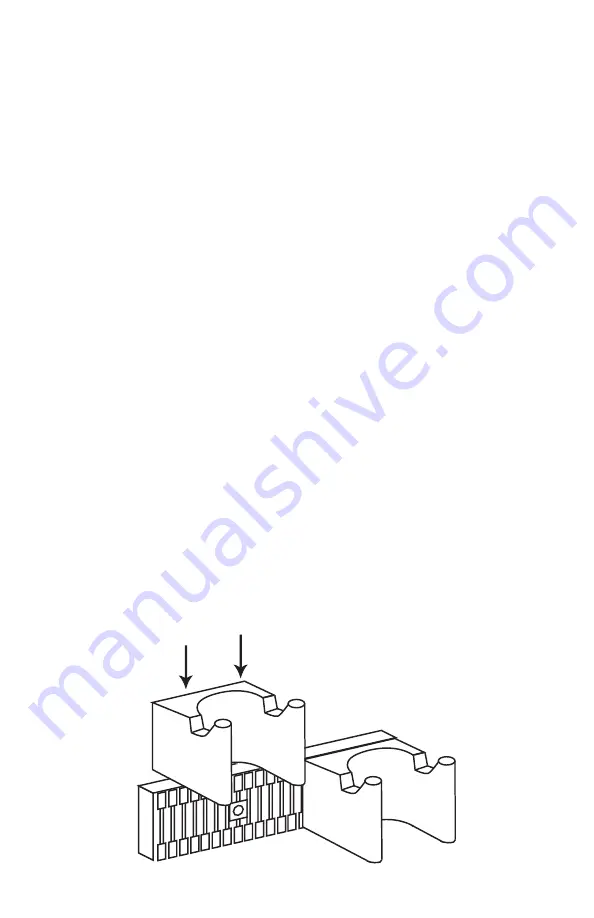
Barrel Rest Installation

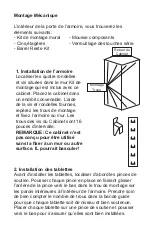
1. After the Barrel rest mounting bar has been attached 

during the Foam installation instructions, you may slide the 

barrel rests onto the mount bar in any position. The barrel 

rests are designed to slide in and out of the mounting bar. 

They can be moved at any time.  See illustration below for 

reference.

Содержание security

Страница 1: ...Corner Security Cabinet 10 Gun Corner Cabinet De Sécurité 10 Pistola Corner Gabinete De Seguridad Caution Attention Atención Read all Instructions and safety tips before using this product Lire toutes les directives et conseils de sécurité avant d utiliser ce produit Leer todas las instrucciones y Las reglas de seguridad antes de utilizar este producto ...

Страница 2: ...net to the wall The cabinet holes are 16 inches apart NOTE This Cabinet is NOT designed to be used without securing it to a wall or other surface IT MAY TIP OVER 2 Installing The Shelves When installing the shelves first locate the shelf support clips Push each clip into place by sliding the back of the clip down into the mounting hole on the side walls inside the cabinet Make sure to count down t...

Страница 3: ...gth of any guns that are going to be stored in this cabinet From this measurement decide the height that you will place the barrel rest to accommodate your guns suitable From this measurement cut the back wall foam into two pieces at the height that you will place the barrel rest Any extra that is left may be placed above the barrel rest on the back wall 2 Apply the liner D to both sides of the ca...

Страница 4: ... in the back of the cabinet NOTE Attaching the foam to the shelves is easily done by removing the shelves from the cabinet once installed and applying the foam Once foam is applied replace the shelf back inside the cabinet Barrel Rest Installation 1 After the Barrel rest mounting bar has been attached during the Foam installation instructions you may slide the barrel rests onto the mount bar in an...

Страница 5: ... Cabinet sont 16 pouces d intervalle REMARQUE Ce cabinet n est pas conçu pour être utilisé sans la fixer à un mur ou autre surface IL pourrait basculer 2 Installation des tablettes Avant d installer les tablettes localiser d abord les pinces de soutien Pousser chaque pince en place en faisant glisser l arrière de la pince vers le bas dans le trou de montage sur les parois intérieures à l intérieur...

Страница 6: ...De Montage 1 Mesurez la longueur de toute canons qui vont être stockées dans ce cabinet De cette mesure décider de la hauteur que vous allez placer le reste baril pour répondre à vos canons suitabley De cette mesure de couper la mousse mur arrière en deux morceaux à la hauteur que vous allez placer le reste baril Toute supplémentaire qui est laissée mai être placé au dessus du reste le baril sur l...

Страница 7: ...s latérales très proprement et sans bulles d air Répétez cette technique sur le côté opposé 3 Retirez le papier du reste baril barre de montage J et placer directement au dessus de l insert de mousse D qui a été appliqué à l étape 2 4 Plaque de fond tapis de mousse B dans le plancher bas de l appareil 5 Retirez l adhésif et placer le plateau mousse A sur les 2 tablettes réglables à l arrière de l ...

Страница 8: ...s del tornillo del gabinete son 16 pulgadas de separación NOTA Este gabinete no está diseñado para ser utilizado sin asegurar a una pared u otra superficie Podrá volcar 2 Cómo instalar los estantes Al instalar los estantes ubique primero los clips de apoyo del estante Empuje cada clip a su lugar para hacerlo deslice la parte posterior del pasador al interior del orificio de montaje en las paredes ...

Страница 9: ...alación 1 Medir la longitud de los cañones que van a ser almacena dos en este gabinete De esta medida decidir la altura que se colocará el resto barril para dar cabida a sus armas suit abley De Esta medida cortar la espuma de la pared trasera en dos piezas a la altura que se colocará el resto barril Cualquier extra es la izquierda que puede ser colocado por encima del resto por barril en la pared ...

Страница 10: ...sera del gabinete NOTA Colocación de la espuma a los estantes se puede hacer fácilmente mediante la eliminación de los estantes del armario si previamente instalado Una vez que la espuma se aplica sustituir la plataforma hacia el interior del gabinete Bartil de Reposo de Instalación 1 Después de que el resto del barril barra de montaje se ha adjuntado en las instrucciones de instalación de espuma ...

Страница 11: ...r reconnu peut être en mesure d ouvrir ce produit en toute sécurité 3 Éviter de placer le cabinet près de la chaleur excessive Ce cabinet ne possède pas de propriétés de résistance au feu 4 Si vous perdez vos clés ou besoin d acheter un barillet de la serrure de remplacement Homak contact avec les informations ci dessous S il vous plaît vous avez votre numéro de clé de prêt qui est situé sur certa...

Страница 12: ... producto HOMAK calidad Por favor tómese el tiempo para registrar su clave y producto llamando al 1 800 874 6625 o visitando www homakmfg com y haciendo clic en el Registro de productos vínculo Esto nos permitirá prestar una mejor asistencia en el futuro para Las llaves de recambio Pieza Las reclamaciones de garantía Otras preocupaciones de productos THIS PRODUCT CARRIES A LIMITED ONE 1 YEAR WARRA...

Отзывы: